Page 6 of 21
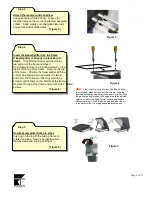
Step 6
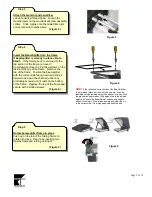
Attach and unfold the hood and mask
Unfold the “wings” and simultaniously
press up so the velcro on the wings meets
the velcro on the sides of the frame.
Secure by lightly pressing along the edge
of the hood and frame. With the hood in place
position the mask and secure it to the hood
using the velcro in the outside of the
hood opening.
(Figure 6)
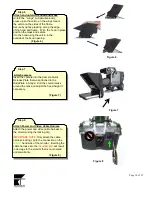
Step 7
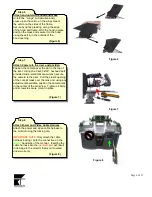
Attach Camera to the riser and position
Position the camera over the slot in the top of
the riser. Using the 1/4x20 x3/8” hexhead bolt
provided and a small crescent wrench secure
the camera to the riser. Pull the elastic opening
of the concial mask over the lens and, using any
adjustments available, position the camera lens
in the center of the LensView. Tighten all bolts
and screws to secure mount in place.
(Figure 7)
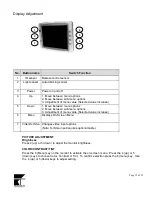
Step 8
Attach Power and Video Cable Harness
Attach the power and video cable harness to
the monitor using the locking clip.
IMPORTANT NOTE:
Only attach the cable
harness locking clip to the connection on the
RIGHT
hand side of the monitor. Inserting the
cable harness into the
incorrect port
will result
in damage to the monitor that is not covered
under warranty.
(Figure 8)
Figure 6
Figure 7
Figure 8


