©2022 Televac® - The Fredericks Company | www.televac.com | sales@televac.com | +1 215 947 2500
mx7b_im rev E Page
8
of
23
4.3.3
To turn on the sensor when Menu Control is selected, use one of the following two options: from
the Measurement Screen, press SEL to navigate to the Vsense Control, then press ENT to unlock
the control, press UP to toggle the status to ON, and then press ENT to save the change. The high
voltage should now turn on. In Menu Control mode, the high voltage can also be toggled by
sending the appropriate command to turn on the sensor through RS-485 or USB
Communications. To turn off the sensor in Menu Control mode, navigate to the Vsense Control
screen, press ENT to unlock the menu, press UP to toggle the status to OFF, and press ENT to
save the change. Alternatively, when in Menu Control mode, the user may send the appropriate
command to turn off the sensor through RS-485 or USB Communications.
4.3.4
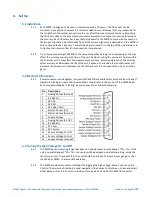
To turn on the sensor when Hardware Control is selected, short pins 13 and 14 together. To turn
off the sensor, open the path between pins 13 and 14. This functionality is included to easily
interface with a low vacuum gauge, such as the Televac® MX2A or MX4A, to automatically
control the unit via an open collector or relay. For more information see Application Note
4.3.5
To protect the sensor from damage, if the sensor high voltage is toggled on when in either Menu
Control or Pin Control mode the pressure is above 1*10
−
3
Torr, overcurrent protection will turn
the sensor off. If the sensor is in Menu Control mode, then a command to turn on the sensor will
need to be sent via communication or through the front panel to toggle the high voltage on
again. If Pin Control is enabled, then the unit will attempt every to turn the high voltage on every
60 seconds until overcurrent protection does not occur.
5.
Menu Navigation
5.1
Description
5.1.1
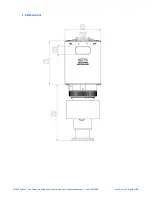
The MX7B contains many operator customizable features. Changing these features is possible
through the menu or via RS-485 or USB communications. To navigate the menu simply use the
buttons found on top of the MX7B. The four buttons include the SEL button, an UP arrow, a
DOWN arrow, and an ENT button. Using the SEL button allows the operator to change between
menu categories. Using the ENT button allows the user to enable value editing and save values in
addition to toggling between options where appropriate. Using the UP and DOWN arrows allows
navigation through menu options. The UP and DOWN arrow buttons are also used to edit values.


