HDTV TRANSMODULATOR - Dual 8PSK to QAM
12
6. Quick start guide
WARNING:
Do not apply power to the headend until all the
connections have been completed and double
checked. Failure to do so may result in irreparable
damage to the equipment.
1. The headend must be installed in a well
ventilated room, free of humidity and with the
necessary facilities. Forced ventilation or an
HVAC system will need to be installed when
ambient temperature is over 113ºF at the
headend location.
2. Before installing the units, take into account
the 19” subrack is 5RU height, so size
rack appropriately. A 1RU spacing plate is
recommended between every 2 subracks for
easier wiring access.
3. Unpack the units and the PSU. Check that all
accessories such as jumpers, coax bridge bars,
power cords, etc., have been provided. If not,
contact your distributor immediately.
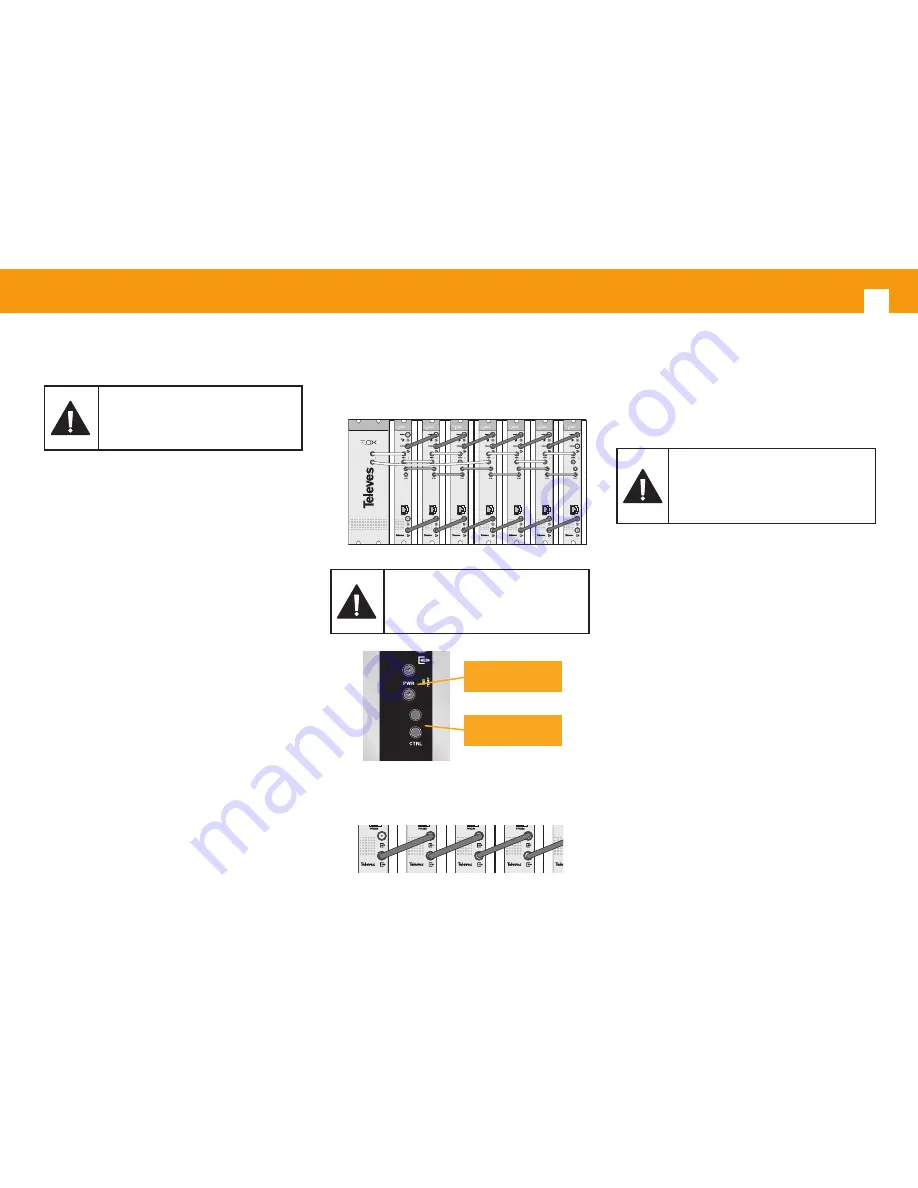
4. Arrange the PSU and units of each subrack from
left to right, starting by the PSU, followed by the
CDC. Remote Headend Controller (if used) and
the transmodulators.
5. Interconnect the units with the power and
control bus jumpers supplied
before applying
power to the system
. Use the long control bus
jumpers to connect different subracks together.
- Each PSU output provides up to 4A and
both must be used in order to balance the
consumption of the 7 transmodulators in a
subrack (for example: 4+3 or 3+4).
HDTV TRANSMODULA
TOR - Dual 8PSK to QAM
HDTV TRANSMODULA
TOR - Dual 8PSK to QAM
HDTV TRANSMODULA
TOR - Dual 8PSK to QAM
HDTV TRANSMODULA
TOR - Dual 8PSK to QAM
HDTV TRANSMODULA
TOR - Dual 8PSK to QAM
HDTV TRANSMODULA
TOR - Dual 8PSK to QAM
HDTV TRANSMODULA
TOR - Dual 8PSK to QAM
WARNING:
Never connect control bus jumpers to power
connectors or vice versa. Doing so will cause
irreparable damage to the units when power is
applied.
PORT1
PORT2
HDTV TRANSMODULA
TOR - Dual 8PSK to QAM
POWER
CONNECTORS
CONTROL BUS
CONNECTORS
6. Connect the supplied RF input and output coax
bridge bars as needed.
HDTV TRANSMODULA
TOR - Dual 8PSK to QAM
HDTV TRANSMODULA
TOR - Dual 8PSK to QAM
HDTV TRANSMODULA
TOR - Dual 8PSK to QAM
HDTV TRANSMODULA
TOR - Dual 8PSK to QAM
HDTV TRANSMODULA
TOR - Dual 8PSK to QAM
HDTV TRANSMODULA
TOR - Dual 8PSK to QAM
HDTV TRANSMODULA
TOR - Dual 8PSK to QAM
7. Be sure that all connections are secured, properly
terminated and tightened
before applying
power to the system
.
WARNING:
Unterminated input and output ports are a
common source of ingress noise.
Be sure to terminate all unused input and output
ports with 75 ohm loads (ref. 4061) for optimum
performance.
8. Each subrack should be treated as a standalone
module in terms of power and RF output.
- Each daisy-chained output does incur some loss.
- Balance the final output of the subrack
appropriately.
- Use an external combiner to combine the
outputs of all subracks together.
9. Proceed with the configuration of each unit as
detailed in this User Manual.
- Start by configuring the inputs of each unit to
the desired satellites/transponders.
- Set the output level accounting for the losses
due to the unit’s loop-through.
- If remote control is used, follow the instructions
in the corresponding User Manual of the CDC
Remote Headend Controller.
Summary of Contents for HDTV TRANSMODULATOR - Dual 8PSK to QAM
Page 1: ...HDTV TRANSMODULATOR Dual 8PSK to QAM EN Ref 563701 User manual w w w t e l e v e s c o m ...
Page 2: ......
Page 4: ......
Page 15: ...EN 15 8 Installation 8 1 19 subrack mounting ...
Page 44: ...HDTV TRANSMODULATOR Dual 8PSK to QAM 44 ...
Page 48: ...televes com ...


