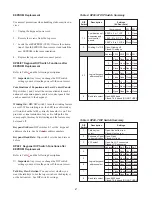
EEPROM Replacement
Use normal precautions when handling static-sensitive de-
vices.
1.
Unplug the keypanel power cord.
2.
Remove the screws from the top cover.
3.
Locate the old EEPROM (U305). Observe the orienta-
tion of the old EEPROM, then remove it and install the
new EEPROM in the same orientation.
4.
Replace the top cover and reconnect power.
KP96/97 Keypanel DIP Switch Functions after
EEPROM Replacement
Refer to Table
and the following descriptions.
☞
Important: Any time you change the DIP switch
settings you must turn the power off-then-on to reset.
Combinations of Expansion and Level Control Panels:
Dip switches 1 and 2 select the various allowable combi-
nations of expansion panels and level control panels that
can be connected to the keypanel.
Winking On / Off: DIP switch 3 turns the winking feature
on or off. When winking is on, the LED in each listen key
will wink when the talk key directly beneath it is on. This
provides a visual reminder of any active talk paths. For
some people, this may be distracting and the feature may
be turned off.
Keypanel Address: DIP switches 4-7 set the keypanel
address as before. See Table
for address numbers.
Keypanel Baud Rate: Dip switch 8 sets the baud rate as
before.
KP98-7 Keypanel DIP Switch Functions after
EEPROM Replacement
Refer to Table
and the following descriptions.
☞
Important: Any time you change the DIP switch
settings you must turn the power off-then-on to reset.
Talk Key Row Selection: You can select whether you
want the talk keys to use the top row (above the displays)
or the bottom row. See DIP switch 1 settings.
2
DIP
Switch
Description
Settings
(X=Don’t care)
Combinations
SW 1 SW 2
1, 2
Combinations of
expansion and
level control
panels
0 EKP’s, 0 or 1 LCP
X
Open
1 EKP, 0 to 2 LCP’s
Open Close
2 EKP’s, 0 to 3 LCP’s Close Close
3
Winking On / Off
Open: Winking off
Closed: Winking on
Address SW 4 SW 5 SW 6 SW 7
4-7
Logical keypanel
address select.
1
Close Open Open Open
2
Open Close Open Open
3
Close Close Open Open
4
Open Open Close Open
5
Close Open Close Open
6
Open Close Close Open
7
Close Close Close Open
8
Open Open Open Close
8
Baud rate select
Open: 9600 baud
Closed: 76.8 kbaud (DO NOT USE!)
Table 2. KP96/97 DIP Switch Summary
DIP
Switch
Description
Settings
1
Talk key row
select
Open: Use bottom row
Closed: Use top row
2
Expansion Panel
In-use Indication
Open: Flash
Closed: No flash
3
LCP select
Open: No LCP connected
Closed: LCP connected
Address Sw 4 Sw 5 Sw 6 Sw 7
4
Logical keypanel
address select.
1
Close Open Open Open
2
Open Close Open Open
5
3
Close Close Open Open
4
Open Open Close Open
6
5
Close Open Close Open
6
Open Close Close Open
7
7
Close Close Close Open
8
Open Open Open Close
8
Baud rate select
Open: 9600 baud
Closed: 76.8 kbaud (DO NOT USE!)
Table 3. KP98-7 DIP Switch Summary


