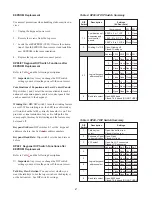
Expansion Panel In-use Indication for IFB and ISO:
The KP98-7 provides a flashing display indication when
an IFB or ISO is in-use by another keypanel. Generally,
the keypanel operator can distinguish this from an incom-
ing call for two reasons: first, the flashing indication is
slower than an incoming call indication; second, an IFB or
ISO will generally have a distinctive name, and since calls
are not normally received from an IFB or ISO, the
keypanel operator is able to conclude that the flashing in-
dication is not an incoming call.
EKP98-0 expansion panels connected to the KP98-7 are a
different matter, however, since they use illuminated but-
tons without alphanumeric displays and cannot display
names. In this case the keypanel operator can only distin-
guish between an in-use indication and an incoming call
indication by the speed of the button flash. If this creates
confusion, disable the flashing in-use indication by setting
DIP switch 2 to the “closed” position.
LCP Selection: If a level control panel will be connected for
use with the KP98-7, set DIP switch 3 to the “Closed” posi-
tion. Otherwise, leave this switch in the “Open” position.
Keypanel Address: DIP switches 4-7 set the keypanel ad-
dress as before. See Table
for address numbers.
Baud Rate: SW1-8 selects the baud rate as before.
Mounting
For ease of use, we recommend mounting each LCP-100A
directly above or below the keypanel or expansion panel
that it will be used with. The LCP-100A knobs do line up
with the keys on KP96/97 Keypanels and EKP96/97 Expan-
sion Panels. When using the LCP-100A with a KP98-7, you
may wish to label the knobs.
Connections
KP96/97 Keypanels
Typical connections for a KP97/96 keypanel are shown in
Figure
. A maximum of two expansion panels and three
level control panels may be connected.
KP98-7 Keypanel
Typical connections for the KP98-7 are shown in Figure
A maximum of one EKP98-0 and one LCP-100A may be
connected. The LCP-100A can only be used to adjust lev-
els for the KP98-7.
Operation Notes
KP96/97 Keypanels
Keypanel operation is described in the KP96/97 Operating
Instructions Manual. Note that the MVOL feature is no
longer applicable with the updated firmware. To adjust the
listen level for any keypanel key, rotate the corresponding
control on the LCP-100A.
KP98-7 Keypanel
Keypanel operation is described in the KP98-7 Operating
Instructions Manual. Note that the MVOL feature is no
longer applicable with the updated firmware. To adjust the
listen level for any keypanel key, rotate the corresponding
control on the LCP-100A.
The EKP98-0 does not have listen keys, but only has talk
keys. Therefore, it is not possible to manually activate the
listen path corresponding to any talk key. Consequently,
you should assign either the auto-listen or auto-reciprocal
special function to all listen keys. Auto-listen will force
the listen path to activate whenever the corresponding talk
key is pressed. Auto-reciprocal will force the listen path to
always be on.
Once you have assigned the EKP98-0 keys, you can adjust
the listen levels using the crosspoint gain feature of
ADAMedit (or ZEUSedit).
3


