background image

BASIC OPERATION

Talking

To talk to a desired channel, simply press the “Talk” key.   The Talk key operates in one of two modes, 

depending on the user’s action:


Momentary (also called “Push to Talk”): Press and hold the Talk key for longer than 1 second.   The talk 

function will be enabled (on) if the Talk key is pressed.   As soon as the Talk key is released, the talk 

function will be disabled.


Latched: Pressing the Talk key quickly (less than 1 second) will latch the talk function on. Pressing the 

Talk key again will disable the talk function. 

When the Talk function is active, the Talk LED located next to that channel’s Talk key will be lit.

Calling

To send a call signal to other members of a partyline, press the Call button.   The Call LED will light on all 

beltpacks of the partyline, including the beltpack which initiated the call signal.

Adjusting the Listening Volume

Each channel has its own individual volume control on the side of the beltpack.

To adjust the listening volume, turn the encoder on the side of the beltpack nearest to the channel.  


Turning the volume control in a clockwise direction (to the right) increases the volume.   


Turning the volume control in a counter-clockwise direction (to the left) decreases the listening 

volume.


To adjust the listening volume of the Program Input, adjust the volume encoder on the bottom of the 

beltpack.   

BASIC OPERATION

Summary of Contents for BP-2

Page 1: ...art of a partyline group IFB or a point to point contact regardless of the physical connection of the device to the supporting network The BP 2 connects over a supporting 100Mbps Ethernet network with...

Page 2: ...com Beltpack includes a monochrome OLED display two talk keys two call keys a menu key and a miniature condenser microphone There are recessed volume controls for Channel 1 and Channel 2 on the side o...

Page 3: ...reases the volume and rotating the encoder counterclockwise decreases the volume Volume encoders are also used to scroll through parameters and values when the beltpack is operating in Menu Mode Menu...

Page 4: ...o headset with microphone Program Input Volume control B This encoder directly adjusts the listening volume of the Program Input audio Network Connections C D Two 100 based T network connections are p...

Page 5: ...ocated next to that channel s Talk key will be lit Calling To send a call signal to other members of a partyline press the Call button The Call LED will light on all beltpacks of the partyline includi...

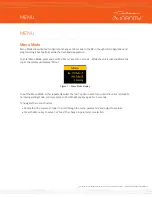
Page 6: ...Figure 1 Menu Mode display To exit the Menu Mode either repeatedly select the exit option in each menu until the unit is returned to normal operating mode or simply press and hold the Menu key again...

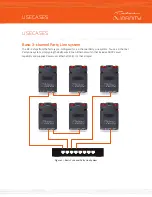
Page 7: ...e configured for a 2 channel Party Line system To use a 2 channel Party Line system simply plug the beltpacks into an Ethernet switch that includes DHCP server capability and supplies Power over Ether...

Page 8: ...s To configure the IP settings for the beltpack Press and hold the menu button for 5 seconds to enter the Menu mode Rotate the Ch1 volume encoder until setup is highlighted Press Menu to enter Setup m...

Page 9: ...Analog xNode offered by the Telos Alliance 1 Open Dashboard 2 Let Dashboard scan the network this can take up to 30 seconds 3 Find the source you wish to use for the program input source in this exam...

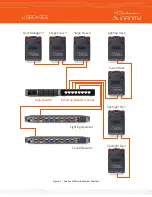
Page 10: ...ve Event Partyline System Example Axia xSwitch Ethercon Breakout Panel Floor Manager 1 Stage Crew 1 Stage Crew 2 Lighting Desk Spotlight Op 1 Spotlight Op 2 Sound Operator Lighting Operator Sound Desk...

Page 11: ...cts List Groups List Exit Partyline List Exit Groups Partyline Exit Exit Directory User Unit ID IP Address User Profile Channel 1 Channel 2 Program In Model Firmware xxxxxxxxxxxx xxx xxx xxx xxx xxxxx...

Page 12: ...Exit xxxxxxxxxxxx xxx xxx xxx xxx xxxxxxxx xxxxxxxx xxxxxxxx INF BP2 xx xx xx xxxxxxxxx xx xx xx xx xx xx Status Audio Mic Input HS Mic Gain Int Mic Gain Sidetone Headset Headset Limit Program In Prog...

Page 13: ...o 10 Off to 15 min 1 to 10 Reverse Exit xxxxxxxxxxxx Unit ID Edit Exit Beltpack Unit ID DHCP IP Address Mask Gateway Exit IP Config Partylines Groups Contacts Exit Ch1 Assign Partylines Groups Contact...

Page 14: ...sign Partylines Groups Contacts Exit Ch2 Assign On Off Self Test Press Any Key to Start All But IP xxx xxx xxx xxx IP ALL Exit Factory Reset SW Update Program In System Exit Passwords Push Profile Loa...

Page 15: ...This Page Intentionally Left Blank QUICK START INSTALLATION GUIDE...

Page 16: ...t Weekly updates on all things broadcast via email TelosAlliance com directcurrent Social Media Facebook TelosAlliance Twitter TelosAlliance LinkedIn TelosAlliance YouTube TelosAllianceTV Google Telos...

Reviews: