Section 11 TECHNICAL INFORMATION
204
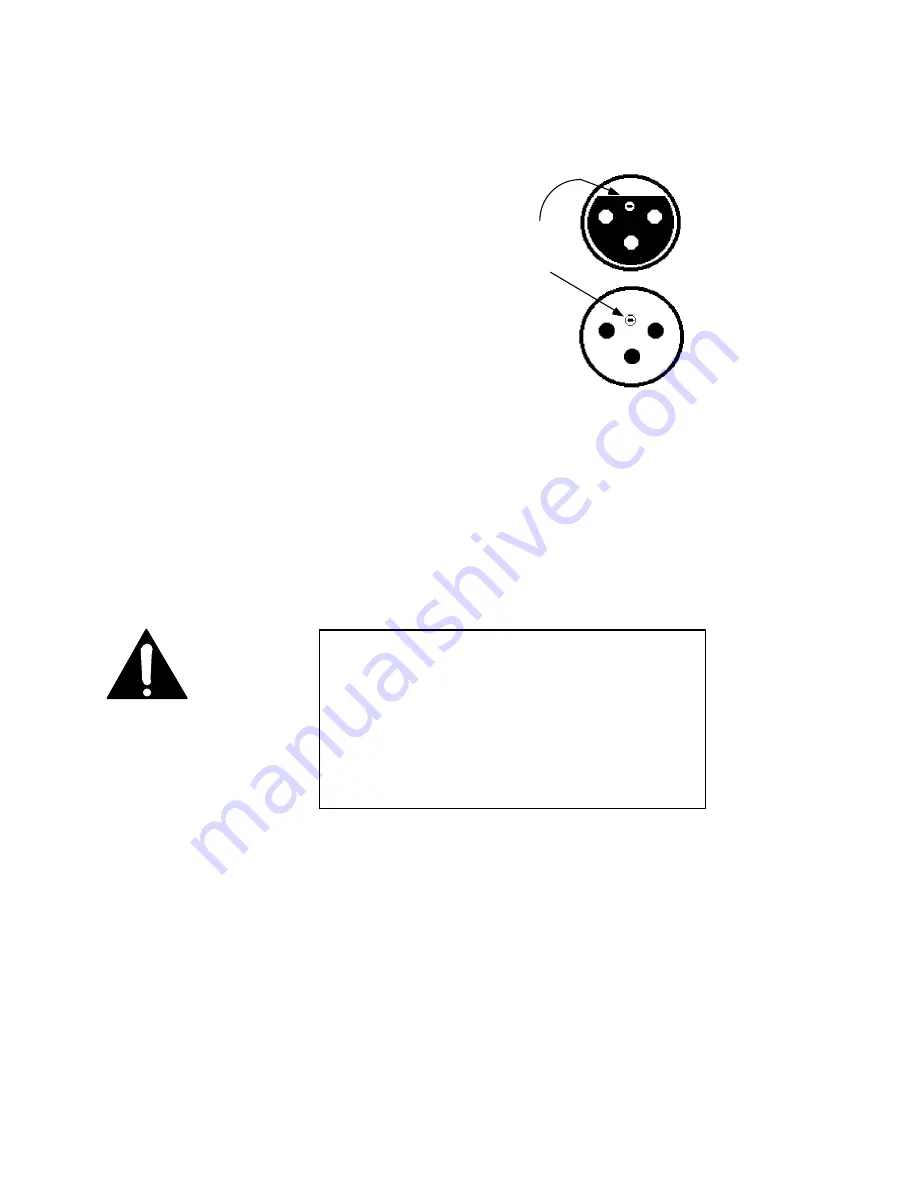
XLR Connectors
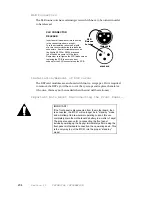
The XLR connectors have retaining screws which have to be turned in order
to be released.
XLR CONNECTOR
RELEASE:
Insert a small screwdriver into the holes
in the connectors, shown at right.
Turn the screwdriver about one eighth
of a turn counterclockwise to release the
connectors. A small screwdriver such as
the Xcelite R3322 or R3324 mayneed
to be filed down some to fit the slots.
Remember to re-tighten the XLR latches when
replacing the PCB to ensure correct
support for the XLR connectors on the PCB.
XLR
Release
Latches
MALE XLR
FEMALE XLR
Installation/Removal of DSP cards
The DSP card modules are anchored with two tie- wraps per. If it is required
to remove the DSPs, you’ll have to cut the ty- wraps and replace them later.
Of course, this may not be needed when the unit will be stationary.
Important Note About Disconnecting the Front Panel...
IMPORTANT!
If the front panel is disconnected from the motherboard, then
re-connected, the 87C51 will no longer be in “stand-by” mode
and will attempt to draw normal operating current–this can
completely drain the motherboard’s battery in a matter of days!
The proper sequence for re-connecting the front panel
includes powering up the Zephyr immediately after making the
front panel-motherboard connection, then powering down. This
is the only way to put the 87C51 into the proper “stand-by”
mode!
Summary of Contents for Zephyr
Page 13: ...Table of Contents 13 SECTION 1 QUICK RESULTS ...
Page 26: ...Section 2 INTRODUCTION 26 This page intentially left blank ...
Page 27: ...Section 2 INTRODUCTION 27 SECTION 2 INTRODUCTION ...
Page 38: ...Section 2 INTRODUCTION 38 This page intentionally left blank ...
Page 39: ...39 SECTION 3 ZEPHYR AT A GLANCE ...
Page 52: ...Section 4 INSTALLATION BASIC OPERATION 52 This page intentionally left blank ...
Page 53: ...Section 4 INSTALLATION BASIC OP 53 SECTION 4 INSTALLATION BASIC OPERATION ...
Page 84: ...Section 4 INSTALLATION BASIC OPERATION 84 ...
Page 85: ...Section 5 ISDN 85 SECTION 5 ISDN ...
Page 105: ...Section 6 NON ISDN NETWORKS 105 SECTION 7 AUDIO CODING ...
Page 118: ...Section 7 AUDIO CODING PRINCIPLES 118 This page intentionally left blank ...
Page 119: ...Section 8 DETAILED MENU REFERENCE 119 SECTION 8 DETAILED MENU REFERENCE ...
Page 157: ...Section 9 REMOTE CONTROL 157 SECTION 9 REMOTE CONTROL ...
Page 176: ...Section 9 REMOTE CONTROL 176 This page intentionally left blank ...
Page 177: ...Section 10 ADVANCED PROBLEM SOLVING 177 SECTION 10 ADVANCED PROBLEM SOLVING ...
Page 196: ...Section 10 ADVANCED PROBLEM SOLVING 196 This page intentionally left blank ...
Page 197: ...Section 11 TECHNICAL INFORMATION 197 SECTION 11 DETAILED TECHNICAL INFORMATION ...
Page 219: ...Section 12 SCHEMATICS 219 SECTION 12 SCHEMATICS ...
Page 221: ...Section 13 MANUFACTURER S DATA SHEETS 221 SECTION 13 MANUFACTURER S DATA SHEETS ...
Page 223: ...Section 14 SPECIFICATIONS WARRANTY 223 SECTION 14 SPECIFICATIONS AND WARRANTY ...
Page 228: ...228 This page intentionally left blank ...
Page 229: ...Section 15 APPENDICES 229 SECTION 15 APPENDICES ...


