background image


FMU126 | 

Wiki


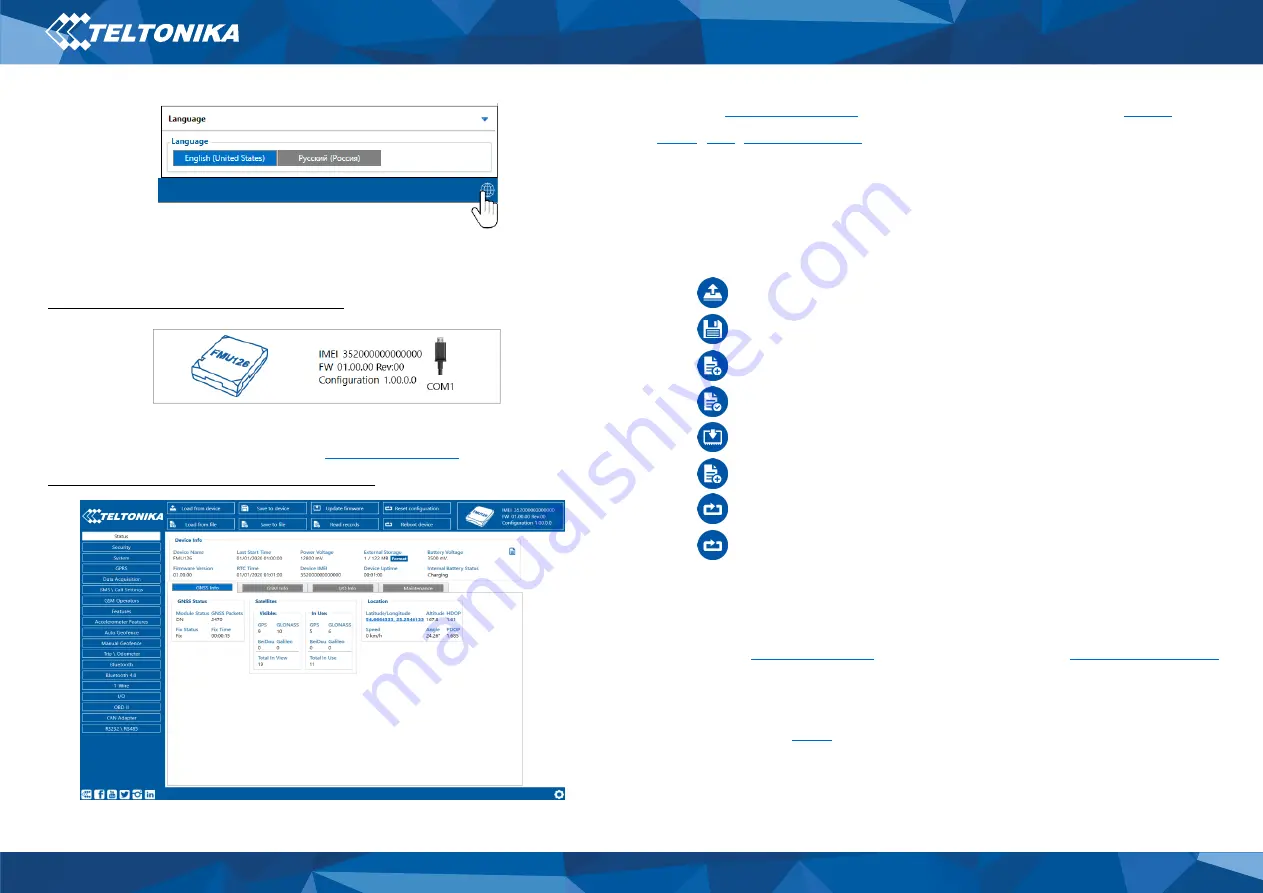
Configuration  process  begins  by  pressing  on  connected  device 
(

Figure 9 Device connected via USB

).  

After connection to Configurato

Status window

 will be displayed 

(

Figure 10 Configurator Status window

).  

Various 

Status window

 tabs display information abou

GNSS

,


GSM

,


I/O

Maintenance

 and etc. FMU126 has one user editable 

profile, which can be loaded and saved to the device. After any 
modification of configuration the changes need to be saved to 
device using 

Save to device

 button. Main buttons offer following 

functionality: 

1.


Load from device


 loads configuration from device. 

2.


Save to device


 saves configuration to device. 

3.


Load from file


 loads configuration from file. 

4.


Save to file


 saves configuration to file. 

5.


Update firmware


 updates firmware on device. 

6.


Read records


 reads records from the device. 

7.


Reboot device


 restarts device. 

8.


Reset configuration


 sets device configuration to 

default. 

Most important configurator section is 

GPRS


 where all your 

server an

GPRS settings

 can be configured and 

Data Acquisition


 where


data acquiring parameters can be configured. 

More details about FMU126 configuration using Configurator can 
be found in ou

Wiki

. 


Figure 9 Device connected via USB


Figure 8 Language selection


Figure 10 Configurator Status window


Summary of Contents for FMU126

Page 1: ...Quick Manual v1 0 Advanced 3G terminal for DLT project in Thailand FMU126...

Page 2: ...he battery 6 PC Connection Windows 7 How to install USB drivers Windows 7 Configuration Windows 7 Quick SMS configuration 9 Mounting recommendations 10 LED indications 11 Characteristics 11 Basic char...

Page 3: ...3 FMU126 Wiki Know your device Figure 1 FMU126 device view...

Page 4: ...ive through RS232 4 RS232 TX Output for data transmit through RS232 5 DIN 1 Digital input channel 1 6 INPUT 6 TX EXT LVCAN TX 7 GND Ground pin 10 30 V DC 8 DOUT 1 Digital output channel 1 Open collect...

Page 5: ...5 FMU126 Wiki Figure 3 FMU126 Wiring scheme Wiring scheme 1 Automotive relay 1 1...

Page 6: ...in Teltonika Configurator Make sure that SIM card cut off corner is pointing outward from slot SIM slot 1 is closer to PCB SIM slot 2 is the top one 3 Connect battery as shown to device Position the...

Page 7: ...r installation window 4 In the following window click Install button Setup will continue installing the driver and eventually the confirmation window will appear Click Finish to complete the setup Con...

Page 8: ...y 1 Load from device loads configuration from device 2 Save to device saves configuration to device 3 Load from file loads configuration from file 4 Save to file saves configuration to file 5 Update f...

Page 9: ...detected by accelerometer Ignition will be detected by vehicle power voltage between 13 2 30 V Device makes a record On Moving if one of these events happen 300 seconds passes Vehicle turns 10 degree...

Page 10: ...on the car model this may happen in 5 to 30 minutes period When the module is connected measure the voltage again to make sure it did not decrease It is recommended to connect to the main power cable...

Page 11: ...ep mode Blinking fast for a short time Modem activity Off Device is not working or Device is in boot mode Characteristics Basic characteristics Table 5 Basic characteristics MODULE Name Quectel UC15 T...

Page 12: ...emperature without battery 40 C to 85 C Operating humidity 5 to 95 non condensing Ingress Protection Rating IP41 Battery charge temperature 0 C to 45 C Battery discharge temperature 20 C to 60 C Batte...

Page 13: ...nput Voltage threshold DIN 1 7 5 V Input Voltage threshold DIN 2 2 5 V ANALOG INPUT Input voltage Recommended Operating Conditions Range 1 0 10 V Input resistance Range 1 150 k Measurement error on 12...

Page 14: ...ess which is inaccessible to the operator All related devices must meet the requirements of EN 62368 1 standard The device FMU126 is not designed as a navigational device for boats Do not disassemble...

Page 15: ...before your start using the device Full User s Manual version can be found in our Wiki This sign on the package means that all used electronic and electric equipment should not be mixed with general h...

Page 16: ...uivalent repaired product fulfilling the same functionality TELTONIKA can also repair products that are out of warranty at an agreed cost Warranty Disclaimer TELTONIKA PRODUCTS ARE INTENDED TO BE USED...

Reviews: