iR1200 Modem
www.telusmobility.com
23
VERIFYING INSTALLATION
In this chapter, you will learn how to verify that the installation of the iR1200 modem was successful.
This chapter includes:
Powering up the Modem
Mobile Installation
Fixed Installation
Page 23
Page 23
Page 23
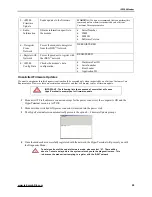
Communication Indicators
Page 24
Powering Up the Modem
Once you have installed the modem’s hardware components and connected all the power cables, power up the modem to ensure
that the installation was successful.
Powering Up – Mobile Installation
The following table contains the steps for powering up the modem for a mobile installation:
1
Turn on the vehicle’s ignition.
2
The STATUS LED light will initially blink Red. This indicates that the modem is searching for a signal
within the iDEN
network.
3
A blinking Green light indicates that a signal has been found and the modem has successfully connected.
4
The STATUS LED should blink Green within 3 minutes from the time the vehicle’s ignition was turned
ON.
Powering Up – Fixed Installation
To turn on the iR1200 modem, an ignition signal is required at the ignition connector. Use the ignition bypass plug to simulate an
ignition signal to power up the modem.
The following table lists the steps for powering up the modem for a building installation:
1
Insert the ignition bypass plug into the 4-prong IGNITION connector located in the rear panel of the
modem (refer to Figures 2 and 3 on Page 6).
2
Plug the AC power cord into a standard 2-prong polarized wall socket.
3
The STATUS LED light will initially blink Red. This indicates that the modem is searching for a signal
within the iDEN
network.
4
A blinking green light indicates that a signal has been found and the modem has successfully made a
connection.
5
The STATUS LED should blink Green within 3 minutes from the time the power was activated on the
modem.
Summary of Contents for iR1200
Page 1: ...iR1200 Rugged Modem iR1200 GPS Enabled Modem INSTALLATION GUIDE ...
Page 2: ......
Page 6: ......


