background image

- 3 -

GB

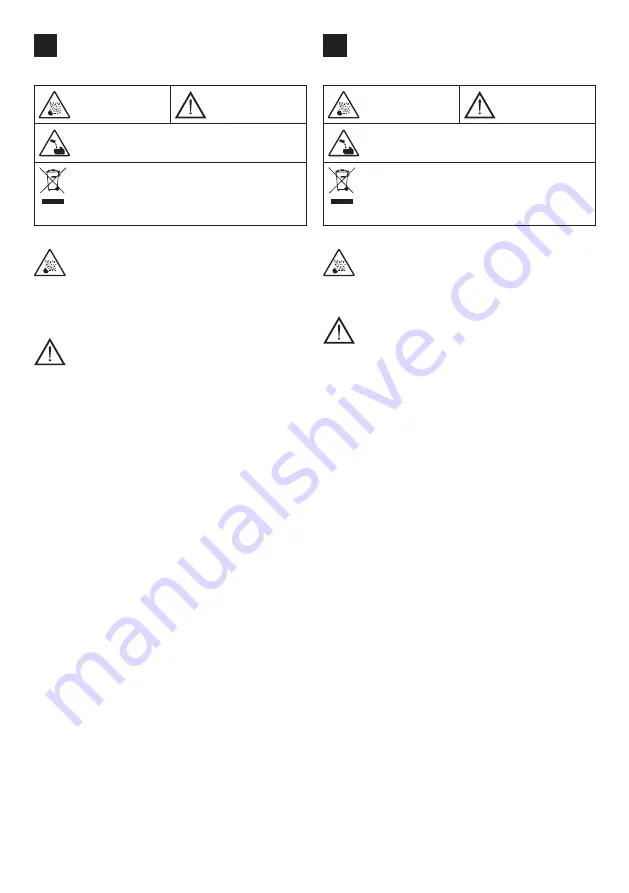
EXPLANATION OF DANGER, MANDATORY AND 

PROHIBITION SIGNS.

DANGER OF 

EXPLOSION

GENERAL 

HAZARD

DANGER OF CORROSIVE SUBSTANCES

Symbol indicating separation of electrical and 

electronic appliances for refuse collection. The 

user is not allowed to dispose of these 

appliances as solid, mixed urban refuse, and 

must do it through authorised refuse collection centres.

1. GENERAL SAFETY RULES FOR THE USE

-  During the charge the battery produces explosive gases, 

avoid  the  formation  of  flames  and  sparkes.  DO  NOT 

SMOKE.

- Position the batteries to be charged in a well-ventilated 

place.

- Inexperience and untrained people should be 

properly instructed before using the appliance.

- People (children included) whose physical, sensory 

or mental capacities would prevent them from using 

the appliance correctly must be supervised by a 

person who is responsible for their safety while the 

appliance is in use.

- Children must be supervised to ensure that they do 

not play with the appliance.

-  Use the battery charger only indoors and make sure that 

you start it in airy places. DO NOT SET IN THE RAIN OR 

SNOW.

- Do not connect or disconnect the clamps to or from the 

battery with the battery charger operating.

- Never use the battery charger inside the car or in the 

bonnet.

-  Substitute the mains cable only with an original one.

-  Do not use the battery charger to charge batteries which 

are not rechargeable.

-  Make  sure  the  available  power  supply  voltage 

corresponds to that shown on the battery charger rating 

plate.

-  To prevent damaging the vehicle electronics, scrupulously 

respect the warnings given by the producer of the vehicle 

or the batteries used.

- This battery charger has components such as switches 

and  relays  which  can  cause  arcs  or  sparks.  Therefore 

when using it in a garage or in a similar place set the 

battery charger in a suitable case. 

-  Repair or maintenance of the inside of the battery charger 

can be executed only by skilled technicians.

-  WARNING:  ALWAYS  DISCONNECT  THE  POWER 

SUPPLY CABLE FROM THE MAINS BEFORE 

CARRYING OUT ANY SIMPLE MAINTENANCE 

OPERATION ON THE BATTERY CHARGER.

-  The battery charger is protected from indirect contact by 

a ground cable as indicated for class I equipment.

  Make  sure  the  outlet  has  an  earth  connection  for 

protection.

I

LEGENDA SEGNALI DI PERICOLO, D’OBBLIGO E 

DIVIETO.

PERICOLO 

ESPLOSIONE

PERICOLO 

GENERICO

PERICOLO SOSTANZE CORROSIVE

Simbolo che indica la raccolta separata delle 

apparecchiature elettriche ed elettroniche. 

L’utente ha l’obbligo di non smaltire questa 

apparecchiatura come rifiuto municipale solido 

misto, ma di rivolgersi ai centri di raccolta autorizzati.

1. SICUREZZA GENERALE PER L’USO

- Durante la carica le batterie emanano gas esplosivi, 

evitate che si formino fiamme e scintille. NON FUMARE.

-  Posizionare le batterie in carica in un luogo areato.

-  Le persone inesperte devono essere opportunamente 

istruite prima di utilizzare l’apparecchio.

- Le persone (bambini compresi) le cui capacità 

fisiche, sensoriali, mentali siano insufficienti ai fini di 

utilizzare correttamente l’apparecchio devono essere 

sorvegliate da una persona responsabile della loro 

sicurezza durante l’uso dello stesso.

- I bambini devono essere sorvegliati per sincerarsi 

che non giochino con l’apparecchio.

-  Usare il caricabatterie esclusivamente all’interno e in 

ambienti ben areati: NON ESPORRE A PIOGGIA O 

NEVE.

-  Non collegare ne scollegare le pinze alla batteria con il 

caricabatterie funzionante.

-  Non usare nel modo più assoluto il caricabatterie 

all’interno di un’autovettura o del cofano.

-  Sostituire il cavo di alimentazione solo con un cavo 

originale.

-  Non utilizzare il caricabatterie per ricaricare batterie di 

tipo non ricaricabili.

-  Verificare  che  la  tensione  di  alimentazione  disponibile 

sia corrispondente a quella indicata sulla targa dati del 

caricabatterie.

-  Per non danneggiare l’elettronica dei veicoli, rispettare 

scrupolosamente le avvertenze fornite dai costruttori dei 

veicoli o delle batterie utilizzate

-  Questo caricabatterie comprende parti, quali interruttori o 

relè che possono provocare archi o scintille; pertanto se 

usato in una autorimessa o in un ambiente simile, porre 

il caricabatterie in un locale o in una custodia adatta allo 

scopo.

- Interventi di riparazione o manutenzione all’interno del 

caricabatterie devono essere eseguiti solo da personale 

esperto.

-  ATTENZIONE:  DISINSERIRE  SEMPRE  IL  CAVO 

DI ALIMENTAZIONE DALLA RETE PRIMA DI 

EFFETTUARE QUALSIASI INTERVENTO DI 

SEMPLICE MANUTENZIONE DEL CARICABATTERIE, 

PERICOLO!

- Il caricabatterie è protetto da contatti indiretti mediante 

un conduttore di terra come prescritto per gli apparecchi 

di  classe  I.  Controllare  che  la  presa  sia  provvista  di 

collegamento di terra di protezione.

Summary of Contents for 807588

Page 1: ...VOOR HET GEBRUIK H LTAL NOS HASZN LATI BIZTONS GI EL R SOK RO SIGURAN A GENERAL PENTRU FOLOSIRE S ALLM NNA S KERHETSANVISNINGAR DK ALMENE SIKKERHEDSREGLER FOR ANVENDELSE N GENERELLE FORHOLDSREGLER FO...

Page 2: ...2 KEY PAD PANEL 3 sec 6V 12V 24V FULL BOOST START DESULFATION 2 7 1 3 5 6 2a 2b 2c 4 4a 4b...

Page 3: ...protection I LEGENDA SEGNALI DI PERICOLO D OBBLIGO E DIVIETO PERICOLO ESPLOSIONE PERICOLO GENERICO PERICOLO SOSTANZE CORROSIVE Simbolo che indica la raccolta separata delle apparecchiature elettriche...

Page 4: ...ontacts indirects gr ce un conducteur de terre selon les prescriptions pour les appareils de classe I Contr ler que la prise est quip e d une protection de mise la terre E LEYENDA SE ALES DE PELIGRO D...

Page 5: ...gen Sie f r gut gel ftete Arbeitspl tze NICHT DEM REGEN ODER SCHNEE AUSSETZEN Nicht die Zangen an die Batterie einstecken oder ausstecken bei funktionierendem Ladeger t Auf keinen Fall soll das Ger t...

Page 6: ...er as pin as bateria com o carregador de baterias funcionando N o usar de maneira nenhuma o carregador de baterias dentro de um autom vel ou do cap Substituir o cabo el ctrico somente com um cabo orig...

Page 7: ...schreven voor de toestellen van klasse I Controleren of het contact voorzien is van een beschermende aardeaansluiting H A VESZ LY K TELEZETTS G S TILT S JELZ SEINEK FELIRATAI ROBBAN S VESZ LYE LTAL NO...

Page 8: ...IE DE NTRE INERE A NC RC TORULUI DE BATERII PERICOL nc rc torul de baterii este protejat de contacte indirecte printr un conductor de mp m ntare potrivit prescrip iilor pentru aparatele de clasa I Ver...

Page 9: ...ne til apparater i klasse I Kontroll r om stikkontakten er forsynet med jordforbindelse N SIGNALERINGSTEKST FOR FARE FORPLIKTELSER OG FORBUDT FARE FOR EKSPLOSJON GENERISK FARE STR LNING FARE KORROSIVE...

Page 10: ...L M NEBEZPE P KAZ M A Z KAZ M NEBEZPE V BUCHU V EOBECN NEBEZPE NEBEZPE PLYNOUC Z KOROSIVN CH L TEK Symbol ozna uj c separovan sb r elektrick ch a elektronick ch za zen U ivatel je povinen nezlikvidova...

Page 11: ...yku zemniacim vodi om v s lade s predpismi pre zariadenia triedy I Skontrolujte i je z suvka vybaven ochrann m uzemnen m SI LEGENDA SIGNALOV ZA NEVARNOST ZA PREDPISANO IN PREPOVEDANO NEVARNOST EKSPLOZ...

Page 12: ...neizravnih dodira putem sprovodnika uzemljenja kao to se nala e za ure aje klase I Provjeriti da uti nica ima za titno uzemljenje LT PAVOJAUS PRIVALOM J IR DRAUD IAM J ENKL PAAI KINIMAS SPROGIMO PAVOJ...

Page 13: ...R GA B STAM BA KOROZIJAS VIELU B STAM BA Simbols kas nor da uz to ka utiliz cija ir j veic atsevi i no cit m elektriskaj m un elektroniskaj m ier c m Lietot ja pien kums ir neizmest o aparat ru munici...

Page 14: ...umulatora podczas funkcjonowania prostownika Surowo zabronione jest u ywanie prostownika wewn trz pojazdu lub pod pokryw komory silnika Uszkodzony przew d zasilania nale y zast pi wy cznie przez orygi...

Page 15: ...ged battery or completed desulfation 5 START mode if present 6 DESULFATION mode 7 BOOST mode quick charge QUICK GUIDE The PDF file of the complete instruction manual and the quick guide can be downloa...

Page 16: ...atteries 3 Integrity control 4 Charge up to 80 5 Charge up to 100 6 Charge maintenance monitor 7 Charge maintenance 8 Pulse charge recovery END OF CHARGE EXAMPLE BEEEP DISPLAY B BOOST QUICK CHARGE VOL...

Page 17: ...monitor 7 Charge maintenance 8 Pulse charge recovery END OF BOOST EXAMPLE BEEEP DISPLAY EXIT ADVANCED FUNCTIONS 3 BEEEP C DESULFATION VOLTAGE SELECTION DISPLAY Info Alarm ADVANCED FUNCTIONS SELECTION...

Page 18: ...TION 3 BEEEP ADVANCED FUNCTIONS FUNCTION SELECTION DISPLAY WAIT FOR 3 TO GET CONFIRMATION CLAMP CONNECTION Info Alarm VEHICLE S STARTING 30 TIMER FOR FOLLOWING START 30 BEEEEP BEEP BEEP EXIT ADVANCED...

Page 19: ...atteria carica o fine desolfatazione 5 Modalit START se presente 6 Modalit DESULFATION desolfatazione 7 Modalit BOOST carica rapida GUIDA RAPIDA Il manuale istruzioni completo scaricabile in formato P...

Page 20: ...lto scariche 3 Controllo integrit 4 Carica fino all 80 5 Carica fino al 100 6 Monitor tenuta carica 7 Mantenimento carica 8 Ripristino carica a impulsi FINE CARICA ESEMPIO BEEEP DISPLAY B BOOST CARICA...

Page 21: ...nuta carica 7 Mantenimento carica 8 Ripristino carica a impulsi FINE BOOST ESEMPIO BEEEP DISPLAY USCITA FUNZIONI AVANZATE 3 BEEEP C DESOLFATAZIONE SELEZIONE TENSIONE DISPLAY Info Alarm SELEZIONEFUNZIO...

Page 22: ...IAVANZATE 3 BEEEP FUNZIONI AVANZATE SELEZIONE FUNZIONE DISPLAY ATTENDERE 3 PER CONFERMA COLLEGAMENTO PINZE Info Alarm AVVIAMENTO VEICOLO TIMER 30 PER SUCCESSIVO START 30 BEEEEP BEEP BEEP USCITA FUNZIO...

Page 23: ...ours 4 b batterie charg e fin d sulfatation 5 modalit START si pr sent 6 modalit DESULFATION 7 modalit BOOST GUIDE RAPIDE Le manuel d instructions complet et le guide rapide peuvent tre t l charg s en...

Page 24: ...3 Contr le int grit 4 Charg e jusqu 80 5 Charg e jusqu 100 6 Dispositif de contr le tanch it charge 7 Maintien charge 8 R tablissement de la charge par impulsions FIN DE CHARGE EXEMPLE BEEEP AFFICHEUR...

Page 25: ...tanch it charge 7 Maintien charge 8 R tablissement de la charge par impulsions FIN DE CHARGE EXEMPLE BEEEP AFFICHEUR SORTIE MENU AVANC 3 BEEEP C D SULFATATION S LECTION TENSION AFFICHEUR Info Alarm S...

Page 26: ...C 3 BEEEP PROGRAMMES AVANC S S LECTION FONCTION AFFICHEUR ATTENDRE 3 POUR LA CONFIRMATION BRANCHEMENT PINCES Info Alarm D MARRAGE V HICULE MINUTEUR 30 POUR D MARRAGE SUCCESSIF 30 BEEEEP BEEP BEEP SORT...

Page 27: ...urso 4 b bater a carga fin desulfataci n 5 modalidad START si est presente 6 modalidad DESULFATACI N 7 modalidad BOOST GU A R PIDA El manual de instrucciones completo y la gu a r pida pueden descargar...

Page 28: ...as 3 Control de la integridad 4 Carga de hasta el 80 5 Carga de hasta el 100 6 Monitoreo retenci n carga 7 Mantenimiento carga 8 Restablecimiento carga a impulsos FIN DE CARGA EJEMPLO BEEEP DISPLAY B...

Page 29: ...eo retenci n carga 7 Mantenimiento carga 8 Restablecimiento carga a impulsos FIN DE CARGA EJEMPLO BEEEP DISPLAY SALIDA MEN AVANZADO 3 BEEEP C DESULFATACI N SELECCI N TENSI N DISPLAY Info Alarm SELECCI...

Page 30: ...3 BEEEP PROGRAMAS AVANZADOS SELECCI N FUNCI N DISPLAY ESPERAR 3 PARA LA CONFIRMACI N CONEXI N PINZAS Info Alarm ARRANQUE VEH CULO TEMPORIZADOR 30 PARA EL ARRANQUE SUCESIVO 30 BEEEEP BEEP BEEP SALIDA...

Page 31: ...sulfatierung 5 Modus START falls vorhanden 6 Modus DESULFATION 7 Modus BOOST KURZANLEITUNG Das vollst ndige Betriebshandbuch und die Kurzanleitung k nnen im PDF Format nach Registrierung unter der fol...

Page 32: ...Pr fung auf einwandfreien Funktionszustand 4 Laden auf 80 5 Laden auf 100 6 berwachung Ladungserhaltung 7 Erhaltungsladung 8 Impulsweises Nachladen ENDE LADEVORGANG BEISPIEL BEEEP DISPLAY B SCHNELLLAD...

Page 33: ...adungserhaltung 7 Erhaltungsladung 8 Impulsweises Nachladen ENDE LADEVORGANG BEISPIEL BEEEP DISPLAY VERLASSEN ERWEITERTES MEN 3 BEEEP C DESULFATIERUNG EINSTELLUNG SPANNUNG DISPLAY Info Alarm AUFRUFEN...

Page 34: ...EP ERWEITERTE PROGRAMME AUSWAHL FUNKTION DISPLAY 3 SEKUNDEN F R DIE BEST TIGUNG WARTEN ANSCHLUSS ZANGEN Info Alarm FAHRZEUGSTART SCHALTUHR 30 SEKUNDEN F R ANSCHLIESSENDEN START 30 BEEEEP BEEP BEEP VER...

Page 35: ...KEY PAD 2 1 6 12 24 BOOST DESULFATION START 2 2 a 6 2 b 12 2 c 24 3 4 4 a 4 b 5 START 6 DESULFATION 7 BOOST PDF www telwin com usermanual A PULSE TRONIC B BOOST C D START 230V 1ph 50 60 Hz 230V 1ph 50...

Page 36: ...RU 36 A PULSE TRONIC Info Alarm Info Alarm 7 PULSE TRONIC V 1 2 3 4 5 6 7 8 1 2 3 4 80 5 100 6 7 8 BEEEP B BOOST Info Alarm 3 BEEEP 3 BEEEP Info Alarm 7...

Page 37: ...37 RU B BOOST PULSE TRONIC V 1 2 3 4 5 6 7 8 1 2 3 4 80 5 100 6 7 8 BEEEP DISPLAY 3 BEEEP C Info Alarm 3 BEEEP 3 BEEEP Info Alarm 7 BEEEP 3 BEEEP...

Page 38: ...RU 38 D 12B 12B Info Alarm 3 BEEEP 3 Info Alarm 30 30 BEEEEP BEEP BEEP 24V...

Page 39: ...ering de machines die vallen onder de verbruiksartikelen overeenkomstig de Europese richtlijn 1999 44 EG alleen indien ze verkocht zijn in de lidstaten van de EU Het garantiecertificaat is alleen geld...

Page 40: ...mjeseci od dana pokretanja stroja koji je potvr en na garantnom listu Vra eni strojevi i ako su pod garancijom moraju biti poslani bez pla anja tro kova prijevoza Iznimka su strojevi koji se vra aju k...

Reviews: