background image

Temperzone   SAT-­‐3   Installation   Setup   Guide,   Issue   2   


Page   6

   of   7   


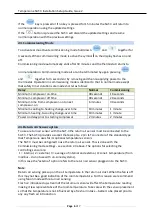
If   the   

   key   is   pressed   or   if   no   key   is   pressed   for   15   minutes   the   SAT-­‐3   will   return   to   

normal   operation   using   the   updated   settings.   
If   the   

   button   is   pressed   the   SAT-­‐3   will   discard   the   updated   settings   and   resume   

normal   operation   with   the   previous   settings.   

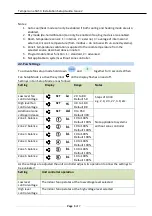
2.3.


Commissioning   Mode   

To   activate   or   de-­‐activate   commissioning   mode   hold   down   

   and   

   together   for   

3   seconds.   When   commissioning   mode   is   active   the   symbol   

i

   on   the   display   flashes   on   and   

off.   
Commissioning   mode   automatically   ends   after   30   minutes   and   the   thermostat   returns   to   

normal   operation.   Commissioning   mode   also   can   be   terminated   by   again   pressing   


and   

   together   for   3   seconds   or   by   removing   and   then   re-­‐applying   power   to   the   

thermostat.   Operation   in   commissioning   mode   is   identical   to   that   in   normal   mode   except   

that   safety   timer   durations   are   made   shorter   as   follows:   

Delay   

Normal   

Commissioning   

Minimum   compressor   on-­‐time   

90   seconds   

10   seconds   

Minimum   compressor   off   time   

90   seconds   

20   seconds   

Minimum   time   from   compressor-­‐on   to   next   

compressor-­‐on   

6   minutes   

30   seconds   

Minimum   cooling-­‐to-­‐heating   change-­‐over   time   

10   minutes   

1   minute   

Minimum   heating-­‐to-­‐cooling   change-­‐over   time   

10   minutes   

1   minute   

Power   on   delay   prior   to   starting   compressor   

2   minutes   

2   minutes   


2.4.


Return   Air   Sensor   option   

To   use   a   return   air   sensor   with   the   SAT-­‐3   the   return   air   sensor   must   be   connected   to   the   

SAT-­‐3.   The   SAT-­‐3   provides   a   socket   that   accepts   a   2   pin   JST   connector   of   the   standard   type   
that   Temperzone   uses   for   its   optional   temperature   sensors.   

The   SAT-­‐3   must   be   configured   to   use   the   return   air   sensor.   This   is   done   with   the   

Commissioning   mode   settings   -­‐   see   section   2.3   above.   The   options   for   selecting   the   

controlling   sensor   are:   

   1   =   internal,   2   =   external,   3   =   average   of   internal   and   external,   4=zone   1   temperature   (from   

modbus   –   do   not   use   with   un-­‐zoned   systems).   

In   this   case   the   "external"   option   refers   to   the   return   air   sensor   plugged   in   to   the   SAT-­‐3.   
   

Note

:         

Return   air   sensing   picks   up   on   the   air   temperature   in   the   return   air   duct.   When   the   fan   is   off   

this   may   not   be   a   good   indication   of   the   room   temperature.   For   this   reason   we   recommend   

using   fan   on   mode   with   return   air   sensing.   

Fresh   air   introduced   up-­‐stream   of   the   return   air   sensor   will   affect   the   temperature   reading   

making   it   less   representative   of   the   room   temperature.   Take   care   with   the   sensor   placement   
so   that   the   temperature   is   not   influenced   by   a   fresh   air   intake   –   better   to   be   placed   prior   to   

any   any   fresh   air   introduction.   

Summary of Contents for SAT-3

Page 1: ...Temperzone SAT 3 Installation Setup Guide Issue 2 SAT 3 Installation Setup Guide Date 4 February 2016 Issue 2 Applies to SAT 3 room temperature controller part number 201 000 146 ...

Page 2: ...Temperzone SAT 3 Installation Setup Guide Issue 2 ...

Page 3: ...uide 2 1 1 General 2 1 1 1 Installation Settings 2 1 1 2 Clock Setting 2 1 2 Fan Setup 2 1 3 Air Conditioner Commissioning 2 2 Detailed SAT 3 Configuration 3 2 1 Installation Settings 3 2 2 Fan Settings 5 2 3 Commissioning Mode 6 2 4 Return Air Sensor Option 6 3 SAT 3 Fault Indications 8 ...

Page 4: ...nd time using the keys detailed in section 1 1 When the day and time are set correctly leave the SAT 3 for 15 seconds to return to normal operation 1 2 Fan Setup Activate fan setup mode by holding down and together for 3 seconds When fan setup mode is active the symbol on the display flashes on and off 1 Adjust the low fan control voltage to a suitable low level while monitoring the airflow 2 Adju...

Page 5: ...i SET Ht Ct to 50 0 C Steps of 0 5 C Temperature differential i td 0 5 to 1 5 C Steps of 0 5 C Indoor fan type i Ft 1 or 3 Single or three speed fan Default 3 speed Enable disable Heating mode i On or off Default on Enable disable Cooling mode i On or off Default on Enable disable Cool Heat auto mode i On or off Default on see note 1 Enable disable Fan Only mode i On or off Default on Enable disab...

Page 6: ...point from zone 1 set point i ZONE SP 2 0 to 10 0 C N A see note 6 Minimum number of zones that must be on i ZONE nn 0 1 or 2 N A see note 6 Zone 1 Size i 1 to 5 N A see note 6 Zone 2 Size i 0 to 5 N A see note 6 Zone 3 Size i 0 to 5 N A see note 6 Zone 4 Size i 0 to 5 N A see note 6 Zone 5 Size i 0 to 5 N A see note 6 Zone 6 Size i 0 to 5 N A see note 6 Programmable timer function i tF 1 or 2 Def...

Page 7: ...bol on the display flashes on and off Settings in Fan Setup Mode are as follows Setting Display Range Notes Low level fan control voltage SET Lo 2 0 to 8 0 Default 5 0 High level fan control voltage SET Hi 4 0 to 10 0 Default 8 0 Steps of 0 333 e g 2 0 2 3 2 7 3 0 etc Additional zone voltage increase SET Ad 0 to 950 Default 300 Zone 1 balance bL 10 to 100 Default 100 Zone 2 balance bL 10 to 100 De...

Page 8: ...utes 1 minute Minimum heating to cooling change over time 10 minutes 1 minute Power on delay prior to starting compressor 2 minutes 2 minutes 2 4 Return Air Sensor option To use a return air sensor with the SAT 3 the return air sensor must be connected to the SAT 3 The SAT 3 provides a socket that accepts a 2 pin JST connector of the standard type that Temperzone uses for its optional temperature ...

Page 9: ...ith the power disconnected Code displayed Description Remedy t1 SAT 3 internal temperature sensor error The internal temperature sensor of the SAT 3 is damaged Replace the SAT 3 t2 SAT 3 external temperature sensor error Check the external temperature sensor connected to the Sat 3 t3 No communications between SAT 3 and unit controller Check the wiring between the unit controller and the SAT 3 Chec...

Reviews: