background image

TOUCH SCREEN PAPERLESS RECORDER


www.tempsendevices.net 

Page 7  


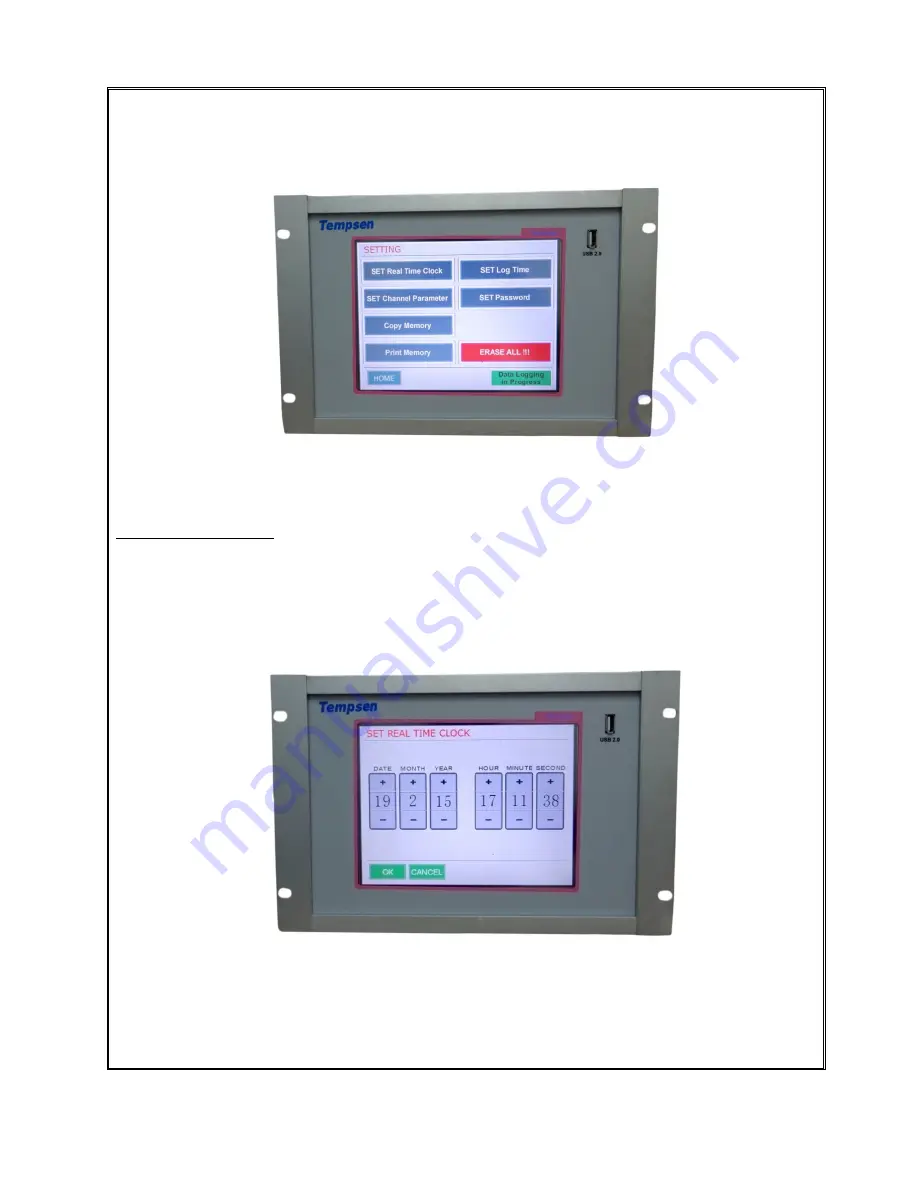
After entering the password, the setting screen will be displayed as shown below           


TIME & DATE SETTINGS 


In Setting -> SET Real Time Clock, Set the real time & date details. Click 

OK

 to save the settings.      


Summary of Contents for TPLR-120 Series

Page 1: ...SCREEN PAPERLESS RECORDER TPLR 120 Series TEMPSEN DEVICES Plot No 2 3 Balaji Nagar 4th Street Mettukuppam Thoraipakkam Chennai 600097 Tele fax 91 44 24581758 Mobil 91 9841201758 Customer Care 91 9841...

Page 2: ...NSTALLATION Installation Location Install the control panel in a location that meets the following criteria 1 Little or no mechanical vibration 2 No corrosive gases 3 Minimal temperature fluctuations...

Page 3: ...B 0 to 1820 C 4 C RTD Base Accuracy 0 2 or 0 5 C 1 F Resolution 0 1 C 2 or 3 wire connection Cable compensation to 50 ohm Open and short circuit detection Type Range C Accuracy C 100 ohm Pt 385 200 t...

Page 4: ...pacity of above specified range provides a wide range of application in data storage for all channels individually Recording data on storage media Using the Setup menu the user can log the data in int...

Page 5: ...1 Compliant Software Web server Based Software Safety and Environmental Operating Range 0 C to 60 C 10 to 90 RH non condensing Dimension Bezel dimension 195 H x 300 W x 5mm above panel Unit dimension...

Page 6: ...es net Page 6 OPERATING PARAMETER SETTING Switch ON the device the following display will show the channel readings It will take a few seconds CONFIGURATION SETTING Click CONFIG in the display Enter t...

Page 7: ...ORDER www tempsendevices net Page 7 After entering the password the setting screen will be displayed as shown below TIME DATE SETTINGS In Setting SET Real Time Clock Set the real time date details Cli...

Page 8: ...www tempsendevices net Page 8 LOG TIME SETTINGS In Setting SET Log Time Set the Log Time Of The Logger Click Ok to save the settings PASSWORD SETTINGS In Setting Click SET Password this feature is use...

Page 9: ...range from the specified values Low 999 High 9999 RANGE Set the range with respect to the Sensor type specification REF PAGE NO 3 OFFSET Set the offset range from 999 to 999 Default set 0 DECIMAL Set...

Page 10: ...front panel of the Logger In Setting Click COPY Memory this feature is used to copy the Logger memory in to the Pen Drive If USB 2 0 drive is not inserted in the drive an error screen PEN DRIVE PROBLE...

Page 11: ...n Ink jet printer through the PRINTER PORT provided in the back panel of Logger In Setting Click PRINT Memory the entire memory will be printed GRAPH After completing all the Settings Click HOME icon...

Page 12: ...RMINAL DETAILS ID NUMBER In Setting ID NUMBER SETTING for Multi Logger Software DATA LOGGING OFF Logging Off The Data Logger Click HOME icon in the Setting screen In Setting DATA LOGGING OFF Input Ter...

Page 13: ...per terminals Connecting the supply to the wrong terminals may damage the unit permanently 2 Check the display whether it shows the actual value properly If yes follow step 3 if no check the sensor In...

Reviews: