background image

ENGLISH

EN

BR2020/T (04–98)

7

MACHINE OPERATION

Read and understand SAFETY PRECAUTIONS
section before operating machine.

PRE–OPERATION

1.

Sweep floor and remove debris.

2.

Check condition of pad.

3.

Check battery charge level. 

(For accurate

reading brush must be spinning)

4.

Check that dust control bag is installed.

5.

Make sure floor is dry.

BURNISHING WITH THE BR2020

1.  Turn on key and main power switch.

2.

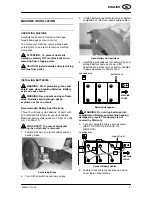
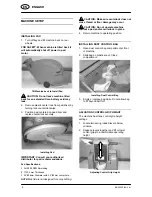
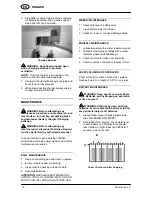
Twist control grips forward to lower pad to
floor and to start pad motor.

Twist Grips to Activate Pad

3.

Begin burnishing by pushing machine forward.

NOTE: If machine vibrates, realign pad.

CAUTION: Keep machine moving at all

times to prevent floor damage, .

4.

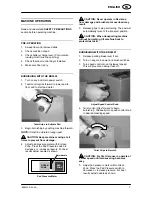
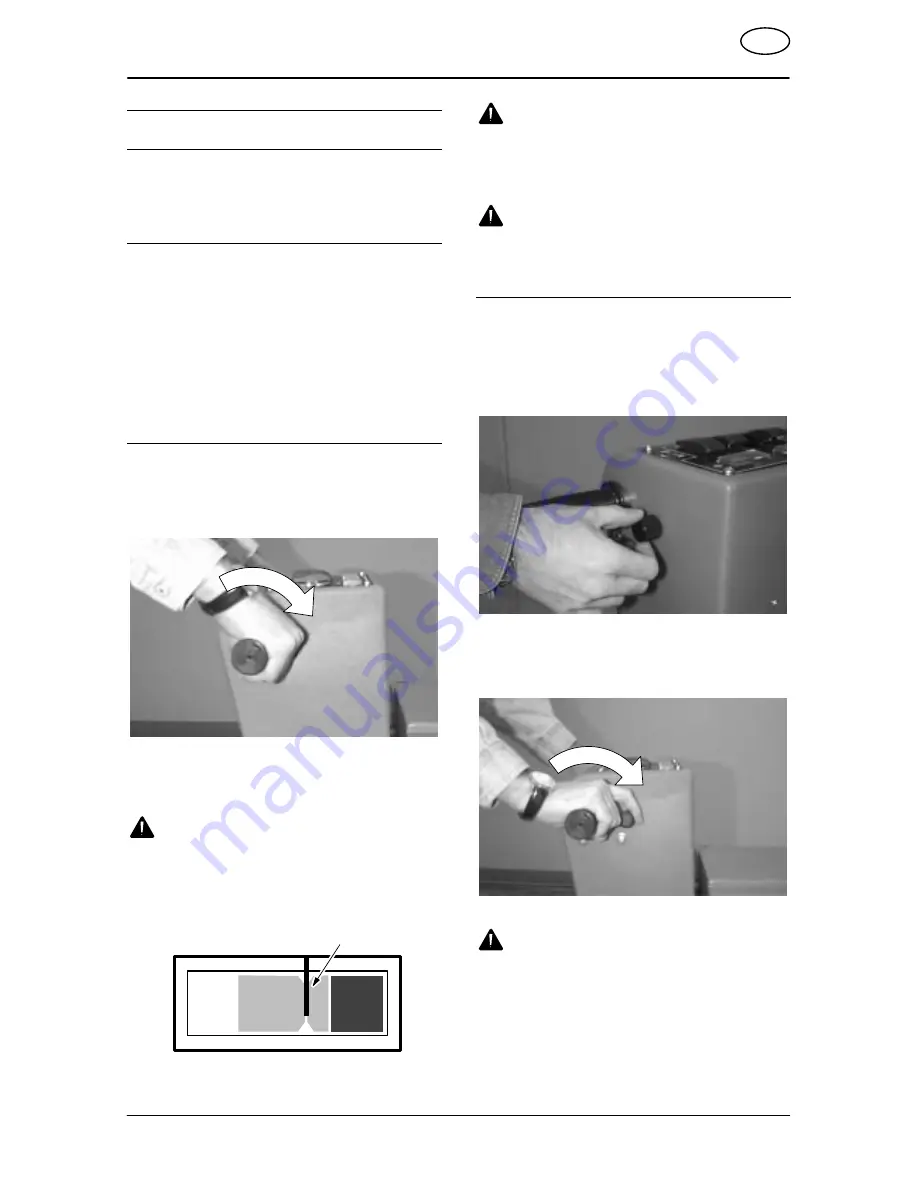
Adjust pad pressure meter within Green
Zone. Press the Pad Pressure switch to
decrease or  increase pressure. For best
results adjust needle as shown.

Meter Needle

GREEN
ZONE

RED
ZONE

Pad Pressure Meter

CAUTION: Never operate in Red zone,

floor damage and brush motor overload may
result.

5.  Release grips to stop burnishing. The pad will

automatically raise to the transport position.

CAUTION: When transporting machine

without burnishing, tilt machine back to
protect dust skirt.

BURNISHING WITH THE BR2020T

1.

Release parking brake lever if set.

2.  Turn on key, main power and brush switches.

3.

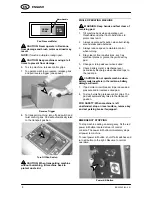
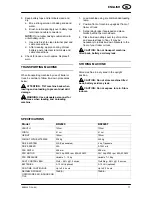
Turn speed control knob to slowest speed.
This will prevent an abrupt take off.

Adjust Speed Control Knob

4.

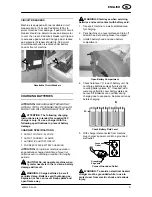
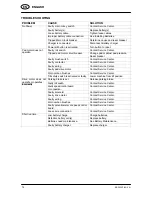
Twist control grips forward to begin
burnishing.  Gradually turn speed control knob
to desired cleaning speed.

Twist Grips to Burnish

CAUTION: For first time users, operate at

a slow speed until maneuvering becomes
easy.

5.

Adjust pad pressure meter within Green
Zone. Press the Pad Pressure switch to
decrease or  increase pressure. For best
results adjust needle as shown.

Summary of Contents for 604777

Page 1: ...604742 Rev 00 04 98 BR2020 T Dust Control Burnisher Model No BR2020 604778 BR2020T 604777 Operator Manual EN EN ...

Page 2: ...TEMS 3 MACHINE COMPONENTS 4 CONTROL PANEL SYMBOLS 4 MACHINE INSTALLATION 5 MACHINE SETUP 6 MACHINE OPERATION 7 CHARGING BATTERIES 9 MAINTENANCE 10 TRANSPORTING MACHINE 11 STORING MACHINE 11 SPECIFICATIONS 11 TROUBLE SHOOTING 12 EC DECLARATION OF CONFORMITY FOR MACHINERY Directive 89 392 EEC Annex II sub A TENNANT N V Address Industrielaan 6 5405 AB P O Box 6 5400 AA Uden The Netherlands Model BR20...

Page 3: ...away from revolving pad Keep machine moving to prevent damage to finish or floor Do not run machine where flammable liquids or gases are present Do not run on ramps or inclines unless adequate personnel are present for assistance Always use extreme caution when maneuvering 3 BEFORE LEAVING OR SERVICING MACHINE Make sure machine is turned off and key is removed Stop on level surface Set parking bra...

Page 4: ...Circuit Breaker Button 12 Key Switch 13 Power Kill Button 14 Hour Meter 15 Rear Tilt Wheels for pad installation 16 Automatic Safety Shut Off Switch for pad installation 17 Dust Control Bag Compartment 18 Wall Rollers 19 Battery Compartment Hood 20 Battery Charge Plug 21 Pad Driver 22 Main Wheels 23 Parking Brake BR2020T CONTROL PANEL SYMBOLS Main Power Pad Motor Circuit Breaker Main Power Circuit...

Page 5: ...teries Maximum battery dimensions are 78 mm W x 394 mm L x 362mm H FOR SAFETY To prevent accidental starting be certain key is removed 1 Position machine on a level surface and set parking brake Set Parking Brake 2 Turn OFF all switches and remove key 3 Unlatch battery hood latches and open battery compartment Remove loose battery cables Open Battery Compartment 4 Carefully install batteries into ...

Page 6: ...ishing 1 25 4 mm Thickness 20 508mm Diameter with 3 5 89mm center hole NOTE Machine is not designed for spray buffing CAUTION Make sure centerlock does not cross thread or floor damage may occur CAUTION Do not operate machine without a pad and or centerlock in place 4 Return machine to operating position INSTALLING DUST CONTROL BAG 1 Open dust control bag compartment at front of machine 2 Slide ba...

Page 7: ...ssure For best results adjust needle as shown Meter Needle GREEN ZONE RED ZONE Pad Pressure Meter CAUTION Never operate in Red zone floor damage and brush motor overload may result 5 Release grips to stop burnishing The pad will automatically raise to the transport position CAUTION When transporting machine without burnishing tilt machine back to protect dust skirt BURNISHING WITH THE BR2020T 1 Re...

Page 8: ...aution when burnishing around walls and obstacles 3 Always reduce speed to maintain control when turning 4 Stay clear of floor obstructions such as electrical plates or grates they will destroy pad 5 Change or turn pads over when soiled 6 Check battery meter s discharge level periodically Recharge when needle drops to the red zone CAUTION Do not operate machine when battery meter needle is in the ...

Page 9: ... set in a discharge condition for lengthy periods CAUTION Do not operate machine when battery meter needle is in the red zone battery damage will result WARNING Charge batteries in a well ventilated area Batteries emit hydrogen gas Explosion or fire can result Keep sparks and open flame away WARNING Shield eyes when servicing batteries and avoid contact with battery acid 1 Transport machine to a w...

Page 10: ... control bag 3 Clean machine housing with damp cloth 4 Recharge batteries ATTENTION RECHARGE BATTERIES ONLY AFTER A TOTAL OF 30 MINUTES OF USE OR MORE THIS WILL PROLONG BATTERY LIFE WEEKLY MAINTENANCE 1 Check fluid level in battery cells 2 Clean battery tops of corrosion 3 Check for loose or corroded battery cables MONTHLY MAINTENANCE 1 Lubricate caster with a water resistant grease 2 Lubricate wh...

Page 11: ...nt of trailer of truck 3 Set parking brake if equipped and place blocks behind the main wheels 4 Place tie down straps over top of machine and secure straps to floor It may be necessary to install tie down brackets to the floor of your trailer or truck CAUTION Do not transport machine tilted back battery acid may leak STORING MACHINE Store machine in a dry area in the upright position CAUTION Do n...

Page 12: ...y wiring Contact Service Center Faulty pad drive motor Contact Service Center Worn carbon brushes Contact Service Center Tilt safety switch is activated or faulty Lower machine from tilt position Drive motor does not t t Parking brake is set Release parking brake operate or operates incorrectly Faulty roll switch Contact Service Center incorrectly Faulty speed control board or connection Contact S...

Reviews: