4-26
T12 Service Information 9009917 (12-12)
TROUbLESHOOTING
battery Charger, Standard and Export
reD flaSheS
PoSSible cauSe
1
battery high voltage
2
battery Low voltage
3
Charge timeout . batteries failed to
reach required voltage . Charger
output was reduced due to high
temperatures .
4
Check battery . battery could not
be trickle charged up to minimum
voltage .
5
over-Temperature: Charger shut
down due to high internal tempera-
ture .
6
Charger internal fault . disconnect
for 15 seconds and reset charger .
This charger is programmable for standard lead-acid,
heavy duty lead-acid batteries . The setting is displayed
using the blink on/off method each time the battery
charger is connected to an aC power supply and the
charger is disconnected from the batteries .
The standard battery charger utilizes a single-Led
display . The Led flashes green during the charging cycle
and changes to solid green when the charging cycle is
complete .
OPERATION
FAULTS
CONFIGURATION
1 . key off . disconnect battery charger from aC power
supply and the batteries . wait 30 seconds before
proceeding to step 2 to allow for capacitor discharge .
* @ 20 hour rate
ALGORITHM # bATTERY TYPE
3
Lead-acid, 240 ah* (Trojan T105)
7
Lead-acid, 360 ah* (Trojan j305)
12
GeL, 240 ah* (exide df06240)
28
GeL, 180 ah* (deka 8GGC2)
43
aGm, 300 ah* (discover evL16a,
evGC6a)
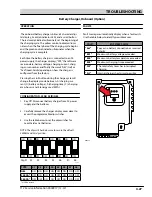
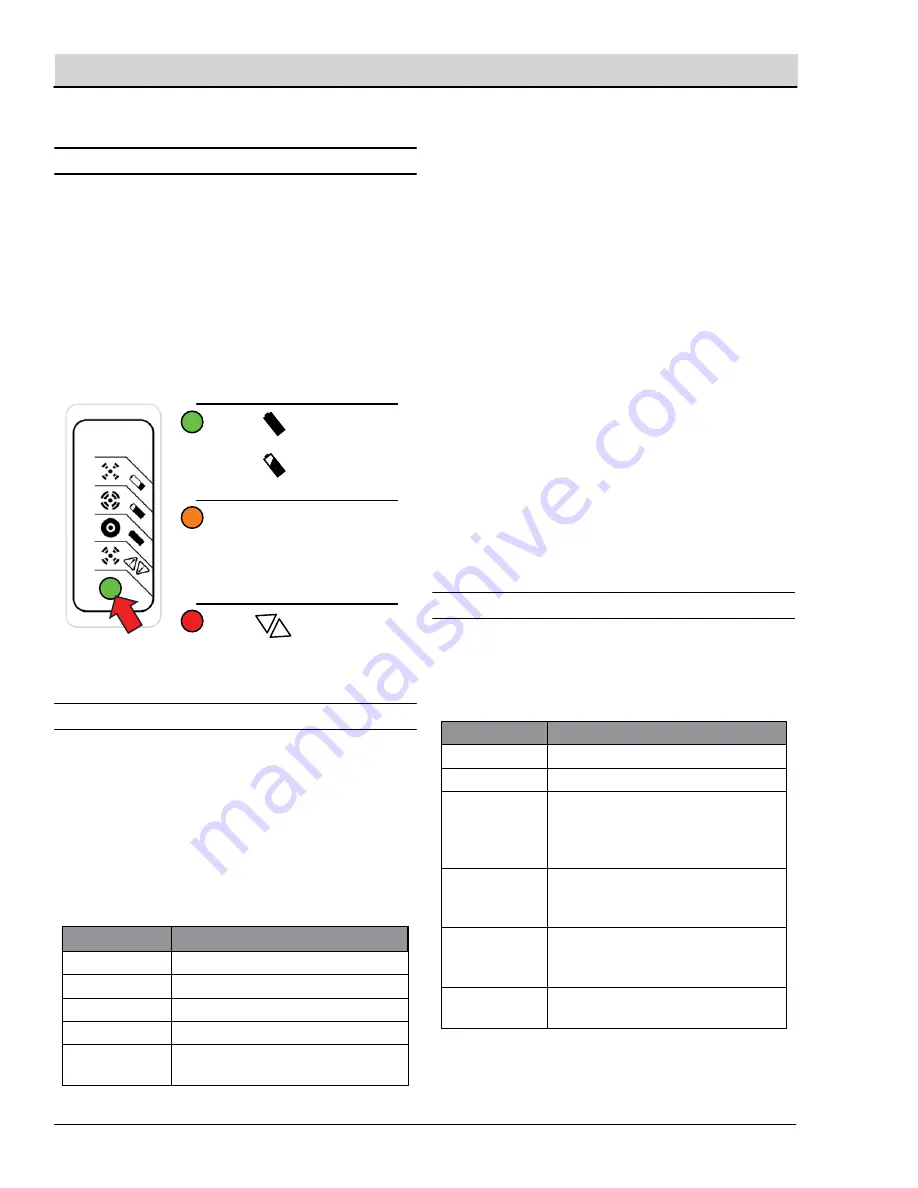
4. Optional Charger Single-LED Display (internal or external)
LED indications following “Power-On Self Test”:
Green
Solid:
Charging complete. Charger in
Maintenance Mode.
Flashing:
Short:
<80% Charge.
Long:
>80% Charge.
When battery is not connected:
Algorithm
Number display.
Amber
Flashing:
Reduced Power Mode: Low AC Voltage or
High internal charger temperature.
Red
Flashing:
Charger error. Reset charger power and
refer to Troubleshooting below.
Maintenance Instructions
1. For flooded lead-acid batteries, regularly check water levels of each battery cell after charging
and add distilled water as required to level specified by battery manufacturer. Follow the
maintenance and safety instructions recommended by the battery manufacturer.
2. Make sure charger connections to battery terminals are tight and clean.
3. Do not expose charger to oil, dirt, mud or direct heavy water spray when cleaning vehicle.
Troubleshooting Instructions
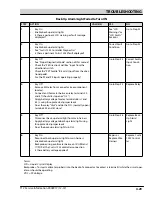
If a fault occurs, count the number of red flashes between pauses and refer to the table below:
n
o
i
t
u
l
o
S
e
s
u
a
C
s
e
h
s
a
l
F
d
e
R
Battery High Voltage
Check battery size and condition and
reset charger (interrupt AC power for
15 seconds).
Battery Low Voltage
Check battery size and condition and
reset charger (interrupt AC power for
15 seconds).
Charge Timeout caused by
battery pack not reaching
required voltage. Charger
output was reduced due to
high temperatures
Check connections.
Operate charger at a lower ambient
temperature.
Check Battery: battery could
not be trickle charged up to
minimum voltage
Check for shorted or damaged cells.
Over-Temperature: Charger
shut down due to high internal
temperature.
Ensure sufficient cooling air flow and
reset charger (interrupt AC power for
15 seconds).
Charger Internal Fault
Reset charger (interrupt AC power
for 15 seconds). Return to qualified
service depot if fault persists.
Green
Solid
: Charge
Complete
Flashing
:
Charging
Amber
Flashing
:
Reduced Power
Mode. Low AC
Voltage or Hi
Charger Temp
Red
Flashing:
Charger Error
See Faults Below
!
!
DQC001
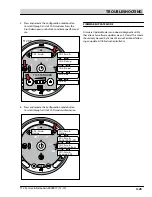
2 . Connect charger to aC supply and observe the
Led display . It will blink on/off to indicate the cur-
rent battery charger setting for 11 seconds .
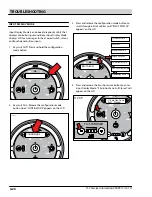
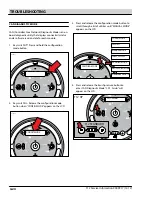
1 . key off . disconnect battery charger from aC power
supply and the batteries . wait 30 seconds before
proceeding to step 2 to allow for capacitor discharge .
DiSPlayinG current charGer SettinG
chanGinG charGer SettinG
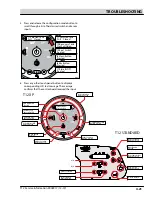
2 . Connect charger to aC supply and observe the
Led display . It will blink on/off to indicate the cur-
rent battery charger setting for 11 seconds .
3 . Connect the battery charger to the batteries for 2
seconds and then disconnect from the batteries,
during the 11 second window, to advance to the
next highest setting .
NOTE: The 11 second window expands to 30 seconds after
the first change has been made.
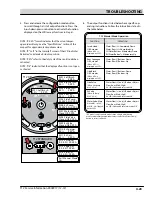
4 . wait 45 seconds after a change has been made to
save the new charger setting .
NOTE: There are 10 total algorithms. The advancement
sequence increases each time and then loops back to #1.
a flashing red Led indicates a charger error . Count the
number of flashes separated by a long pause and then
use the table below to identify a possible cause .
Summary of Contents for EC-H2O T12
Page 8: ...1 4 T12 Service Information 9009917 12 12 SAFETY PRECAUTIONS...
Page 68: ...3 44 T12 Service Information 9009917 12 12 MAINTENANCE...
Page 132: ...4 64 T12 Service Information 9009917 12 12 TROUBLESHOOTING...
Page 177: ......
Page 178: ......


