7
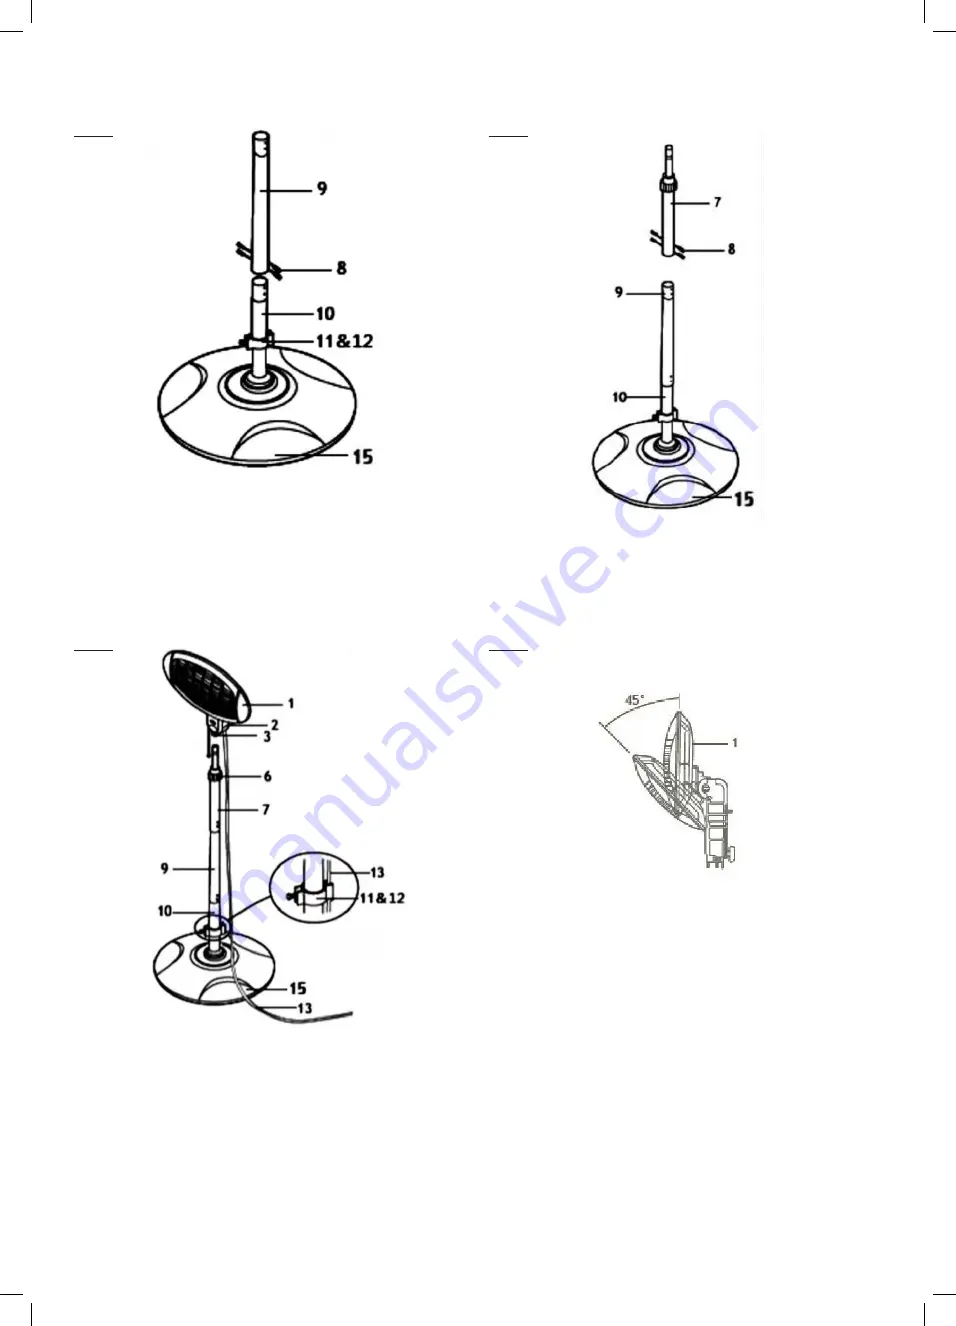
Set the heater housing (1) to the desired angle between 0° and
45°.
Warning!
Never adjust the angle while the heater is in opera-
tion.
The patio heater is now fully assembled and can, if necessary,
be dismantled in the reverse order.
I
mportant: All screws must be tightened securely
Step 2
Attach the power cable fastener (11) to the lower tube (10), and
use the screw (12) to fasten it in the desired position.
Loosen the screws (8) on the middle tube (9).
Use the 4 screws (8) to firmly screw the middle tube (9) to the
lower tube (10).
Step 3
Loosen the screws (8) on the upper tube (7).
Use the 4 screws (8) to firmly screw the upper tube (7) to the
middle tube (9) .
Step 4
Pull the extension out from the upper tube (7) and use the
height adjustment knob (6) to fix it to your desired height.
Insert the upper tube (7) into the casing (3) of the heater hou-
sing (1).
Tighten the adjustment knob (2) to secure the heater housing
(1) on the tube.
Now place the power cable (13) in the power cable fastener (11) .
Step 5
P21110_TEPRO_2140UK_Standheizer_GB_210909.indd 7
13/9/2021 3:49 PM


