background image

17

t

6.  Only place the BBQ meat on the grate 

when the charcoal is covered with a 

bright layer of ash.

7.  Hook the BBQ grate handle to the 

crossbars on the BBQ grate to attach 

or remove the BBQ grate. Place the 

BBQ grate on the bracket in the fire 

pan. The handle should be removed 

while grilling as it becomes very hot. 

With a hot grill, grasp the handle only 

with BBQ gloves.

Maintenance and Cleaning

Your grill is made of high-quality materials. 

To clean and maintain the surfaces, please 

heed the following instructions:

Danger Risk of burning!

Let the grill cool down 

completely before cleaning.


– Only tip out the ash when the fuel has 

completely burned out.

Danger Health risk!

Do not use any decolourants 

or thinners to remove stains. 

These are harmful to health 

and must not come into contact 

with food.

Attention Risk of damage!

Do not use any strong or 

grinding solvents or abrasive 

pads, since these can attack 

the surfaces and leave behind 

scrape marks.

•  Let the fuel burn out completely after 

grilling. This eases the cleaning effort 

by burning away excess fat and BBQ 

residues.

•  Remove the cold ashes. 

It is very 

important that you remove the ashes 

from the fire pan before moisture 

combines with the cold ashes. Ash 

is saline and, when moistened, will 

attack the inside of the fire pan. The 

fire pan can thus be damaged over 

the years by rust.

•  Clean the BBQ regularly, at best after 

every use.

•  Remove the BBQ grate and clean it 

thoroughly with soapy water. Rinse the 

BBQ grate with clear water. Dry the 

BBQ grate thoroughly.

•  Use a wet sponge to remove loose 

residue from the grill.

•  Use a soft, clean cloth for drying. Do 

not scratch the surfaces when wiping 

them dry.

•  Clean the internal and external surfaces 

generally with warm soapy water.

•  Tighten all screws before every use to 

guarantee stable footing for your BBQ 

at all times.

•  IMPOrTANT:

 The BBQ should always 

be stored somewhere where it is 

protected from moisture.

P180200_TEPRO_00202_Flint_20181023_DE_GB.indb   17

23/10/2018   11:44 AM

Summary of Contents for Flint

Page 1: ...Version 2019 Art Nr 00202 k Bedienungsanleitung RUNDGRILL FLINT Holzkohlengrill t Instruction Manual ROUND BBQ Flint Charcoal Grill P180200_TEPRO_00202_Flint_20181023_DE_GB indb 1 23 10 2018 11 44 AM ...

Page 2: ...P180137_TEPRO_00202_Flint_20180718_DE_GB indb 2 18 7 2018 12 04 PM 2 2 2 1 7 8 7 6 6 7 8 10 9 P180200_TEPRO_00202_Flint_20181023_DE_GB indb 2 23 10 2018 11 44 AM ...

Page 3: ...heitshinweise 5 Sicherheitshinweise 5 7 Montage 7 8 Vorbereitung 7 Benötigtes Werkzeug 7 Grill zusammenbauen 7 8 Grill aufstellen 8 Vor dem Grillen 8 Bedienung 8 9 Wartung und Reinigung 9 Entsorgung 10 Technische Daten 10 Konformitätserklärung 10 Service 10 Inverkehrbringer 10 P180200_TEPRO_00202_Flint_20181023_DE_GB indb 3 23 10 2018 11 44 AM ...

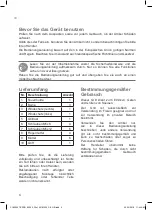
Page 4: ...schutz links 1 5 Grillrost 1 6 Schrauben M5x8 4 7 Schrauben M5x12 6 8 Flügelmutter 4 9 Mutter 6 10 Griff 1 Bitte prüfen Sie ob die Lieferung vollständig und unbeschädigt ist Sollte ein Teil fehlen oder defekt sein wenden Sie sich bitte an Ihren Händler Reklamationen nach erfolgter oder angefangener Montage hinsichtlich Beschädigung oder fehlender Teile werden nicht anerkannt Bestimmungsgemäßer Geb...

Page 5: ...ungs und Unfallgefahr Dieses Gerät ist nicht dafür bestimmt durch Personen einschl Kinder mit eingeschränkten physischen sen so ri schen oder geistigen Fähigkeiten oder mangels Erfahrung und oder mangels Wissen benutzt zu werden Zu Ihrer Sicherheit Signalsymbole Gefahr Hohes Risiko Missachtung der Warnung kann zu Schäden für Leib und Leben führen Achtung Mittleres Risiko MissachtungderWarnungkann ...

Page 6: ...len lassen Gefahr Verpuffungsgefahr Entzündliche Flüssigkeiten die in die Glut gegossen werden bilden Stichflammen oder Verpuffungen Niemals Zündflüssigkeit wie Benzin oder Spiritus verwenden Auch keine mit Zündflüssigkeit getränkten Kohlestücke auf die Glut geben Gefahr Vergiftungsgefahr Beim Verbrennen von Holzkohle Grillbriketts etc bildet sich Kohlenmonoxyd Dieses Gas ist geruchlos und kann in...

Page 7: ...d Scheuerspuren hinterlassen Montage Vorbereitung Gefahr Verletzungsgefahr Die Nichtbeachtung der Anweisungen kann zu Problemen und Gefahren bei der Verwendung des Grills führen Befolgen Sie alle hier aufgeführten Montageanweisungen 1 Lesen Sie sich die Montage anweisungen zunächst vollständig durch 2 Nehmen Sie sich ausreichend Zeit für die Montage und schaffen Sie eine ebene Arbeitsfläche von ei...

Page 8: ... 30 Minuten eingefeuert werden Siehe Abschnitt Vor dem Grillen 6 Die Demontage erfolgt in umgekehrter Reihenfolge Wichtig Alle Schrauben müssen fest angezogen sein Grill aufstellen Achtung Beschädigungsgefahr Während des Gebrauchs können sich die Verschraubungen allmählich lockern und die Stabilität des Grills beeinträchtigen Prüfen Sie die Festigkeit der Schrauben vor jedem Gebrauch Ziehen Sie gg...

Page 9: ...igungsgefahr Verwenden Sie keine starken oder schleifenden Lösemittel oder Scheuerpads da diese die Oberflächen angreifen und Scheuerspuren hinterlassen Lassen Sie den Brennstoff nach dem Grillen ausbrennen Das hilft den Reinigungsaufwand zu verringern indem überschüssiges Fett und Grillrückstände abbrennen Entleeren Sie die kalte Asche Es ist sehr wichtig dass Sie die Asche aus der Feuermulde her...

Page 10: ...tmaße Grill aufgebaut ca 38 x 38 x 59 cm BxTxH Grillfläche ca Ø 34 cm Max Brennstoffmenge 1 2 kg max Konformitätserklärung Dieses Produkt erfüllt die geltenden europäischen und nationalen Richtlinien DIN EN 1860 1 Service Bei technischen Fragen wenden Sie sich bitte an den Service Dieses Produkt wurde sorgfältig hergestellt und verpackt Sollte es dennoch einmal Grund zur Beanstandung geben helfen ...

Page 11: ...s 13 Safety instructions 13 15 Assembly 15 16 Preparation 15 Required tools 15 Assembling the BBQ 15 16 Setting up the BBQ 16 Before grilling 16 Operation 16 17 Maintenance and Cleaning 17 Disposal 18 Technical details 18 Declaration of conformity 18 Service 18 Distributor 18 P180200_TEPRO_00202_Flint_20181023_DE_GB indb 11 23 10 2018 11 44 AM ...

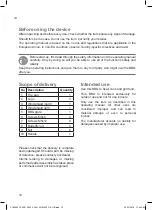
Page 12: ...ry No Description Quantity 1 Fire pan 1 2 Legs 3 3 Wind shield right 1 4 Wind shield left 1 5 BBQ grate 1 6 Screws M5x8 4 7 Screws M5x12 6 8 Butterfly nut 4 9 Nut 6 10 Handle 1 Please check that the delivery is complete and undamaged Should a part be missing or defective please contact your dealer Claims relating to damages or missing parts made after assembly has taken place or commenced will not...

Page 13: ...nger Risk of burning and accidents This device is not intended for use by persons incl children with limited physical sensory or mental capacities or lacking experience and or lacking knowledge For your safety Signal symbols Danger High risk Failure to observe the warning can lead to potentially fatal injuries Attention Moderate risk Disregarding this warning can lead to property damage Caution Lo...

Page 14: ...before cleaning and or storage Danger Risk of deflagration Flammable liquids that are poured on the embers cause flash flames or deflagrations Never use flammable liquids such as petrol or spirits Nor put pieces of charcoal soaked in flammable liquid onto the embers Danger Risk of poisoning When burning charcoal barbecue briquettes etc carbon monoxide is formed This gas is odourless and can be fat...

Page 15: ...ese can attack the surfaces and leave behind scrape marks Assembly Preparation Danger Risk of injury Failure to follow these instructions can lead to problems and risks while using the BBQ Follow all of the assembly instructions listed here 1 First read through the assembly instructions completely 2 Allow yourself enough time for assembly and find an even working space of one to two square meters ...

Page 16: ...ead it evenly over the fire pan To do this use a suitable fireproof tool with a long fireproof handle 4 Insert the handle 10 in the BBQ grate 5 and place it at the desired height 5 The BBQ is now ready for use 6 Dismantling is carried out in reverse order Important All screws must be tightly fastened Setting up the BBQ Attention Risk of damage During use the screws can loosen slowly and impair the...

Page 17: ...nce these can attack the surfaces and leave behind scrape marks Let the fuel burn out completely after grilling This eases the cleaning effort by burning away excess fat and BBQ residues Remove the cold ashes It is very important that you remove the ashes from the fire pan before moisture combines with the cold ashes Ash is saline and when moistened will attack the inside of the fire pan The fire ...

Page 18: ...rox 38 x 38 x 59 cm WxDxH Grill surface approx Ø 34 cm Max amount of fuel 1 2 kg max Declaration of conformity This product is in compliance with the applicable European and national Directives DIN EN 1860 1 Service Please contact our service point for assistance with technical questions This product was carefully manufactured and packaged Should you nevertheless have a complaint our employees are...

Page 19: ...19 P180200_TEPRO_00202_Flint_20181023_DE_GB indb 19 23 10 2018 11 44 AM ...

Page 20: ...P180200_TEPRO_00202_Flint_20181023_DE_GB indb 20 23 10 2018 11 44 AM ...

Reviews: