background image

Teq AVIT   

www.teqavit.com 

    info@teqavit.com   1-949-709-4040               


8


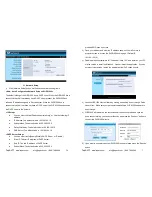
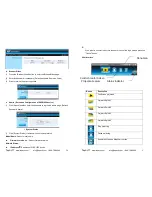
7)  WiPS1000 will search available WiFi Network and list all WiPS1000 Device. 

One can select a network and press the “Connect” button to connect the 

selected WiFi Device. 


8)  If changing e the WiFi Network is not needed to keep the connection to current 

network, one  can press the “Skip” button. 

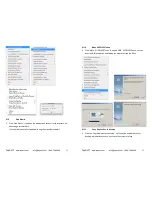
9)  WiPS1000 will search and list the WiPS1000 receiver Device. You can select 

the target receiver device and press the “OK” button to connect the selected 

receiver device. 


10)   If target WiPS receiver device is not in the list, press the “Manual” button to 

enter the receiver IP address manually and connect.  

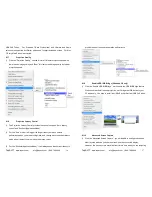
11)   A 4-digit session login code seen on the upper right corner of screen of 

attached display needs to be entered to make connection.   


Teq AVIT   

www.teqavit.com 

    info@teqavit.com   1-949-709-4040               


25


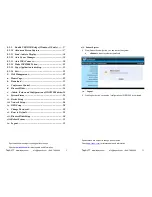
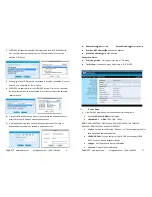
Subnet Mask

subnet mask   

Default Gateway

default gateway


Wireless MAC address

wireless MAC address


Wire MAC address

wire MAC address


Connection Status:  


Projecting status:

 “Waiting for projecting” or “Projecting” 


Total Users:

 It shows how many users login to   WiPS1000. 


ii. 

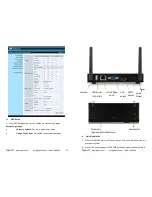
Device Setup 

1)  Click [Device Setup] button, it will show the device setting items, 


Choose

 <VGA> or <HDMI> 

output option 


<Resolution>

:     

HDMI

: 720p, 1080i, 1080p 

VGA

: UXGA(1600*1200), WXGA+(1440*900), WXGA(1360*768, 1280x768, 

1280x800) ,XGA(1024*768), and SVGA(800*600).  


<Code>

: You can select “Disable”, “Random”, or “Use the following code” to 

set a specified 4-characters Number.  


<IWB USB Port>

: You can configure the IWB USB port to support “IWB 

(HID)” device or “Mouse/Keyboard” device 


<Apply>

Confirmation and Save modifications 


<Cancel>:

 Cancel all the modifications 

Summary of Contents for WIPS1000

Page 1: ...3 Unit Details 4 4 Quick Installation 5 5 DoWiFi for Windows Mac OS 6 Install the application 6 User Interface 9 8 1 Menu 10 8 1 1 Show Receiver Information 11 8 1 2 Web Admin 12 8 1 3 Search Receive...

Page 2: ...24 i System Status 24 ii Device Setup 25 iii Network Setup 26 iv OSD Setup 28 v Change Passwords 29 vi Reset to Default 29 vii BrowserSlides Setup 30 viii Reboot System 31 ix Logout 31 Specifications...

Page 3: ...or smartphone to control your PC Mac or view the presenting slides WiPS1000 Features Icon Feature Description DoWiFi No more wires Display over WiFi for Windows Mac Plug Show No software installation...

Page 4: ...d and device settings 2 Package Contents WiPS1000 Box Plug N Show USB Token Power Adapter DC 5V 2 5A 2 WiFi Antenna User Guide 3 Unit Details Power Button and LED USB Port for mouse keyboard Teq AVIT...

Page 5: ...ad the customized Logo Image Teq AVIT www teqavit com info teqavit com 1 949 709 4040 5 4 Quick Installation 1 Connect WiPS1000 device to Projector through VGA port or HDMI port and turn on projector...

Page 6: ...is 192 168 100 10 Wireless Setup Wireless LAN The default value is Enable Region default value is Worldwide SSID SSID string max Length is 32 bytes SSID Broadcast The default value is Enable Channel...

Page 7: ...sable DHCP Server or Disable Start IP The start IP address of DHCP Server End IP The end IP address of DHCP Server Subnet Mask The default value is 255 255 255 0 Teq AVIT www teqavit com info teqavit...

Page 8: ...screen of attached display needs to be entered to make connection Teq AVIT www teqavit com info teqavit com 1 949 709 4040 25 Subnet Mask subnet mask Default Gateway default gateway Wireless MAC addr...

Page 9: ...System Status it will show current system status Model Name Product model name Firmware version no Product firmware version Network Status IP address IP address of WiPS1000 device Teq AVIT www teqavit...

Page 10: ...WiFi connect feature Make Plug Show Token Make Plug Show USB token Copy Application to Desktop Copy the application to desktop About About this application Exit Exit the application Teq AVIT www teqa...

Page 11: ...on on desktop Web Admin Open web admin page Search Receiver Search another receiver device Launch SidePad MirrorOp Receiver Launch SidePad sender Enable BrowserSlides Enable BrowserSlides feature Proj...

Page 12: ...age from another chapter Teq AVIT www teqavit com info teqavit com 1 949 709 4040 21 8 1 14 Make WiPS1000 Token 1 Click Make WiPS1000 Token to make a USB WiPS1000 Token you can insert a USB thumb driv...

Page 13: ...enable the WiFi connect feature through WiPS1000 application Teq AVIT www teqavit com info teqavit com 1 949 709 4040 13 8 1 3 Search Receiver Device 1 Click Search Receiver Device it will disconnect...

Page 14: ...doing the full screen projection one can also choose to project the audio to WiPS1000 receiver for the multimedia or video scenario Note For Windows XP system please install the Audio driver VAC exe V...

Page 15: ...o teqavit com 1 949 709 4040 15 browser on connected mobile devices Note Audience need to connect to WiPS1000 WiFi Network open the browser and click the BrowserSlides button to start receiving the sl...

Page 16: ...smooth performance when you are watching video and change back to shortest latency mode when it detect you are moving the mouse cursor 3 For the Shortest Application Mode it will always keep the short...

Reviews: