Part No. 40462
DPL-25S • DPL-30S • DPL-25S Super Series
7 - 17
September 2016
Section 7 - Repair Procedures
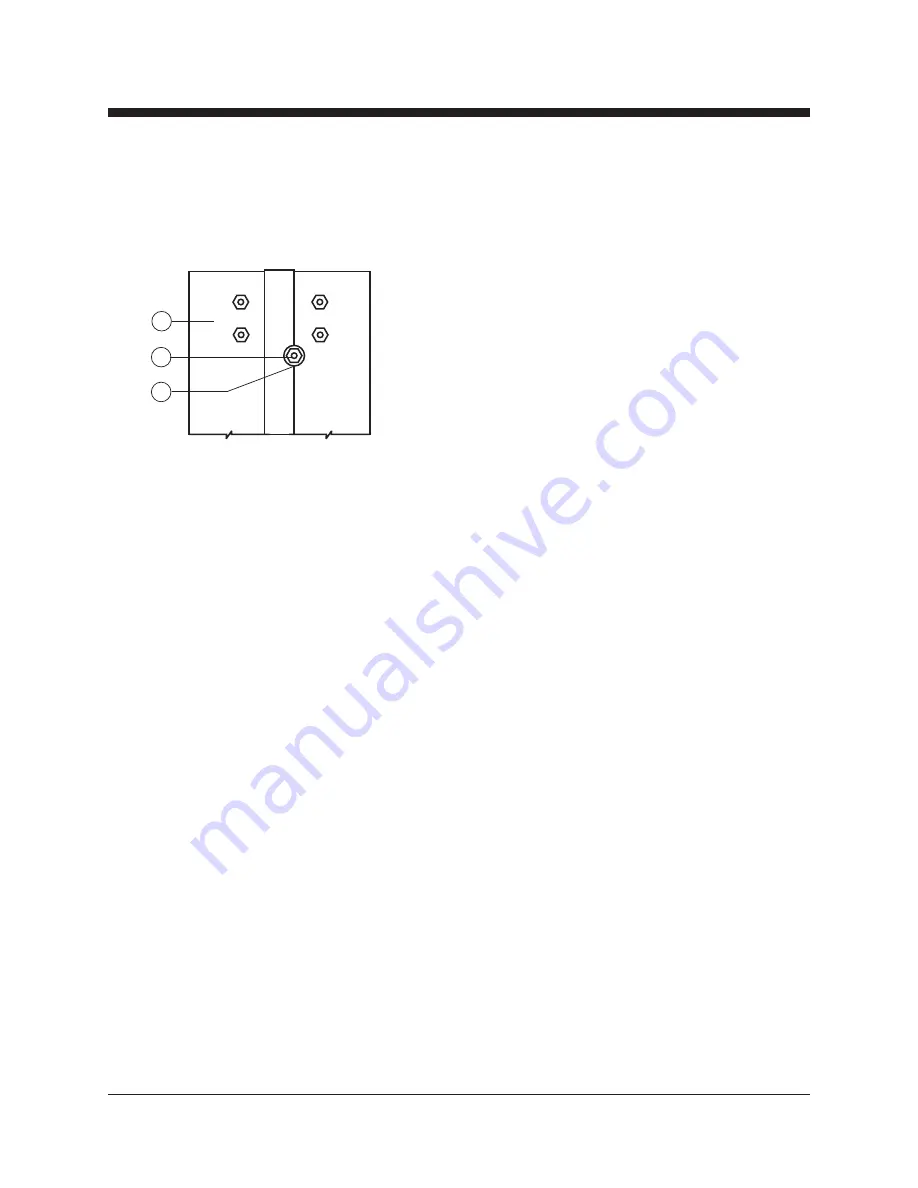
3 Remove the socket head retaining bolt from the
clevis block on the lift cylinder rod end.
a
top of no. 1 column
b
retaining bolt
c
clevis block
4 Support the cylinder and carefully slide it out of
the bottom of the mast.
5 Carefully rotate the mast until it is resting on the
back of the number 1 column.
6 Slide the carriage toward the top enough to
remove the tension on the lifting chain.
7 Slide the column that is under the carriage
toward the top about 6 inches (15.2 cm) to
access the idler wheel mounting fasteners.
8 Hold the idler wheel axle from turning by placing
a screwdriver in the hole of the axle. Remove
the axle mounting fasteners, then remove the
idler wheel assembly.
Note: When the idler wheel assemblies are
removed, be sure to label the location of each idler
wheel assembly. Be sure the shims and related
components remain in the correct location.
9 Remove the adjustment nuts from the chain
tension rocker on the carriage.
MAST ASSEMBLY
a
b
c
10 Slide the carriage out the bottom of the mast
assembly.
11 Lay the chains out on the floor at the top of the
mast. Do not allow the chains to become
twisted or dirty.
12 Remove the adjustment nuts from the chain
tension rocker on the column.
13 Slide the column out the bottom of the mast.
14 Push the next column toward the top of the
mast to access the idler wheel assembly
mounting fasteners.
15 Hold the idler wheel axle from turning by placing
a screwdriver in the hole of the axle. Remove
the axle mounting fasteners, then remove the
idler wheel assembly.
16 Remove the adjustment nuts from the chain
tension rocker on the column.
17 Slide the column out the bottom of the mast.
18 Follow steps 14 through 17 for each remaining
column.
Note: If the chains are removed, be sure to mark
the location and label each chain before removal.


