Service Manual
February 2022
Mast Components
60
GRC
™
Part No. 1314708GT
How to Disa ssem ble t he Mast
How to Disassemble the Mast
Bodily injury hazard. This
procedure requires specific repair
skills, lifting equipment and a
suitable workshop. Attempting
this procedure without these
skills and tools could result in
death or serious injury and
significant component damage.
Dealer service is strongly
recommended.
1 Remove the platform. Refer to Repair
Procedure,
How to Remove the Platform.
2 Remove the mast. Refer to Repair Procedure,
How to Remove the Mast Assembly.
3 Remove the lift cylinder. Refer to Repair
Procedure,
How to Remove the Lift Cylinder.
4 Remove the mast coil cord. Refer to Repair
Procedure,
How to Remove the Mast Coil
Cord.
5 Remove the fasteners securing the AC outlet
junction box to the upper half of the mast and
remove the junction box. Set the junction box
and the fasteners to the side.
6 Remove the fasteners securing the work trays
to the upper half of the mast and remove the
work trays. Set the trays and the fasteners to
the side.
7 Remove the fasteners securing the down limit
switch assembly to the limit switch bracket
and remove the limit switch assembly. Set the
limit switch assembly and the fasteners to the
side.
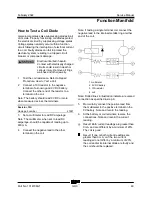
8 With the chassis mount side up, stagger the
mast assembly to gain access to the rivets
securing the inner wear pads, to the bottom
half of the number 2, number 3 and number
4 mast sections.
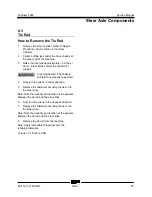
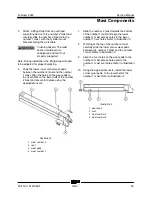
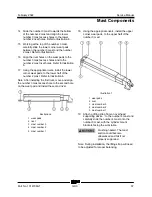
9 Using a drill, carefully drill out the rivets
securing the number 2 inner wear pads to the
bottom half of the number 2 mast section, the
number 3 inner wear pads to the bottom half
of the number 3 mast section and the number
4 inner wear pads to the bottom half of the
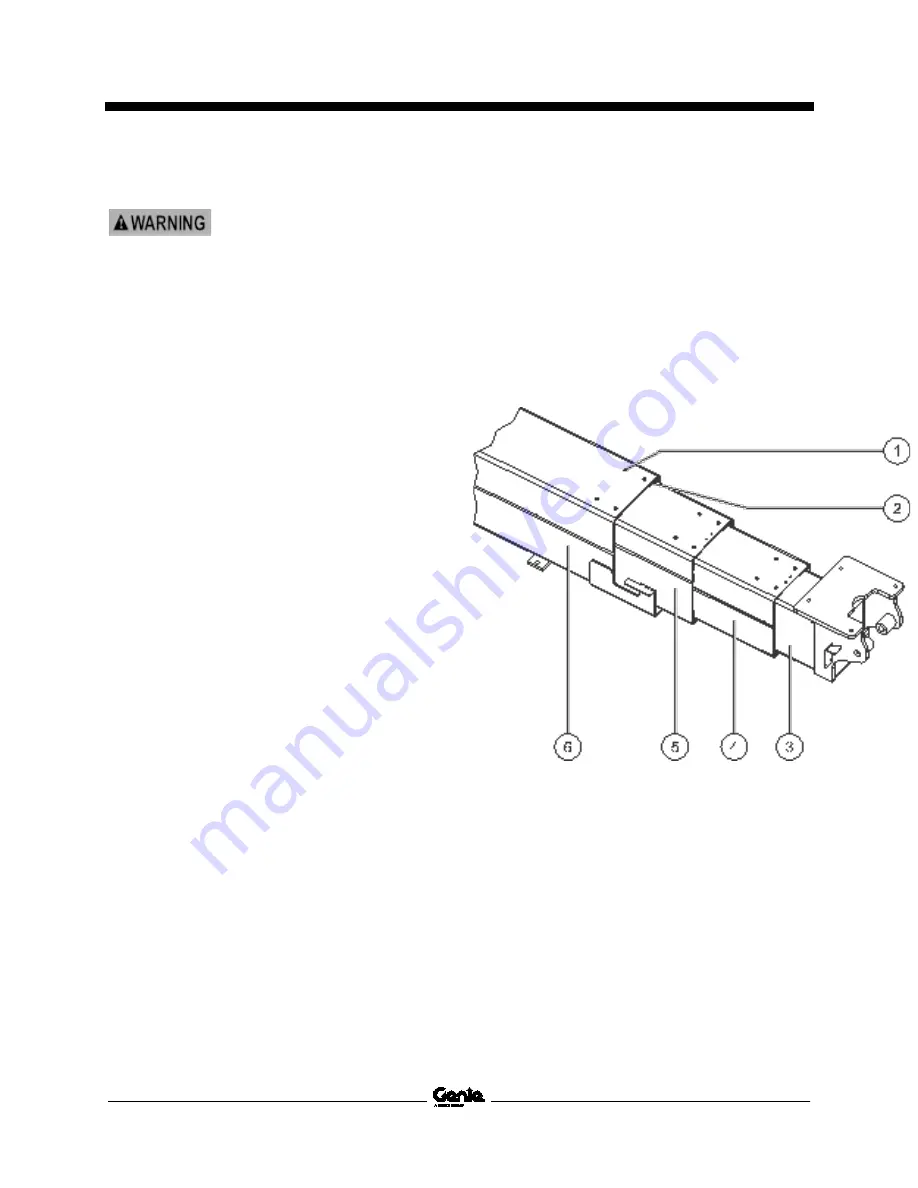
number 4 mast section. Refer to Illustration 1.
Note: While drilling the rivets out, be careful not
drill into the opposing mast section.
Note: While drilling the rivets out, be careful not
enlarge the wear pad mounting holes.
Illustration 1
1 rivet
2 wear pads
3 mast number 1
4 mast number 2
5 mast number 3
6 mast number 4
Summary of Contents for Genie GRC-12
Page 113: ...February 2022 Service Manual 101 Electrical Schematic GRC Options...
Page 115: ...February 2022 Service Manual 103 Electrical Schematic GRC from GRC11 1000 to GRC11 1078...
Page 118: ...Service Manual February 2022 106 Electrical Schematic GRC from GRC11 1000 to GRC11 1078...
Page 119: ...February 2022 Service Manual 107 Electrical Schematic GRC from GRC11 1079 to GRC14 1780...
Page 122: ...Service Manual February 2022 110 Electrical Schematic GRC from GRC11 1079 to GRC14 1780...
Page 123: ...February 2022 Service Manual 111 Electrical Schematic GRC from GRC14 1781 to GRC15 2343...
Page 126: ...Service Manual February 2022 114 Electrical Schematic GRC from GRC15 2344 to GRC16P 2481...
Page 127: ...February 2022 Service Manual 115 Electrical Schematic GRC from GRC16P 2482 to GRC16P 2562...
Page 130: ...Service Manual February 2022 118 Electrical Schematic GRC from GRC16P 2563 to GRCP 5999...
Page 131: ...February 2022 Service Manual 119 Hydraulic Schematic GRC from GRC11 1000 to GRC12 1168...
Page 135: ......


