Part No. 1268495
S-100HD • S-120HD
3 - 17
September 2016
Section 3 • Repair Procedures
Platform Components
2-1
Platform
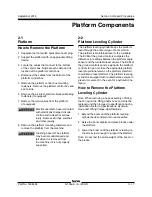
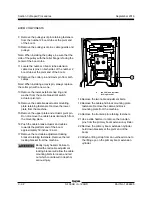
How to Remove the Platform
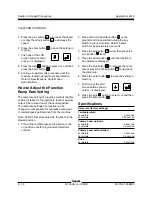
1 Separate the foot switch quick disconnect plug.
2 Support the platform with an appropriate lifting
device.
3 Locate the cables that connect to the bottom
of the control box. Number each cable and its
location at the platform control box.
4 Disconnect the cables from the bottom of the
platform control box.
5 Remove the platform control box mounting
fasteners. Remove the platform control box and
set it aside.
6 Remove the air line to platform bracket retaining
fasteners (if equipped).
7 Remove the weld cables from the platform
(if equipped).
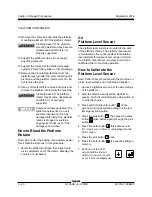
Electrocution/burn hazard. Contact
with electrically charged circuits
could result in death or serious
injury. Remove all rings, watches
and other jewelry.
8 Remove the platform mounting fasteners and
remove the platform from the machine.
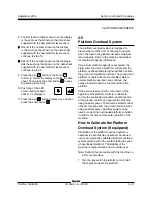
Crushing hazard. The platform
may become unbalanced and
fall when it is removed from
the machine if it is not properly
supported.
2-2
Platform Leveling Cylinder
The platform leveling cylinder keeps the platform
level through the entire range of boom motion.
The platform is maintained level to the turntable.
The ECM at the ground controls compares the
difference in readings between the platform angle
sensor and the turntable level sensor. The ECM at
the ground controls sends a signal to the platform
controls to open or close the appropriate platform
level proportional valve on the platform manifold
to maintain a level platform. The platform leveling
cylinder is equipped with counterbalance valves to
prevent movement in the event of a hydraulic line
failure.
How to Remove the Platform
Leveling Cylinder
Note: When removing a hose assembly or fitting,
the O-ring on the fitting and/or hose end must be
replaced and then torqued to specification during
installation. Refer to Specifications,
Hydraulic
Hose and Fitting Torque Specifications.
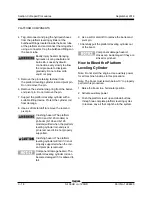
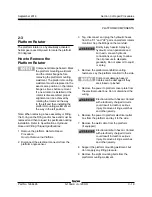
1 Extend the boom until the platform leveling
cylinder barrel-end pivot pin is accessible.
2 Raise the boom slightly and place blocks under
the platform.
3 Lower the boom until the platform is resting on
the blocks just enough to support the platform.
Note: Do not rest the entire weight of the boom on
the blocks.
Summary of Contents for Genie S-100HD
Page 14: ...September 2016 S 100HD S 120HD Part No 1268495 xiv This page intentionally left blank ...
Page 124: ...3 94 S 100HD S 120HD Part No 1268495 September 2016 Section 3 Repair Procedures MANIFOLDS ...
Page 126: ...3 96 S 100HD S 120HD Part No 1268495 September 2016 Section 3 Repair Procedures MANIFOLDS ...
Page 201: ...Section 5 Schematics September 2016 5 19 Electrical Schematic View 1 S 100HD Models 5 20 ...
Page 204: ...September 2016 Section 5 Schematics 5 22 Electrical Schematic View 2 S 100HD Models 5 21 ...
Page 205: ...Section 5 Schematics September 2016 5 23 Electrical Schematic View 3 S 100HD Models 5 24 ...
Page 208: ...September 2016 Section 5 Schematics 5 26 Electrical Schematic View4 S 100HD Models 5 25 ...
Page 209: ...Section 5 Schematics September 2016 5 27 Electrical Schematic View 5 S 100HD Models 5 28 ...
Page 212: ...September 2016 Section 5 Schematics 5 30 Electrical Schematic View 6 S 100HD Models 5 29 ...
Page 213: ...Section 5 Schematics September 2016 5 31 Electrical Schematic View 7 S 100HD Models 5 32 ...
Page 216: ...September 2016 Section 5 Schematics 5 34 5 33 Safety Circuit Schematic S 100HD Models ...
Page 217: ...Section 5 Schematics September 2016 5 35 5 36 Electrical Schematic View 1 S 120HD Models ...
Page 220: ...September 2016 Section 5 Schematics 5 38 Electrical Schematic View 2 S 120HD Models 5 37 ...
Page 221: ...Section 5 Schematics September 2016 5 39 Electrical Schematic View 3 S 120HD Models 5 40 ...
Page 224: ...September 2016 Section 5 Schematics 5 42 Electrical Schematic View 4 S 120HD Models 5 41 ...
Page 225: ...Section 5 Schematics September 2016 5 43 Electrical Schematic View 5 S 120HD Models 5 44 ...
Page 228: ...September 2016 Section 5 Schematics 5 46 Electrical Schematic View 6 S 120HD Models 5 45 ...
Page 229: ...Section 5 Schematics September 2016 5 47 5 48 Electrical Schematic View 7 S 120HD Models ...
Page 232: ...September 2016 Section 5 Schematics 5 50 Safety Circuit Schematic S 120HD Models 5 49 ...
Page 233: ...Section 5 Schematics September 2016 5 51 Perkins 854F 34T Engine Electrical Schematic 5 52 ...
Page 235: ...Section 5 Schematics September 2016 Part No 1268495 S 100HD S 120HD 5 53 ...
Page 236: ...September 2016 Section 5 Schematics 5 54 Perkins 854F 34T Engine Electrical Harness 5 53 ...
Page 237: ...Section 5 Schematics September 2016 5 55 Deutz TD2 9 Engine Electrical Schematic 5 56 ...
Page 240: ...September 2016 Section 5 Schematics 5 58 Deutz TD2 9 Engine Electrical Harness 5 57 ...
Page 241: ...Section 5 Schematics September 2016 5 59 Hydraulic Schematic S 100HD Models 5 60 ...
Page 248: ...September 2016 Section 5 Schematics 5 66 Hydraulic Schematic S 120HD Models 5 60 ...
Page 249: ......

