Service and Repair Manual
December 2019
Platform Controls
28
SX
™
-150
Part No. 1300669GT
How to Adj ust the Functi on Speeds
How to Adjust the Function
Speeds
Note: Perform this procedure with the boom in the
stowed position.
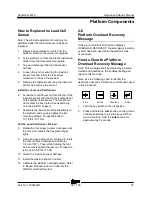
Note: Use the following chart to identify the
description of each LCD screen control button used
in this procedure.
Plus
Minus
Previous
Enter
1 Pull out the red Emergency Stop button to the
on position at both the ground and platform
controls.
2 Press and hold the
enter
button on the ground
control panel while turning the key switch to
platform controls. Hold the
enter
button for
approximately 5 seconds.
3 Press the
plus
button twice, then press the
minus
button twice.
4 Press the
previous
button until the function to
be adjusted is displayed.
5 Press the
plus
button to increase the speed or
press the
minus
button to decrease the
speed.
6 Press the
enter
button to save the setting in
memory.
7 Press the
enter
or
previous
button on the
LCD screen until EXIT is displayed.
8 Press the
plus
button or
minus
button to
select YES and then press the
enter
button.
9 Continue to perform this procedure until the
machine function speed meets specification.
Refer to Specifications,
Performance
Specifications
.
How to Adj ust the Functi on R amp R ate Setti ng
How to Adjust the Function Ramp
Rate Setting
The ramp rate setting of a joystick controls the time
at which it takes for the joystick to reach maximum
output, when moved out of the neutral position. The
ramp rate settings of a joystick can be changed to
compensate for hydraulic pump wear to maintain
peak performance from the machine.
Note: Perform this procedure with the boom in the
stowed position.
Note: Use the following chart to identify the
description of each LCD screen control button used
in this procedure.
Plus
Minus
Previous
Enter
1 Pull out the red Emergency Stop button to the
on position at both the ground and platform
controls.
2 Press and hold the
enter
button on the ground
control panel while turning the key switch to
platform controls. Hold the
enter
button for
approximately 5 seconds.
3 Press the
plus
button twice, then press the
previous
button twice.
4 Press the
previous
button until the function to
be adjusted is displayed.
5 Press the
plus
button to increase the ramp
rate or press the
minus
button to decrease the
ramp rate.
6 Press the
enter
button to save the setting in
memory.
7 Press the
enter
or
previous
button on the
LCD screen until EXIT is displayed.
8 Press the
plus
button or
minus
button to
select YES and then press the
enter
button.
Summary of Contents for Genie SX-150
Page 105: ...December 2019 Service and Repair Manual Manifolds Part No 1300669GT SX 150 93 ...
Page 107: ...December 2019 Service and Repair Manual Manifolds Part No 1300669GT SX 150 95 ...
Page 109: ...December 2019 Service and Repair Manual Manifolds Part No 1300669GT SX 150 97 ...
Page 117: ...December 2019 Service and Repair Manual Part No 1300669GT SX 150 105 ...
Page 119: ...December 2019 Service and Repair Manual Part No 1300669GT SX 150 107 ...
Page 122: ...Service and Repair Manual December 2019 Manifolds 110 SX 150 Part No 1300669GT ...
Page 124: ...Service and Repair Manual December 2019 Manifolds 112 SX 150 Part No 1300669GT ...
Page 229: ...December 2019 Service and Repair Manual 217 Control Circuits Horn ...
Page 230: ...Service and Repair Manual December 2019 218 SX 150 Part No 1300669GT Control Circuits Horn ...
Page 231: ...December 2019 Service and Repair Manual Part No 1300669GT SX 150 219 Control Circuits Power ...
Page 232: ...Service and Repair Manual December 2019 220 Control Circuits Power ...
Page 233: ...December 2019 Service and Repair Manual 221 Control Circuits Can Bus ...
Page 234: ...Service and Repair Manual December 2019 222 SX 150 Part No 1300669GT Control Circuits Can Bus ...
Page 236: ...Service and Repair Manual December 2019 224 Control Circuits Deutz TD2011L04i Engine ...
Page 237: ...December 2019 Service and Repair Manual 225 Control Circuits Deutz TD 2 9 L4Engine ...
Page 240: ...Service and Repair Manual December 2019 228 Control Circuits Perkins 1104D 44T Engine ...
Page 241: ...December 2019 Service and Repair Manual 229 Control Circuits Perkins 854F 34T Engine ...
Page 244: ...Service and Repair Manual December 2019 232 Control Circuits Axle Extend Retract ...
Page 245: ...December 2019 Service and Repair Manual 233 Control Circuits Steering ...
Page 247: ...December 2019 Service and Repair Manual Part No 1300669GT SX 150 235 Control Circuits Propel ...
Page 248: ...Service and Repair Manual December 2019 236 Control Circuits Propel ...
Page 249: ...December 2019 Service and Repair Manual 237 Control Circuits Turntable Rotate ...
Page 252: ...Service and Repair Manual December 2019 240 Control Circuits Boom Up Down ...
Page 253: ...December 2019 Service and Repair Manual 241 Control Circuits Boom Extend Retract ...
Page 261: ...December 2019 Service and Repair Manual 249 Control Circuits Recovery PLD ...
Page 264: ...Service and Repair Manual December 2019 252 Control Circuits Telematics ...
Page 265: ...December 2019 Service and Repair Manual 253 Generator Receptacle Wiring ANSI CSA ...
Page 268: ...Service and Repair Manual December 2019 256 Generator Receptacle Wiring CE ...
Page 269: ...December 2019 Service and Repair Manual 257 Perkins 1104D 44T Engine Electrical Schematic ...
Page 272: ...Service and Repair Manual December 2019 260 Perkins 854F 34T Engine Electrical Schematic ...
Page 273: ...December 2019 Service and Repair Manual 261 Perkins 854F 34T Engine Harness ...
Page 276: ...Service and Repair Manual December 2019 264 Deutz TD 2 9 L4 Engine Electrical Schematic ...
Page 277: ...December 2019 Service and Repair Manual 265 Deutz TD 2 9 L4 Engine Harness ...
Page 279: ...December 2019 Service and Repair Manual 267 Hydraulic Schematic ...
Page 280: ...Service and Repair Manual December 2019 268 Hydraulic Schematic ...
Page 282: ......


