background image

EnglishEnglish

11

OMNITV3A

12 Month Limited Warranty

VOXX Accessories Corporation (the “Company”) warrants to the original retail 
purchaser of this product that should this product or any part thereof, under 
normal use and conditions, be proven defective in material or workmanship within 
12 months from the date of original purchase, such defect(s) will be repaired 
or replaced (at the Company’s option) without charge for parts and repair labor. 
To obtain repair or replacement within the terms of this Warranty, the product 
along with any accessories included in the original packaging is to be delivered 
with proof of warranty coverage (e.g. dated bill of sale), specification of defects(s), 
transportation prepaid, to the Company at the address shown below. Do not return 
this product to the Retailer.

This Warranty is not transferable and does not cover product purchased, service 
or used outside the United States or Canada. The Warranty does not extend to the 
elimination of externally generated static or noise. This Warranty does not apply 
to costs incurred for installation, removal or reinstallation of the product, or, if in 
the Company’s opinion, the product has been damaged through acts of nature, 
alteration, improper installation, mishandling, misuse, neglect, or accident. This 
Warranty does not cover damage caused by an AC adapter not provided with the 
product.

THE EXTENT OF THE COMPANY’S LIABILITY UNDER THIS WARRANTY IS 
LIMITED TO THE REPAIR OR REPLACEMENT PROVIDED ABOVE AND, IN NO 
EVENT, SHALL THE COMPANY’S LIABILITY EXCEED THE PURCHASE PRICE 
PAID BY PURCHASER FOR THE PRODUCT. This Warranty is in lieu of all other 
express warranties or liabilities. ANY IMPLIED WARRANTIES, INCLUDING ANY 
IMPLIED WARRANTY OF MERCHANTABILITY OR FITNESS FOR A PARTICULAR 
PURPOSE, SHALL BE LIMITED TO DURATION OF THIS WARRANTY. ANY ACTION 
FOR BREACH OF ANY WARRANTY HEREUNDER, INCLUDING ANY IMPLIED 
WARRANT, MUST BE BROUGHT WITHIN A PERIOD OF 24 MONTHS FROM THE 
DATE OF ORIGINAL PURCHASE. IN NO CASE SHALL THE COMPANY BE LIABLE 
FOR ANY CONSEQUENTIAL OR INCIDENTAL DAMAGES WHATSOEVER. No person 
or representative is authorized to assume for the Company any liability other than 
expressed herein in connection with the sale of this product.

Some states/provinces do not allow limitations on how long an implied warranty 
lasts or the exclusion or limitation of incidental or consequential damage so the 
above limitations or exclusions may not apply to you. This Warranty gives you 
specific legal rights and you may also have other rights which vary from state/
province to state/ province.

U.S.A.:

 Audiovox Return Center, 150 Marcus Blvd., Hauppauge, NY 11788

CANADA:

 Audiovox Return Center, c/o Genco, 6685 Kennedy Road, Unit 3, Door 16, 

Mississauga, Ontario  L5T 3A5

Summary of Contents for OMNITV3A

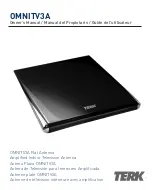
Page 1: ...opietario Guide de l utilisateur OMNITV3A Flat Antenna Amplified Indoor Television Antenna Antena Plana OMNITV3A Antena de Televisi n para Interiores Amplificada Antenne plate OMNITV3A Antenne de t l...

Page 2: ...o communications However there is no guarantee that interference will not occur in a particular installation If this equipment does cause harmful interference to radio or television reception which ca...

Page 3: ...OMNITV3A installs in minutes and is easy to use The OMNITV3A has a patented design that lets it receive signals from 360 degrees and work in both the horizontal and vertical planes which means it requ...

Page 4: ...tions for placing it you can lay it flat hang it on the wall or stand it upright The antenna is designed to perform equally well in all three positions For most settings the recommended position is st...

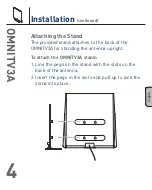
Page 5: ...tand The provided stand attaches to the back of the OMNITV3A for standing the antenna upright To attach the OMNITV3A stand 1 Line the pegs on the stand with the slots on the back of the antenna 2 Inse...

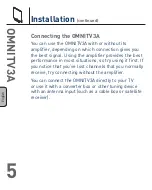
Page 6: ...best signal Using the amplifier provides the best performance in most situations so try using it first If you notice that you ve lost channels that you normally receive try connecting without the ampl...

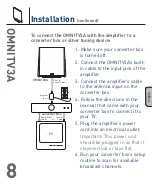
Page 7: ...o the input jack of the amplifier 3 Connect the amplifier s built in cable to the antenna input on your TV 4 Plug the amplifier s power cord into an electrical outlet Important This power unit should...

Page 8: ...e to the antenna input on your TV 3 Run your TV s tuner channel setup to scan for available broadcast channels To connect the OMNITV3A without the amplifier directly to your TV Note about digital chan...

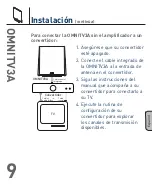
Page 9: ...r 3 Connect the amplifier s cable to the antenna input on the converter box 4 Follow the directions in the manual that came with your converter box to connect it to your TV 5 Plug the amplifier s powe...

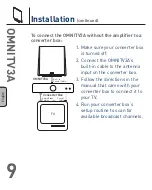
Page 10: ...onverter box is turned off 2 Connect the OMNITV3A s built in cable to the antenna input on the converter box 3 Follow the directions in the manual that came with your converter box to connect it to yo...

Page 11: ...e antenna Try placing the antenna outside of or above the metal cabinet If you decide to keep the OMNITV3A on a metal cabinet use it in the upright position My home has aluminum siding insulation Wher...

Page 12: ...ent This Warranty does not cover damage caused by an AC adapter not provided with the product THE EXTENT OF THE COMPANY S LIABILITY UNDER THIS WARRANTY IS LIMITED TO THE REPAIR OR REPLACEMENT PROVIDED...

Page 13: ...las instrucciones puede ocasionar interferencias perjudiciales para las comunicaciones de radio Sin embargo no existe ninguna garant a de que no se vaya a producir una interferencia en una instalaci...

Page 14: ...en minutos y es f cil de usar La OMNITV3A tiene un dise o patentado que le permite recibir se ales desde 360 y funciona tanto en planos horizontales como verticales lo que significa que no requiere v...

Page 15: ...dejarla acostada colgando en la pared o parada en forma vertical La antena est dise ada para funcionar igualmente bien en las tres posiciones Para la mayor a de los entornos la posici n recomendada e...

Page 16: ...a la parte posterior de la OMNITV3A para sostener la antena en forma vertical Para conectar el soporte de la OMNITV3A 1 Alinee las clavijas en el soporte con las ranuras en la parte posterior de la an...

Page 17: ...sempe o en la mayor a de las situaciones por lo tanto trate de usarlo primero Si usted nota que ha perdido canales que normalmente recibe intente conectarse sin el amplificador Usted puede conectar di...

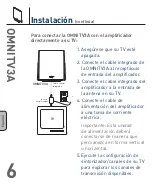
Page 18: ...cable integrado del amplificador a la entrada de la antena en su TV 4 Conecte el cable de alimentaci n del amplificador a una toma de corriente el ctrica Importante Esta unidad de alimentaci n deber c...

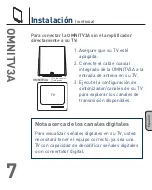
Page 19: ...TV 3 Ejecute la configuraci n de sintonizador canales de su TV para explorar los canales de transmisi n disponibles Para conectar la OMNITV3A sin el amplificador directamente a su TV Nota acerca de lo...

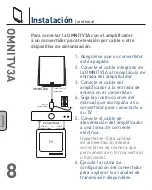
Page 20: ...ntena en el convertidor 4 Siga las instrucciones del manual que acompa a a su convertidor para conectarlo a su TV 5 Conecte el cable de alimentaci n del amplificador a una toma de corriente el ctrica...

Page 21: ...t apagado 2 Conecte el cable integrado de la OMNITV3A a la entrada de antena en el convertidor 3 Siga las instrucciones del manual que acompa a a su convertidor para conectarlo a su TV 4 Ejecute la ru...

Page 22: ...fuera de o por encima del gabinete met lico Si usted decide mantener la OMNITV3A en un gabinete met lico sela en la posici n vertical Mi casa tiene aislamiento paredes de aluminio D nde deber a coloc...

Page 23: ...ados por un adaptador de CA que no haya sido suministrado con el producto EL ALCANCE DE LA RESPONSABILIDAD DE LA COMPA A BAJO ESTA GARANT A EST LIMITADO A LA REPARACI N O EL REEMPLAZO PROVISTO ARRIBA...

Page 24: ...s install conform ment aux instructions peut causer de l interf rence nuisible pour les communications radio Cependant il n est pas assur que de l interf rence ne se produira pas dans une installation...

Page 25: ...rend quelques minutes et elle est commode utiliser L OMNITV3A utilise un concept brevet qui lui permet de recevoir des signaux sur 360 degr s et de fonctionner l horizontale ou la verticale ce qui sig...

Page 26: ...e accroch e au mur ou la verticale Cette antenne est con ue pour fonctionner aussi bien peu importe sa position Pour la plupart des installations nous recommandons la position verticale Par contre la...

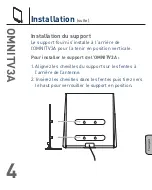
Page 27: ...nstalle l arri re de l OMNITV3A pour la tenir en position verticale Pour installer le support de l OMNITV3A 1 Alignez les chevilles du support sur les fentes l arri re de l antenne 2 Ins rez les chevi...

Page 28: ...ement une meilleure performance alors essayez d abord en l utilisant Si vous remarquez que vous ne recevez plus certains canaux que vous recevez normalement essayez de la brancher sans l amplificateur...

Page 29: ...z le c ble int gr de l amplificateur l entr e de l antenne de votre t l viseur 4 Branchez le cordon d alimentation de l amplificateur dans une prise lectrique Important Cet adaptateur d alimentation d...

Page 30: ...lisez le syntoniseur la configuration des canaux de votre t l viseur pour balayer les canaux disponibles Pour brancher l OMNITV3A sans son amplificateur directement votre t l viseur Remarque propos de...

Page 31: ...ntr e de l antenne du bo tier convertisseur 4 Suivez les instructions du guide fourni avec votre bo tier convertisseur pour le brancher votre t l viseur 5 Branchez le cordon d alimentation de l amplif...

Page 32: ...ferm 2 Branchez le c ble int gr de l OMNITV3A l entr e de l antenne de votre bo tier convertisseur 3 Suivez les instructions du guide fourni avec votre bo tier convertisseur pour le brancher votre t...

Page 33: ...installer l antenne l ext rieur ou au dessus du bo tier m tallique Si vous d cidez d utiliser l OMNITV3A dans un bo tier m tallique installez la en position verticale Ma r sidence poss de du bardage u...

Page 34: ...te Garantie ne couvre pas les dommages caus s par un adaptateur CA non fourni avec le produit L TENDUE DE L OBLIGATION DE LA COMPAGNIE SOUS CETTE GARANTIE SE LIMITE LA R PARATION OU AU REMPLACEMENT IN...

Page 35: ...r Customer Service Visit Our Website At www audiovox com Product Information Photos FAQ s Owner s Manuals http www terk com Para Servicio al Cliente Visite nuestro sitio web en http www terk com Infor...

Reviews: