Installation and Operating Guide
High-
IonBar™ (Ionizing Bar)
©
Copyright 2016 Terra Universal Inc. All rights reserved.
• Revised November 2016 • Document No. 1800-45
Terra Universal, Inc. • TerraUniversal.com • 800 S. Raymond Ave. • Fullerton, CA 92831 • TEL: (714) 578-6000 • FAX: (714) 578-6020
3
2.0
Installation
Carefully unpack your ionizing equipment. Report any shipping damage immediately to the freight company.
Installation on Fan/Filter Units
When ordered with a fan/filter unit, the IonBar™ includes a set of stainless steel mounting brackets designed to
suspend the IonBar™ within the stream of HEPA-filtered air. The airflow is required for the ions to reach the targeted
surface before they are dispersed, allowing for efficient neutralization of static charges.
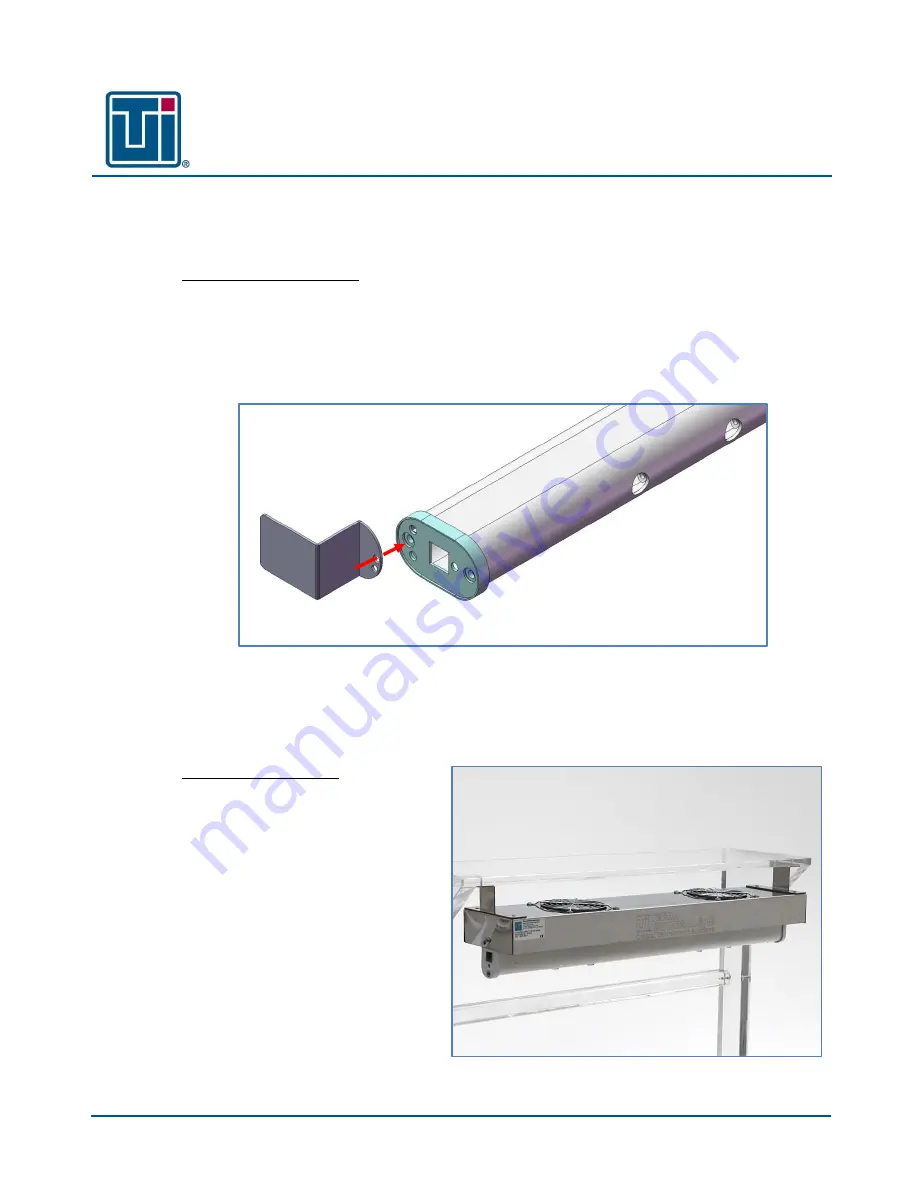
Attach the mounting brackets according to the diagram below (one on each end), using the provided screws.
With the mounting brackets installed, place the IonBar™ in the ceiling bay where the fan/filter unit goes. The
mounting brackets will rest upon the frame of the ceiling bay; no other fasteners are required. Simply lower the FFU
into the ceiling bay and allow the weight of the FFU to hold the IonBar™ in position.
Installation on Gloveboxes
When ordered with a glovebox, the IonBar™
will be mounted to a stainless steel fan module
that will aid in the dispersal of ions. The
IonBar™ assembly will be preinstalled in the
chamber, in the orientation specified by the
original order.
Typically, the ions need to be directed
downward towards the main work area.
However, in some cases, the application
requires the ions to be directed towards the
user, eliminating static around the gloves. The
design of the mounting brackets allows for a
wide range of mounting locations to best suit
your application.
Figure 1:
Fasten the mounting bracket in the orientation shown above.
Figure 2:
The airflow from the fan module is required to
disperse the generated ions throughout the glovebox


