background image

12


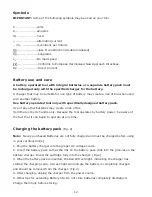
V…………………………volts
A…………………………amperes
Hz……………………….hertz
~…………………….….alternating current
…/m……………….....revolutions per minute
    .....................class II construction (double insulated)
Kg………………………..kilograms
n

0

………………………..No load speed

    ……………….….....Conforms to European Harmonised New Approach Directives.
DC ………………..…….Direct Current

Battery use and care

A battery operated tool with integral batteries or a separate battery pack must 
be recharged only with the specified charger for the battery.
A charger that may be suitable for one type of battery may create a risk of fire when used 
with another battery.
Use battery operated tool only with specifically designed battery pack.
Use of any other batteries may create a risk of fire. 
Hold the tool by its handle only. Because the tool operates by battery power, be aware of 
the fact that it can begin to operate at any time. 

Charging the battery pack 

(Fig. 2)

Note: 


Newly purchased Batteries are not fully charged and must be charged before using 

in your cordless tool(s).
1. Plug the battery charger into the proper AC voltage source. 
2. Insert the battery pack so that the ribs on the battery pack slide into the grooves on the 
battery charger. Insert the cartridge fully into the charger. (Fig.2)
3. When the battery pack is inserted, the Red LED will light, indicating the charger has 
started the charging cycle. A Green light will indicate the battery is completely charged 
and should be removed from the charger. (Fig.2)
4. After charging, unplug the charger from the power source.
5. Other tips for extending Battery life: Do not store batteries completely discharged. 
Charge them fully before storing.

Symbols

IMPORTANT: Some of the following symbols may be used on your tool.

Summary of Contents for T12VAG

Page 1: ...12V Li ion Cordless Angle Grinder T12VAG User Manual Please read and retain for future reference IMPORTANT Read all instructions before use...

Page 2: ...10 8 spring washer 4 33 12v li ion battery pack 9 front cover 34 connector holder 10 608 bearing 35 Armature 11 retainer plate 36 screw m3x6 12 screw m4x8 37 armature support 13 big gear 38 flange b 1...

Page 3: ...2 Exploded Assembly Diagram NOTICE Actual product may vary from pictures shown...

Page 4: ...3 2 4 3 1 7 5 Fig 1 Fig 2 1 Wheel Guard 2 Quick Release Lever 3 Grinding Wheel 4 Spindle Lock 5 Switch Button 6 Battery Pack 7 Charger Tabs Charge indicator Battery capacity indicator LED 6...

Page 5: ...4 Wheel Guard Spindle Fig 3 Fig 4 Spindle Lock Wheel Guard Inner Flange Grinding Wheel Outer Flange...

Page 6: ...before using this product Failure to do so can result in serious injury Save this manual for future reference Copyright 2013 by ACL Group Intl Ltd All rights reserved This manual or any artwork conta...

Page 7: ...Keep work area clean and well lit Cluttered or dark areas invite accidents Do not operate power tools in explosive atmospheres such as in the presence of flammable liquids gases or dust Power tools c...

Page 8: ...ed surfaces such as radiators cooking ranges and any other fixed appliance with metal surfaces Do not expose your power tool to wet or damp conditions and NEVER use in rain Check regularly the power c...

Page 9: ...SE IN A DANGEROUS ENVIRONMENT Don t use power tools in damp or wet locations or expose them to rain Keep work area well lit 6 KEEP CHILDREN AWAY All visitors should remain at a safe distance from work...

Page 10: ...imes 16 MAINTAIN TOOLS WITH CARE Keep tools clean and in good working condition for maximum safety performance Follow instructions for lubricating and changing accessories 17 DISCONNECT TOOLS BEFORE S...

Page 11: ...erstood the manual and apply their own caution and common sense when using this power tool Following this guide will greatly reduce your risk of electric shock or injury Only use qualified repair agen...

Page 12: ...battery pack into power tools that have the switch on invites accidents Do not open the battery Danger of short circuiting Protect the power tool against heat e g also against continuous sun irradiati...

Page 13: ...be aware of the fact that it can begin to operate at any time Charging the battery pack Fig 2 Note Newly purchased Batteries are not fully charged and must be charged before using in your cordless too...

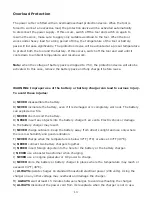
Page 14: ...injuries A NEVER disassemble the battery B NEVER incinerate the battery even if it is damaged or is completely worn out The battery can explode in a fire C NEVER short circuit the battery D NEVER inse...

Page 15: ...away from others If wheel is flawed it will likely separate during this test 1 Do not charge battery pack when temperature is below 10 C 50 F or above 40 C 104 F 2 Do not attempt to use a step up tran...

Page 16: ...s cut by means of welding 4 Grinding of synthetic resin bricks marbles etc 5 Cutting thin wall tubes and small size metal materials CAUTION Never cover air vents They must always be open for proper mo...

Page 17: ...battery with the grooves in the housing and slide it into place Always insert it all the way until it locks in place with a little click Lightly pull on the battery pack to ensure it is locked into p...

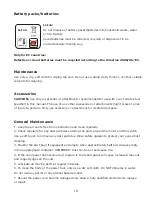
Page 18: ...DUH QR ORQJHU VXLWDEOH IRU XVH PXVW EHVHSDUDWHO FROOHFWHG DQG VHQW IRU UHFRYHU LQ DQ HQYLURQPHQWDOO IULHQGO PDQQHU Disposal of the exhausted battery WARNING Do not dispose of the exhausted battery The...

Page 19: ...hot and cause fire 4 If the sand paper has become dull replace it Dull sand paper will cause increased tear out and ragged edges on the cuts 5 Lubricate all moving parts at regular intervals 6 To clea...

Page 20: ...declaration is to certify that it conforms to CE EMC MD and RoHS directives EN55014 1 A1 2009 EN55014 2 A2 2008 All provisions of Annex 1 of Council Directive 2004 108 EC EMC directive EN60745 1 A11...

Page 21: ...mes all risk and liability arising out of his or her repairs or parts replacement to the original product 12 Months Limited Warranty If within 12 months from the date of purchase you experience any pr...

Reviews: