background image

any operator must have read and understood the manual and apply their own 
caution and common sense when using this machine.
Following this guide will greatly reduce your risk of electric shock or injury.

Grounding Tools
Electrical Powered Connections

3- Prong Plug and Outlet

Any electric powered tool that is marked Ground Required must have a fitted  three

wired power cord. The main importance of this is the green wire within the cord, this

green wire must at all times be connected to the grounding prong of the plug. This 

prong must never be removed or discarded. The green wire Must NEVER be conne-

cted to any other prong. The Three prong plug must only be connected to the power

supply through a three prong power outlet

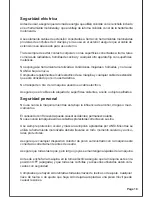
The illustration above shows a three prong plug and outlet.

Only use qualified repair agents to service this machine.

Only use qualified electrician to repair any damaged wiring.

NEVER remove the grounding prong from the power toll or extension cord.

Page 7

Summary of Contents for TBG6

Page 1: ...User Manual Please read and retain for future reference 6 Heavy Duty Bench Grinder TBG6 LISTED E154499...

Page 2: ...2 2 1 1 1 1 1 2 1 1 1 1 1 1 1 1 1 1 1 1 1 1 2 1 2 2 1 1 1 1 1 1 1 1 1 1 1 1 4 4 4 1 1 39 40 41 42 43 44 45 46 47 48 49 50 51 52 53 54 55 56 57 58 59 60 61 62 63 64 65 66 67 68 69 70 71 72 73 74 75 76...

Page 3: ...Exploded Assembly Diagram Page 2...

Page 4: ...ntl Ltd Diagrams within this manual may not be drawn proportionally Due to continuing improvements actual product may differ slightly from the product described herein Read this entire manual before u...

Page 5: ...ead and Keep This Manual Keep children and bystanders away while operating a power tool Distractions can cause you to lose control Please read carefully all instructions within this manual Failure to...

Page 6: ...ety Never use your machine whilst under the influence of alcohol drugs or medication Tiredness can often cause accidents stay alert Never use your machine without the correct guards in place Always us...

Page 7: ...e wheels 5 Ensure all clamps and guards are being used 6 Do not grind materials not suitable for this machine 7 Do not use in wet damp conditions or locations 8 Always use supports when working with l...

Page 8: ...ance of this is the green wire within the cord this green wire must at all times be connected to the grounding prong of the plug This prong must never be removed or discarded The green wire Must NEVER...

Page 9: ...only be connected to a three wire extension cord Only double insulated tools can be connected to twowire cords When using any extension cord the machine will suffer a power reduction due to the drop...

Page 10: ...OFF and unplugged from the power source before doing any maintenance or adjustments Replace the power cord immediately if it is cut worn or damaged in any way Under normal use grinding wheels may beco...

Page 11: ...or subject to neglect improper use or attempted repair other than by a qualified engineer Heavy duty daily professional or hire usage is not covered under this warranty Due to continuous product deve...

Page 12: ...rface mounting holes provided How to assemble the bench grinder Ref 3 Assemble the eye shield Ref 4 Set up the tool rest Ref 2 Accessories for tool rest 1 Tool rest part 2 Screw set screw flat washer...

Page 13: ...the 3 screws on wheel guard Ref 8 Remove the wheel guard Ref 9 Use spanner to take off the screw nut for wheel Ref 10 Wheel assembly parts Ref 11 After changing a wheel make sure you dress it to elimi...

Page 14: ...LISTED E154499 Page 13 Manual del usuario Por favor lea este manual y gu rdelo para referencia futura...

Page 15: ...2 2 2 6 1 1 4 1 6 6 1 1 2 2 2 4 4 4 1 8 8 8 2 2 1 1 1 39 40 41 42 43 44 45 46 47 48 49 50 51 52 53 54 55 56 57 58 59 60 61 62 63 64 65 66 67 68 69 70 71 72 73 74 75 76 Barra de montaje de ojo derecho...

Page 16: ...Dibujo despiezado del conjunto Page 15...

Page 17: ...s diagramas que aparecen en este manual no podr n ser dibujados de manera proporcional Debido a mejoras continuas el producto especificado puede diferir ligeramente del producto descrito en el present...

Page 18: ...avor lea detenidamente todas las instrucciones contenidas en este manual Si no se observan todas as advertencias de seguridad pueden sufrirse lesiones per sonales graves El t rmino herramienta motoriz...

Page 19: ...segure que el cable est alejado de superficies calientes aceite u objetos afilados No use nunca la m quina mientras est bajo la influencia de alcohol drogas o med icamentos El cansancio con frecuencia...

Page 20: ...ina en marcha sin las ropas de seguridad correctas 3 No ponga la m quina en marcha con las ropas sueltas 4 Mantenga manos y extremidades alejadas de las cuchillas de la sierra 5 Asegure que todas las...

Page 21: ...res pitones y una toma Esta m quina se suministra con todas las cubiertas y dispositivos de protecci n rel evantes los cuales deber n comprobarse antes de cada operaci n Este manual deber ser le do y...

Page 22: ...iento de puesta a tierra DEBE ser conectada a un cable de extensi n con tres hilos Solamente las herramientas con doble aislamiento pueden ser conectadas a cables con dos hilos Cuando se usa cualquier...

Page 23: ...tes de intentar llevar a cabo reparaciones de cualquier tipo Podr usar su rectificadora de banco para pulimentar y bru ir podr adquirir estas muelas en la mayor a de las tiendas de accesorios AVISO El...

Page 24: ...rios no est cubierto por en virtud de esta garant a Esta garant a queda anulada si el producto ha sido sobrecargado o sujeto a descuido mal uso o intento de reparaci n que no sea por un t cnico cualif...

Page 25: ...rios para el soporte de herramienta 1 Pieza de soporte de herramienta 2 Tornillo tornillo de fijaci n arandela plana arandela de estrella perilla Instale el protector ocular Instale el soporte de herr...

Page 26: ...a de la muela Ref 8 Retire la guarda protectora de la muela Ref 9 Use una llave de tuercas para desmontar la tuerca roscada de la muela Ref 10 Piezas de montaje de la muela Ref 11 Despu s de cambiar l...

Page 27: ...Page 26...

Page 28: ......

Reviews: