background image

15


Disposal

Power tools, accessories and packaging should be sorted for environmentally-friendly recycling.
Only for EC countries:

Environmental Protection

RECYCLING: WASTE ELECTRICAL PRODUCTS SHOULD NOT BE DISPOSED OF WITH 
HOUSEHOLD WASTE. PLEASE RECYCLE WHERE FACILITIES EXIST. CHECK WITH YOUR LOCAL 
AUTHORITY OR RETAILER FOR RECYCLING ADVICE.

Do not dispose of power tools into household waste!
According to the European Directive 2002/96/EC on waste electrical and 
electronic equipment and its incorporation into national right, products 
that are no longer suitable for use must beseparately collected and sent 
for recovery in an environmentally-friendly manner.

Maintenance 

Use only a dry, soft cloth for wiping the unit. Do not use a damp cloth, thinner, or other 
volatile solvents for cleaning.

Accessories

CAUTION: Use only accessories or attachments recommended for use with your Terratek tool 
specified in this manual. The use of any other accessories or attachments might present a risk 
of injury to persons. Only use accessory or attachment for its stated purpose.

General Maintenance

1. Keep the air vents free from obstruction and clean regularly.
2. Check regularly for any dust particles entering the grills around the motor and the switch. 
Use a soft brush to remove any dust particles. Wear safety glasses to protect your eyes whilst 
cleaning.
3. Monitor the dust bag (if equipped) and empty when approximately half full. Always empty 
into an appropriate container. REMEMBER: dust can be hot and cause fire.
4. If the cutting tool has become dull, replace it. Dull cutters will cause increased tear-out and 
ragged edges on the cuts.
5. Lubricate all moving parts at regular intervals.
6. To clean the body of the power tool, only use a soft damp cloth. Do NOT immerse in water. 
A mild detergent can be used but NOT petrol or any alcohol based product.
7. Should the power cord become damaged only allow a fully qualified electrician to replace 
or repair.

Summary of Contents for TTID750

Page 1: ...Electric Hammer Dril TTID750 User Manual Please read and retain for future reference IMPORTANT Read all instructions before use...

Page 2: ...Contents Parts List Parts List Safety Instructions Technical Information Using your drill Maintenance Warranty 1...

Page 3: ...2 Exploded Assembly Diagram NOTICE Actual product may vary from pictures shown...

Page 4: ...3 1 2 3 6 5 4 8 7 Fig 1 1 Drill chuck 2 Drill depth stop 3 Drill hammer drill selector switch 4 Locking button 5 ON OFF switch 6 Speed controller 7 Forward Reverse switch 8 Additional handle...

Page 5: ...04 dB A KWA uncertainty 3 dB Read this entire manual before using this product Failure to do so can result in serious injury Save this manual for future reference Copyright 2013 by ACL Group Intl Ltd...

Page 6: ...Keep work area clean and well lit Cluttered or dark areas invite accidents Do not operate power tools in explosive atmospheres such as in the presence of flammable liquids gases or dust Power tools c...

Page 7: ...ed surfaces such as radiators cooking ranges and any other fixed appliance with metal surfaces Do not expose your power tool to wet or damp conditions and NEVER use in rain Check regularly the power c...

Page 8: ...SE IN A DANGEROUS ENVIRONMENT Don t use power tools in damp or wet locations or expose them to rain Keep work area well lit 6 KEEP CHILDREN AWAY All visitors should remain at a safe distance from work...

Page 9: ...imes 16 MAINTAIN TOOLS WITH CARE Keep tools clean and in good working condition for maximum safety performance Follow instructions for lubricating and changing accessories 17 DISCONNECT TOOLS BEFORE S...

Page 10: ...operation this manual should be read and kept in a safe place Whilst we warn of all the possible risks attached to using power tools any operator must have read and understood the manual and apply th...

Page 11: ...and eye protection To avoid hearing loss and eye injuries 3 If the bit becomes jammed immediately turn the trigger switch off to prevent an overload which can damage the motor Use reverse to loosen j...

Page 12: ...e or industrial applications Our warranty will be voided if the machine is used in commercial trade or industrial businesses or for equivalent purposes Installing the additional handle Fig 1 8 Install...

Page 13: ...d as far as possible into the chuck After inserting the drill bit or tool tighten the chuck 1 until the drill bit or tool is secure Check that the drill bit is secure in the chuck 1 Check at regular i...

Page 14: ...ximum speed setting Set the speed using the setting ring 6 on the ON OFF switch 5 Do not attempt to make this setting whilst the drill is in use Clockwise Counter clockwise switch Fig 2 7 Warning Chan...

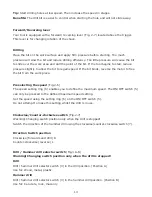
Page 15: ...Hammer drill selector switch 3 to position A drill Use a low speed setting Inserting Removing screws Switch the Drill Hammer drill selector switch 3 to position A drill Use a low speed setting Startin...

Page 16: ...ith your Terratek tool specified in this manual The use of any other accessories or attachments might present a risk of injury to persons Only use accessory or attachment for its stated purpose Genera...

Page 17: ...conforms to CE EMC LVD MD and RoHS directives EN55014 1 2006 A1 EN55014 2 1997 A1 A2 EN61000 3 2 2006 A1 A2 EN61000 3 3 2008 All provisions of Annex 1 of Council Directive 2004 108 EC EMC directive E...

Page 18: ...that all repairs or parts replacement should be done by certified or licensed technicians The buyer assumes all risk and liability arising out of his or her repairs or parts replacement to the origin...

Reviews: