15
14
English
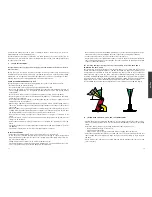
7a DISASSEMBLING/ASSEMBLING FHX, FHSX, FHX-V, TDH CLAMPS
The clamps can be easily disassembled for
cleaning and inspection purposes. Please
make use of the following procedure.
- Remove the retaining pin (4) and the cam
pin (3).
- Remove the cam (2).
- Clean all parts with a standard
degreasant.
- Grease the cam pin (3) with bearing
grease.
- Assembling the clamp is in reverse order.
- Always insert new original retaining pins
(4) with the aid of a hammer,
combination pliers and pin punch.
- Always use original Terrier components
when replacing parts.
- Remove any burr with a file.
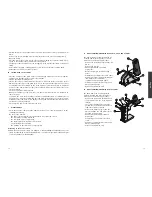
7b DISASSEMBLING/ASSEMBLING THSK CLAMPS
The THSK clamp can be easily disassem-
bled for cleaning and inspection. Please
make use of the following procedure.
- Remove the tension pin (6) with the use
of a pin driver from the tooth segment
shaft (5).
- The tooth segment shaft can now be
pushed out of the frame and the tooth
segment (3) can be removed.
- Remove the hairpin pegs (7) and the
pins (4), and the two side plates (2) can
be taken from the clamp.
- Clean all the parts with a standard
degreasant.
- Assembling of the clamp is in reverse
order.
- Always use original Terrier components
when replacing parts.
- Remove any burr with a file.
- Check whether the teeth of the cam are free from dirt, and if necessary clean with a wire
brush.
- Remove any grease, dirt and mill scale from the plate at the site of the lifting clamp.
- Open the clamp.
- Place the jaws as far as they will go over the plate, making sure that the clamp is posi-
tioned so as to balance the load when it is being lifted.
- Lift gently so that the lifting force can be applied; check whether the clamp is rotating or
tilting.
- If the clamp is rotating or tilting read the fore mentioned remarks on lifting again.
- Ensure that the load is in a stable position.
5b LIFTING WITH THSK CLAMPS
- Place the clamp onto the plate (cable or chain already attached to the tooth segment;
and take care that the chain of cable is not twisted);
- Tighten the clamps firmly by hand;
- Tension the cables or chains with the crane hook, while the inside of the jaws presses
firmly against the edge of the plate (note: due to the fact that the clamp does not have
a constant pretension available on the tooth segment, it will be necessary to watch the
position of the clamps until the cables are tensioned: make sure the clamps stay in the
correct position).
- The load can now be lifted carefully.
- During the transport of the load, take care that a constant tension is maintained on
chains or slings.
- To unhook, the crane hook should be lowered so far that the clamp is completely free of
any load (note: make sure that when the load is lowered, there are no obstacles under-
neath where the load could rest on during lowering and whereby the clamps will become
un loaded to early by accident).
- The clamps can now be removed from the load.
6
MAINTENANCE
- Check the general condition of the clamp at least once a month, see Chapter 7 - Disas-
sembling/Assembling.
- Do not use the clamp if:
- the body is split or deformed, in particular in way of the jaw corners,
- the cam has been visibly deformed,
- the cam teeth are no longer sharp,
- the shackle pins have visibly been deformed,
- any retaining pins are missing,
- the marking on the clamp is no longer legible.
Depending on the defects noted:
disassemble and clean the clamp (see Chapter 7 - Disassembling/Assembling) or have the
clamp overhauled by Terrier Lifting Clamps B.V. or another recognized mechanical repair
center (see Chapter 8 - Overhauling).
6
- Controleer of het segment soepel open en dicht gaat.
- Controleer of de tanden van het segment vrij van vuil zijn en reinig deze zonodig met een
staalborstel.
- Maak de plaat ter plaatse van de hijsklem vrij van vet, vuil en walshuid.
- Open de klem.
- Plaats de bek volledig over de plaat en zorg dat de klem dusdanig geplaatst is dat de last
in balans is tijdens het hijsen.
- Hijs rustig zodat de hijskracht kan aangrijpen en controleer of de klem niet begint te
draaien of te kantelen.
- Indien de klem begint te kantelen of te draaien, raadpleeg voorgaande regels opnieuw.
- Zorg dat de last stabiel is geplaatst.
6
ONDERHOUD
Controleer voor een optimale veiligheid minstens eenmaal per maand de algehele staat
van de klem, zie ook hoofdstuk 7 - Demontage/Montage.
Gebruik de klem niet meer als:
- het huis gescheurd of vervormd is, let daarbij vooral op de bekhoeken;
- het segment zichtbaar vervormd is;
- de segmenttanden niet meer scherp zijn;
- de assen zichtbaar vervormd zijn;
- de spanstiften ontbreken;
- de markering op de klem niet meer leesbaar is.
Afhankelijk van de geconstateerde gebreken:
demonteer en reinig de klem (zie hoofdstuk 7 - Demontage/Montage) of laat de klem re-
viseren door Terrier Lifting Clamps B.V., of een ander erkend revisiebedrijf (zie hoofdstuk 8
- Revisie).
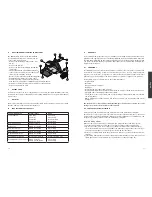
7a
DEMONTAGE/MONTAGE RICHTLIJNEN VAN TOEPASSING VOOR DE FHX, FHSX, FHX-V
en TDH HIJSKLEM
De FHX, FHSX, FHX-V en TDH hijsklem
kan voor reiniging en inspectie op een-
voudige wijze als volgt gedemonteerd
worden.
- Verwijder de spanstift (4) en de seg-
mentas (3).
- Verwijder het segment (2).
- Reinig alle onderdelen m.b.v. een
standaard ontvettingmiddel.
- Vet de segmentas (3) in met vet.
- Verwijder eventuele bramen m.b.v.
een vijl.
Bij montage dienen alle onderdelen in
omgekeerde volgorde in elkaar gezet te
worden. Plaats daarbij altijd nieuwe ori-
ginele spanstiften en maak gebruik van
originele Terriër onderdelen.
4
1
2
3
4
4308005 gebruikershandleiding horizontaal:Layout 2 19-01-2010 10:55 Pagina 6
7
7b
DEMONTAGE/MONTAGE RICHTLIJNEN VAN TOEPASSING VOOR DE THSK HIJSKLEM
De THSK klem kan voor reiniging en in-
spectie op eenvoudige wijze gedemon-
teerd worden:
- Verwijder met een pendrijver de spans-
tift (6) uit de tandsegmentas (5).
- De tandsegmentas kan nu uit het frame
worden geschoven waarop het tandseg-
ment (3) verwijderd kan worden.
- Verwijder de haarspeldstiften (7) en de
twee pennen (4), de twee zijplaten (2)
kunnen dan uit de klem (1) genomen
worden.
Bij montage van de klem dient boven-
staande in omgekeerde volgorde uitge-
voerd te worden. Maak daarbij altijd
gebruik van nieuwe spanstiften. Na in-
spectie en/of reparatie dient de klem op
een trekbank getest te worden.
7c
DEMONTAGE/MONTAGE RICHTLIJNEN VAN TOEPASSING VOOR DE TNMH HIJSKLEM
De TNMH klem kan voor reiniging en inspec-
tie op eenvoudige wijze gedemonteerd
worden:
- Verwijder met een pendrijver de spanstift
(9) uit de tandsegmentas (5).
- De tandsegmentas kan nu uit het frame
worden geschoven waarop het tandseg-
ment (2) verwijderd kan worden.
- Reinig alle onderdelen m.b.v. een stan-
daard ontvettingsmiddel.
- Vet de segmentas (3) in met vet.
- Verwijder eventuele bramen m.b.v. een vijl.
Bij montage dienen alle onderdelen in omge-
keerde volgorde in elkaar gezet te worden.
Plaats daarbij altijd nieuwe originele spanstif-
ten en maak gebruik van originele Terrier on-
derdelen. Na inspectie en/of reparatie dient
de klem op een trekbank getest te worden.
8
REVISIE
Tenminste eenmaal (1x) per jaar, of als schade aan de klem dit nodig maakt, dient de klem
gecontroleerd, getest en indien nodig gereviseerd te worden door Terrier Lifting Clamps
B.V. of een erkend revisiebedrijf.
7
3
4
5
9
2
1
6
8
6
2
3
5
1
4
7
Nederlands
4308005 gebruikershandleiding horizontaal:Layout 2 19-01-2010 10:55 Pagina 7


