3
PRECAUTIONS
• When using metal needle cannula, do not withdraw the guidewire back
into the cannula, as shearing of the guidewire may result.
• This kit must be used by a trained physician.
• This kit is for single use only. Do not resterilize or reuse.
• Contents are sterile, non-toxic, and non-pyrogenic in unopened, undam-
aged package.
• Do not use if the package or product is stained or damaged. Use the
introducer kit immediately after opening the package and dispose of the
kit after use.
• Before use, make sure the sheath size (Fr.) is appropriate for the access
vessel and the catheter to be used.
• The entire procedure from skin incision to sheath removal must be carried
out aseptically.
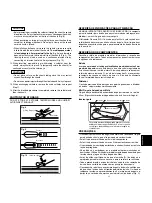
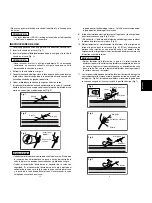
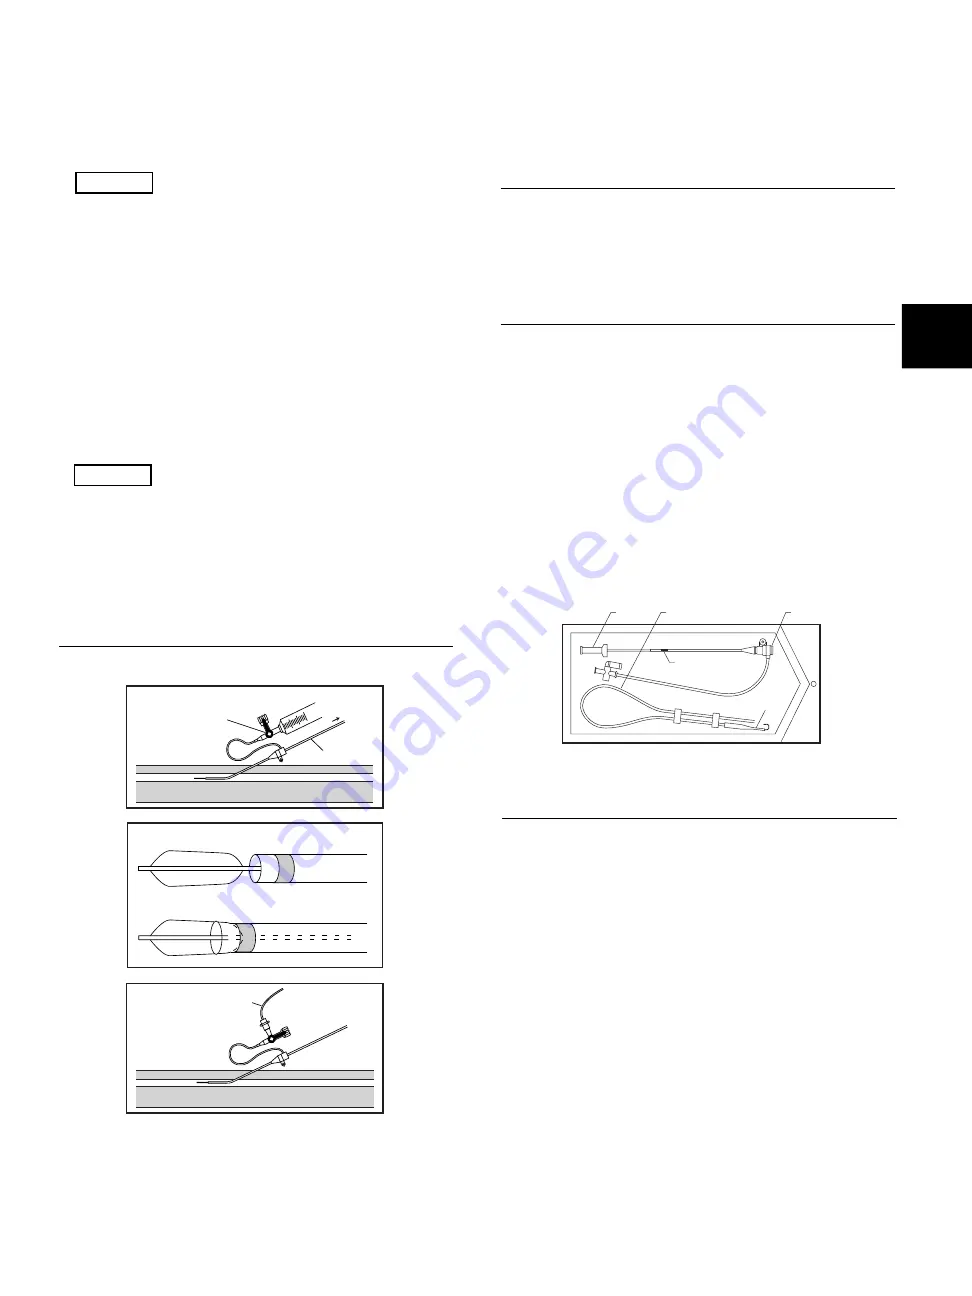
• When inflating a balloon at, or close to, the sheath’s tip, be sure not to
inflate it inside the distal end of sheath. The radiopaque marker is located
approx. 5 mm proximal to the tip and therefore does not actually mark the
true distal tip of the sheath (Fig. 9).
• Do not use a power injector through the side tube and 3-way stopcock.
DESCRIPTION AND INDICATIONS FOR USE
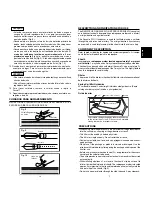
The RADIFOCUS PINNACLE R/O II INTRODUCER SHEATH consists of
an introducer (a sheath incorporating a radiopaque marker and a dilator),
a mini guidewire and a guide inserter.
The Pinnacle R/O II Introducer is used to facilitate placing a catheter
through the skin into a vein or artery. The mini guidewire is an accessory
device which is used for placement of the sheath into the vein or artery.
COMPONENT DESCRIPTION
Refer to product labeling for appropriate system components. All compo-
nents that enter blood vessels are radiopaque.
Sheath
Incorporates
a radiopaque marker located approximately 5 mm proxi-
mal to the tip,
1-way valve and a 3-way stopcock connected by a side tube.
The sheath can be used with a catheter of the same Fr. size or up to two Fr.
sizes smaller without blood leakage at the 1-way valve. This highly flexible
sheath is designed to resist kinking.
Dilator
The precise fit of the dilator in the sheath allows for simultaneous motion of
both dilator and sheath.
Spring Coil Mini Guidewire
45 cm double-ended (J and straight) stainless steel guidewire. (Some
catalog numbers may not include a mini guidewire.)
Guide Inserter
The contents of this package may differ from that shown
in the instructions for use. Please consult available
catalog information for proper contents.
Dilator
Radiopaque Marker
Sheath
Spring Coil Mini Guidewire
Guide Inserter
ENGLISH
18
ATEN
ÇÃ
O
•
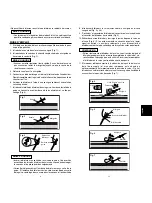
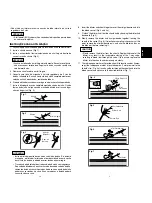
Antes de remover ou inserir o cateter através da bainha, aspire o
sangue da válvula reguladora de 3 vias para remover qualquer
depósito de fibrina que se possa ter acumulado dentro ou sobre a
ponta da bainha (Fig. 8).
•
Quando efetuar a punção, sutura ou incisão do tecido próximo da
bainha, tenha cuidado para não danificar a bainha. Não coloque um
grampo sobre a bainha nem a prenda com uma sutura.
•
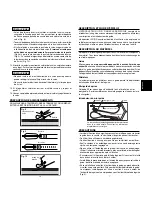
Quando encher o balão na ou próximo da ponta da bainha, certifique-
se de que não o faz dentro da extremidade distal da bainha.
O
marcador radiopaco localiza-se aproximadamente a 5 mm
proximais da ponta
(Fig. 4a) e, portanto, na verdade, não marca a
ponta distal real da bainha (Fig. 9). A linha de irrigação também pode
ser usada como um local de infusão contínua através da conexão de
uma linha de infusão à válvula reguladora de 3 vias (Fig. 10).
12. Quando inserir, manipular ou remover um cateter da bainha, mantenha-
a sempre no lugar. Para suturar a bainha temporariamente (para
acesso contínuo) use o buraco da agulha.
ATEN
ÇÃ
O
•
Não suture o tubo da bainha pois isto pode restringir o acesso/fluxo
através da bainha.
•
Não utilize um injetor mecânico através do tubo lateral e da válvula
reguladora de 3 vias.
13. Para trocar cateteres, remova o cateter usado e repita o
Passo 11.
14. Depois de completar o procedimento desejado, remova o cateter e, em
seguida, a bainha.
CUIDADOS PARA ARMAZENAMENTO
NÃO EXPONHA A TEMPERATURA E UMIDADE EXTREMAS. EVITE A
EXPOSIÇÃO DIRETA AOS RAIOS DO SOL.
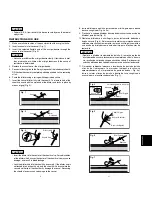
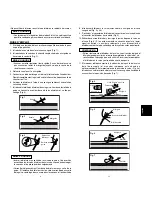
Fig. 8
3-Way Stopcock
Catheter
OFF
Fig. 9
Correct
Incorrect
Fig. 10
Infusion Line
OFF
Cateter
Válvula Reguladora
de 3 Vias
Correto
Incorreto
Linha de
Infusão

