background image

Overview

The touchscreen displays a map at all times. 
To move the map in any direction, hold and 
drag a finger. To rotate the map in any 

direction, hold and turn two fingers.

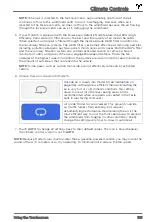
To set the map's orientation, touch the icon in 

the top right corner of the map:

North Up - North is 

always at the top of the 
screen.

Heading Up - The 
direction you are driving 
is always at the top of 
the screen. The map 
rotates as you change 
direction. This icon has 
an integrated compass 
that indicates the 
direction you are 
driving.

NOTE:

 When navigating, 

this icon also allows you 
to view the route 
overview view (see 

Navigating on page 
140

).

When you rotate or move the map, your 

current location is no longer tracked. The 

message "Tracking Disabled" displays briefly


next to the map orientation icon and the icon 

turns gray. To re-enable tracking, touch the 

map's orientation icon to choose North Up or 

Heading Up.

Touch the 

+

 and 

-

 icons to zoom the map in 

and out on your current or chosen location. 

When you zoom in or out using these icons, 

tracking remains enabled.

Touch the following icons to customize what 

the map displays and to access navigation 

settings:

NOTE:

 These icons disappear after a few 

seconds when not in use. Touch anywhere on 

the map to re-display them.

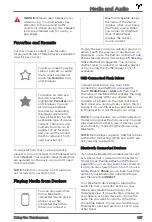
Display/hide satellite 
imagery (if equipped with 
premium connectivity).

Display/hide traffic


conditions (if equipped 
with premium 

connectivity). Green lines 

indicate no traffic; orange 

lines indicate light traffic;


red lines indicate 

moderate traffic; and pink 
lines indicate heavy traffic.


To ensure traffic is easy to 
identify along a navigation 
route, green traffic lines 
display under the blue 
route line, whereas 
orange, red, and pink 
traffic lines display on top 

of the blue route line.

Display/hide all charging 
locations and a popup list 
that includes the city and 
proximity of the 
corresponding stations on 
the map. Charging 
locations include Tesla 
Superchargers, Tesla 
destination chargers, third 
party fast chargers (see 
note below), and public 
chargers that you have 
used previously. See 

Charging Locations on 
page 142

.

NOTE:

 In some market 

regions, third party fast 

chargers are also included 

on the map as dark grey 

pins when you display 

chargers.

NOTE:

 The map always 

displays Superchargers, 

even when you hide 

charging locations.

Maps and Navigation

139

Using the Touchscreen

Summary of Contents for MODEL S

Page 1: ...MODEL S OWNER S MANUAL Software version 2020 20 Europe ...

Page 2: ...ng on vehicle options software version and market region the information displayed on the touchscreen in your vehicle may appear slightly different PRODUCT SPECIFICATIONS All specifications and descriptions contained in this document are verified to be accurate at the time of printing However because continuous improvement is a goal at Tesla we reserve the right to make product modifications at an...

Page 3: ...ummon 109 Smart Summon 113 Lane Assist 117 Collision Avoidance Assist 120 Speed Assist 124 Using the Touchscreen 126 Controls 126 Climate Controls 133 Maps and Navigation 139 Media and Audio 145 Phone 149 Air Suspension 152 Calendar 154 Security Settings 155 HomeLink Universal Transceiver 159 Connecting to Wi Fi 162 Software Updates 163 Mobile App 165 Charging 168 Electric Vehicle Components 168 B...

Page 4: ...Declarations of Conformity 224 Troubleshooting Alerts 231 Index 243 Contents ...

Page 5: ...Steering wheel buttons left Using Left Steering Wheel Buttons on page 45 5 Instrument panel Instrument Panel on page 59 6 Steering wheel buttons right Using Right Steering Wheel Buttons on page 46 7 Gear selector Shifting Gears on page 53 8 Touchscreen Touchscreen Overview on page 6 9 Glovebox button Glove Box on page 20 10 Cabin climate control Climate Controls on page 133 11 Power window switche...
Page 6: ...rakes Braking and Stopping on page 68 17 Accelerator pedal Acceleration Modes on page 76 18 Hazard warning lights Hazard Warning Flashers on page 58 19 Cup holders Cup Holders on page 22 Interior Overview 4 MODEL S OWNER S MANUAL ...

Page 7: ...erior mirrors Mirrors on page 49 7 Hood Front trunk Front Trunk on page 18 8 Radar sensor hidden from view in the above image About Autopilot on page 89 9 Wheels and tires Wheels and Tires on page 206 10 Rear view camera Rear View Camera on page 83 and About Autopilot on page 89 11 Rear trunk liftgate Rear Trunk on page 15 12 Ultrasonic sensors Park Assist on page 73 and About Autopilot on page 89...

Page 8: ... slightly different 1 This area on the top of the touchscreen displays useful information and provides shortcuts to various features In addition to the time of day and the current outside temperature this area displays the following icons Touch to lock unlock all doors and trunks Touch to display the charging screen and access charge settings on the touchscreen Access information about your Model ...

Page 9: ... Wi Fi on page 162 Connect to a Bluetooth device see Pairing a Bluetooth Phone on page 149 Displays the status of the front passenger airbag applicable only in regions where the airbag can be disabled as described in Airbags on page 38 2 Controls Touch to control features and customize Model S to suit your preferences see Controls on page 126 3 Media Player see Media and Audio on page 145 4 Touch ...

Page 10: ...aps and Navigation on page 139 NOTE When you touch Controls choose an app or expand Media Player the window displays on top of the map To close the Controls window touch Controls again or touch the X in the top corner of the window To close an app touch the X in the top corner of the window To close Media Player drag it all the way down to the bottom of the touchscreen or touch the icon again The ...

Page 11: ...n page 12 must be off and the vehicle must detect the key near the driver s door before opening the rear trunk Model S also locks automatically If you enable Walk Away Door Lock Model S locks when you walk away carrying your key with you see Walk Away Locking on page 12 While sitting inside Model S you can also lock and unlock the vehicle by touching the icon on the touchscreen s status bar or by ...

Page 12: ...Avoid contact with solvents waxes and abrasive cleaners Replacing the Key Battery The key s battery lasts for approximately a year with normal use When the battery is low a message displays on the instrument panel Follow these steps to replace it NOTE Tesla recommends replacing the battery in all keys at the same time 1 With the key placed button side down on a soft surface use a small flat bladed...

Page 13: ...lock button on the key There is no need to reset the setting The next time you approach Model S provided the above conditions do not apply handles automatically extend Whenever a door is open the Door Open indicator displays on the instrument panel Also the image of the Model S on the touchscreen s Controls Quick Controls window also provides a visual representation of an open door or trunk Openin...

Page 14: ...nd close all doors Walk Away Lock disables and will not lock when you leave with the key You will need to manually lock your vehicle until after your next drive NOTE If all doors are closed and you use the key to unlock Model S walk away locking is temporarily suspended for one minute If you open a door within this minute it does not re lock until after all the doors are closed and you have walked...

Page 15: ...alk away locking You must manually re enable walk away locking after replacing the key s battery Opening Interior Doors with No Power If Model S has no electrical power the front doors open as usual using the interior door handles To open the rear doors fold back the edge of the carpet below the rear seats to expose the mechanical release cable Pull the mechanical release cable toward the center o...

Page 16: ...ly press the window switches as they may lower the windows on the driver or other doors CAUTION Closing the door while the window is fully raised for example if manually raised can damage the windows or the vehicle Ensure the window is slightly lowered before closing the door WARNING Before closing a window it is the driver s responsibility to ensure that all occupants especially children do not h...

Page 17: ... the powered liftgate to stop it in place To open the rear trunk from inside Model S in the unlikely situation that Model S has no power see Interior Emergency Trunk Release on page 17 WARNING Before opening or closing the powered liftgate it is important to check that the area around the liftgate is free of obstacles people and objects Although the powered liftgate can detect obstacles it cannot ...

Page 18: ...ress the interior release switch located inside the rear trunk and push the liftgate up If Model S is locked and is equipped with a power liftgate the first press unlocks the rear trunk and the second press opens it NOTE If Model S is not equipped with the Tesla Rear Facing Child Seats the switch may appear to exist but it will be inactive and pressing it does not release the liftgate If Model S i...

Page 19: ... pulling its lower edge very firmly toward you 2 Pull the cable to release the latch 3 Push the rear trunk open NOTE The button glows for several hours after a brief exposure to ambient light WARNING Do not allow children to play inside the trunk or become locked inside An unrestrained child could suffer serious injury or death in a crash A child could suffer heat exhaustion if trapped in the vehi...

Page 20: ...when Valet mode is active see Valet Mode on page 43 Closing The Model S hood is not heavy enough to latch under its own weight and applying pressure on the front edge or center of the hood can cause damage To properly close the hood 1 Lower the hood until the striker touches the latches 2 Place both hands on the front of the hood in the areas shown in green then press down firmly to engage the lat...

Page 21: ...sh up on the hood NOTE The interior release button glows following a brief exposure to ambient light WARNING People should never climb inside the front trunk Never shut the front trunk when a person is inside WARNING Care should be taken to ensure that objects inside the front trunk do not bump against the release button causing the trunk to accidentally open Front Trunk 19 Opening and Closing ...

Page 22: ... This can prevent connected devices from charging or from being recognized by the Media Player NOTE Power is available whenever the vehicle is considered awake The vehicle may be awake for many reasons For example when using features such as Summon or when features such as Smart Preconditioning Cabin Overheat Protection Keep Climate On Dog Mode etc are enabled The vehicle is also awake whenever th...

Page 23: ...able for accessories requiring up to 11A continuous draw 15A peak or a maximum of 150 continuous watts 180 watts peak NOTE Power is available whenever the vehicle is considered awake The vehicle may be awake for many reasons For example when using features such as Summon or when features such as Smart Preconditioning Cabin Overheat Protection Keep Climate On Dog Mode etc are enabled The vehicle is...

Page 24: ...up holder slide back the armrest To expose rear cup holders if available on your vehicle press and release the cup holder face plate located at the back of the center console Interior Storage and Electronics 22 MODEL S OWNER S MANUAL ...

Page 25: ...n it does not close If after removing the obstruction it still does not close touch and hold CLOSE to override the sunroof s anti trap mechanism NOTE If you find wind noise which varies depending on driving speed excessive even with the sunroof in the comfort position open a window slightly CAUTION Remove snow and ice before opening the sunroof Opening a sunroof covered in snow and ice can cause d...

Page 26: ... at least 25 cm from the center of the airbag cover 3 Place the shoulder section of the seat belt mid way between your neck and your shoulder Fit the lap section of the belt tightly across your hips not across your stomach Model S seats include integrated head supports that cannot be adjusted or removed Adjusting the Front Seats 1 Move seat forward backward and adjust the seat s height and tilt an...

Page 27: ...that the seat belts are not trapped behind the backrest Pull the seat back upward until it locks into place To confirm that the seat back is locked in the upright position try pulling it forward WARNING Always ensure the seat backs are locked in their upright position by pushing it forward or rearward Failure to do so increases the risk of injury Seat Heaters The front seats contain heating pads t...

Page 28: ...yment of the seat mounted side air bags if a collision occurs Also if the vehicle is equipped with an occupant detection system that is used to determine the status of the passenger front airbag seat covers may interfere with this system Front and Rear Seats 26 MODEL S OWNER S MANUAL ...

Page 29: ... Tesla WARNING Seat belts must be worn by passengers in all seating positions To Fasten a Belt 1 Ensure correct positioning of the seat see Correct Driving Position on page 24 2 Draw the belt out smoothly ensuring the belt lays flat across the pelvis chest and mid point of your collar bone between the neck and shoulder 3 Insert the latch plate into the buckle and press together until you hear a cl...

Page 30: ...d if necessary replaced Testing Seat Belts To confirm that seat belts are operating correctly perform these three simple checks on each seat belt 1 With the seat belt fastened give the webbing nearest the buckle a quick pull The buckle should remain securely locked 2 With the belt unfastened unreel the webbing to its limit Check that unreeling is free from snags and visually check the webbing for ...

Page 31: ...ING Seat belts that show signs of wear such as fraying or have been cut or damaged in any way must be replaced by Tesla WARNING Avoid contaminating a seat belt s components with any chemicals liquids grit dirt or cleaning products If a seat belt fails to retract or latch into the buckle it must be replaced immediately Contact Tesla WARNING Do not make modifications or additions that can prevent a ...

Page 32: ...our vehicle The status of the passenger front airbag displays in the top corner of the touchscreen When driving with a child seat on the front passenger seat always double check the status of the passenger front airbag to confirm that it is OFF To protect an adult subsequently occupying the front passenger seat check to verify that the passenger front airbag is ON For details on how the passenger ...

Page 33: ... 0 up to 13 kg LA U U Group I 9 18 kg UFB U UF U UF Group II 15 25 kg UFB U UF U UF Group III 22 36 kg UFB U UF U UF U Universal rear facing child restraint UF Universal forward facing child restraint L Suitable for these particular child restraints Maxi Cosi Cabrio Cabriofix E4 04443517 or Takata Mini E4 04443717 X Seating position is not suitable for children in this mass group ASeat must be pla...

Page 34: ... IUF ILB D IL Suitable for any semi universal child restraint any rear or forward facing restraint with support leg IUF Suitable for any universal child restraint forward facing with tether ARecommendation Takata Mini E4 04443717 BRecommendation Takata Midi E4 04444204 CRecommendation Maxi cosi Cabriofix Easyfix E4 04443517 DRecommendation Maxi cosi Pearl Familyfix E4 043908 WARNING Do not use ISO...

Page 35: ...t NOTE ISOFIX and i Size are international standards for integrated anchors used in passenger vehicles to attach child safety seats WARNING Do not use ISOFIX i Size anchors with child restraint system or booster seats that have an integral safety belt where the combined weight of the child plus the child restraint system exceeds 33 kg Installing Seat Belt Retained Child Seats First make sure that ...

Page 36: ...efully read and follow the instructions provided by the manufacturer of the child restraint system These instructions describe how to slide the child restraint system onto the seat s anchor bars until you hear it click into place You may need to push the child restraint system firmly against the seat back to ensure it fits snugly Adjust until the child restraint system is fitted firmly against the...

Page 37: ...ined weight of the child plus the child restraint system exceeds 33 kg Attaching Upper Tether Straps If an upper tether strap is provided attach its hook to the anchor point located on the back of the rear seats NOTE The location of anchor points may not be readily visible but can be found by identifying a slice in the seat s material WARNING Tighten upper tether straps according to the instructio...

Page 38: ... use a forward facing child safety seat until your child weighs over 9 kg and can sit independently Up to the age of two a child s spine and neck are not sufficiently developed to avoid injury in a frontal impact WARNING Do not allow a baby or infant to be held on a lap All children should be restrained in an appropriate child safety seat at all times WARNING To ensure children are safely seated f...

Page 39: ...ld unattended even if the child is secured in a child safety seat WARNING Never use a child safety seat that has been involved in a collision Have the seat inspected or replaced as described in the child safety seat manufacturer s instructions Child Safety Seats 37 Seating and Safety Restraints ...

Page 40: ...aint at those seating positions All occupants including the driver should always wear their seat belts whether or not an airbag is also provided at their seating position to minimize the risk of severe injury or death in the event of a crash NOTE On RHD Right Hand Drive vehicles the locations of the passenger and driver airbags are reversed 1 Passenger front airbag 2 Driver s front airbag 3 Side a...

Page 41: ...o and the pelvis They inflate only if a severe side impact occurs Side airbags on the non impacted side of the vehicle do not inflate Curtain airbags Curtain airbags help protect the head Curtain airbags on both the impacted and non impacted side of the vehicle will inflate only if a severe side impact occurs or if the vehicle rolls over Passenger Front Airbag Status The status of the passenger fr...

Page 42: ...gh voltage is disabled To restore high voltage power use the touchscreen to manually power off Model S see Powering Off on page 51 then press the brake to power it back on again Airbag Warning Indicator The airbag indicator on the instrument cluster remains lit if the airbag system is malfunctioning The only time this indicator should light up is briefly when Model S first powers up in which case ...

Page 43: ...n an occupant s torso and the side of Model S WARNING Passengers shouldn t lean their heads against doors Doing so can cause injury if a curtain airbag inflates WARNING Do not allow passengers to obstruct the operation of an airbag by placing feet knees or any other part of the body on or near an airbag WARNING Do not attach or place objects on or near the front airbags the side of the front seats...

Page 44: ... feature Also in cases where the vehicle is equipped with driver profiles some features may not be automatically saved and adjusted based on the driver profile for example mirror position NOTE To stop automatic adjustments that are in process based on a driver s profile touch Stop on the Driver Profile dropdown menu Automatic adjustments also stop if you manually adjust a seat mirror or the steeri...

Page 45: ...and glovebox are locked Home and Work locations are not available in the navigation system Voice commands are disabled Autopilot convenience features are disabled Most status bar functions are disabled The Mobile Access setting is disabled HomeLink if applicable in your market region is not accessible Driver Profiles are not accessible Wi Fi and Bluetooth are disabled When Model S is in Valet mode...

Page 46: ...en enter your 4 digit PIN When you cancel Valet mode all settings associated with the most recently used driver profile and climate control settings are restored and all features are available NOTE You do not need to enter a PIN to cancel Valet mode from the mobile app Driver Profiles 44 MODEL S OWNER S MANUAL ...

Page 47: ...ng Wheel Buttons Use the buttons on the left side of the steering wheel to change radio stations control the media player s volume and to choose what displays on the left side of the instrument panel whenever the Navigation app is not displaying instructions 1 Next If you are listening to local or satellite radio and you have defined more than one radio preset press to play the next preset in the ...

Page 48: ... what displays on the right side of the instrument panel to adjust Model S features and to use voice commands NOTE Whenever you receive or make a phone call the right side of the instrument panel automatically displays call options to help you easily handle phone calls on your Bluetooth connected phone 1 Press to use a voice command to call a contact navigate or listen to Internet music When you h...

Page 49: ...the voice button again or simply wait NOTE Voice commands may be spoken in English French German Italian Dutch Spanish Norwegian Danish or Swedish To call a contact on your Bluetooth connected phone say Call or Dial followed by the contact s first and or last name s For example Call Joe or Call Joe Smith To search for or navigate to a location say Where is Drive to or Navigate to followed by an ad...

Page 50: ...ee Climate Controls on page 133 When turned on radiant heat keeps the steering wheel at a comfortable temperature NOTE Depending on date of manufacture your Model S may not include a heated steering wheel even when equipped with the optional cold weather package Horn To sound the horn press the center pad on the steering wheel Steering Wheel 48 MODEL S OWNER S MANUAL ...

Page 51: ...ide mirrors In addition mirror adjustments may not be saved to your driver profile NOTE See Cold Weather Best Practices on page 87 for information to ensure your mirrors function properly in cold weather Auto Fold Mirrors Based on Location Model S can automatically fold and unfold the side mirrors based on location which saves you from having to manually position them each time you need to fold or...

Page 52: ...e on or off using the touchscreen Touch Controls Vehicle Mirror Auto Tilt NOTE Depending on date of manufacture and options selected at time of purchase some Model S vehicles are not equipped with Mirror Auto Tilt Rear View Mirror The rear view mirror is adjusted manually When in the Drive or Neutral gear the rear view mirror automatically dims in low lighting conditions for example when driving a...

Page 53: ...a low battery in the key interference from other devices using radio signals and objects between the key and receiver Always keep the key with you After driving the key is needed to restart Model S after it powers off And when you leave Model S you must bring the key with you to lock Model S either manually or automatically Powering Off When you finish driving shift into Park by pressing the butto...

Page 54: ...screen using the scroll buttons does not power Model S off and on Power Cycling the Vehicle If your vehicle demonstrates unusual behavior or a nondescript alert is present you can try power cycling the vehicle to potentially resolve the issue 1 Shift into Park 2 On the touchscreen touch Controls Safety Security Power Off 3 Wait for at least two minutes without interacting with the vehicle Do not o...

Page 55: ...lied Model S automatically shifts into Park whenever you connect a charge cable or if two or more of the following conditions are met simultaneously while traveling slower than approximately 2 km h The driver s seat belt is unbuckled The occupancy sensor in the driver s seat does not detect an occupant The driver s door is opened NOTE The above conditions do not reflect a comprehensive list of rea...

Page 56: ...ntrols Service Tow Mode Model S beeps and shifts into Neutral which releases the parking brake When Tow mode is active Model S displays this indicator light on the instrument panel along with a message telling you that Model S will roll freely NOTE In Tow mode Model S does not shift into a driving gear To cancel Tow mode shift into Park or touch Tow mode again Tow mode also cancels if you use the ...

Page 57: ... time you drive If daytime running lights are required in your region the exterior lights used for this purpose are always on when Drive gear is engaged PARKING Only the side marker lights parking lights tail lights and license plate lights turn on NOTE If daytime running lights are required in your region the exterior lights used for this purpose are always on whenever a driving gear Drive or Rev...

Page 58: ...0 minutes 4 If you turn on AMBIENT LIGHTS interior ambient lights turn on whenever the headlights are on 5 If you turn on Auto High Beam only available on Model S equipped with Autopilot components your vehicle automatically switches from high beam headlights to low beam headlights when there is light detected in front of Model S See High Beam Headlights on page 57 6 If you turn on Headlights afte...

Page 59: ... off because Auto High Beam is on and is detecting light in front of Model S When light is no longer detected the high beams will automatically turn back on WARNING Auto High Beam is an aid only and is subject to limitations It is the driver s responsibility to make sure that the headlights are always adjusted as appropriate for the weather conditions and driving circumstances Headlights After Exi...

Page 60: ...up or down The turn signals stop operating when canceled by the steering wheel or when you return the lever to the central position The corresponding turn signal indicator lights up on the instrument panel when a turn signal is operating You also hear a clicking sound WARNING If you have purchased an optional Autopilot package and Traffic Aware Cruise Control is active engaging a turn signal can c...

Page 61: ...or light fails to turn on or off contact Tesla NOTE The following illustration is provided for demonstration purposes only Depending on vehicle options software version and market region the information displayed may be slightly different The following indicators illuminate on the instrument panel to advise you or alert you of a specific condition Indicator Description Low beam headlights are on H...

Page 62: ...dlights on page 57 Parking lights side marker lights tail lights and license plate lights are on See Lights on page 55 Front fog lights if equipped See Lights on page 55 Rear fog lights if equipped See Lights on page 55 Adaptive Front Lighting if equipped See Adaptive Front Lighting System AFS on page 57 Electronic stability control systems are actively minimizing wheel spin by controlling brake p...

Page 63: ...lt is detected or the brake fluid level is low See Braking and Stopping on page 68 Contact Tesla immediately Airbag safety If this red indicator does not flash on briefly when Model S prepares to drive or if it remains on contact Tesla immediately See Airbags on page 38 An ABS Anti lock Braking System fault is detected See Braking and Stopping on page 68 Contact Tesla immediately The parking brake...

Page 64: ...eat belt reminder The front passenger s air bag is turned off See Airbags on page 38 Electronic stability control systems are no longer minimizing wheel spin On a Rear Wheel Drive vehicle the traction control system has been turned off or on an All Wheel Drive vehicle Slip Start has been enabled See Traction Control on page 72 Model S is in Tow mode and can roll freely It does not automatically sh...

Page 65: ...ms are being heated or cooled Flashes green when the left turn signal is operating Both turn signal indicators flash green when the hazard warning flashers are operating Flashes green when the right turn signal is operating Both turn signal indicators flash green when the hazard warning flashers are operating Instrument Panel 63 Driving ...

Page 66: ...en you are actively navigating to a destination navigation instructions display here Use the left steering wheel buttons to change what displays on the left side of the instrument panel whenever navigation instructions are not displayed see Using Left Steering Wheel Buttons on page 45 3 Traffic Aware Cruise Control is cruising at a set speed When Traffic Aware Cruise Control is available but you h...

Page 67: ...tons to change what displays on the right side of the instrument panel whenever a phone call is not active see Using Right Steering Wheel Buttons on page 46 9 Total estimated driving distance or energy available Instead of driving distance you can display the percentage of battery energy remaining To do so touch Controls Display Energy Display NOTE When anticipating when you need to charge use ran...

Page 68: ...replace the wiper blade immediately For details on checking and replacing wiper blades see Wiper Blades and Washer Jets on page 190 CAUTION In harsh climates ensure that the wiper blades are not frozen or adhered to the windshield De icing Wipers To make wiper blades easy to access so you can remove any ice and snow shift Model S into Park turn the wipers off then use the touchscreen to move them ...

Page 69: ...de icers that turn on whenever the ambient temperature nears freezing or when you turn on the heated wipers see Climate Controls on page 133 The washer de icers turn off when the heated wipers turn off after 15 minutes provided the temperature is warm enough to prevent freezing Wipers and Washers 67 Driving ...

Page 70: ...tain firm pressure even on low traction surfaces The ABS varies the braking pressure to each wheel according to the amount of traction available This prevents wheels from locking and ensures that you stop as safely as possible WARNING Do not pump the brake pedal Doing so interrupts operation of the ABS and can increase braking distance WARNING Always maintain a safe distance from the vehicle in fr...

Page 71: ... increase driving range Of course this is no substitute for regular braking when needed for safety NOTE If regenerative braking is aggressively slowing Model S such as when your foot is completely off the accelerator pedal at highway speeds the brake lights turn on to alert others that you are slowing down WARNING In snowy or icy conditions Model S may experience traction loss during regenerative ...

Page 72: ... the accelerator and brake pedals See Vehicle Hold on page 75 WARNING Never rely on HOLD to adequately decelerate or fully stop your vehicle Many factors can contribute to a longer stopping distance including downward slopes the low regenerative braking setting and reduced or limited regenerative braking see Regenerative Braking on page 69 Always be prepared to use the brake pedal to adequately de...

Page 73: ... was previously in Park it shifts into Neutral When you use the touchscreen to manually apply the parking brake the red parking brake indicator lights up on the instrument panel If the parking brake experiences an electrical issue the amber parking brake indicator lights up and a fault message displays at the top of the instrument panel CAUTION In the unlikely event that Model S loses electrical p...

Page 74: ...the wheels to spin at a limited speed you can enable Slip Start Slip Start can be enabled only when Model S is moving 48 km h or slower Slip Start automatically disables when the speed exceeds 80 km h Under normal conditions Slip Start should not be enabled Enable it only in circumstances where you deliberately want the wheels to spin such as Starting on a loose surface such as gravel or snow Driv...

Page 75: ...ns bicyclists animals or objects that are moving protruding located too far above or below the sensors or too close or too far from the sensors Park Assist is for guidance purposes only and is not intended to replace your own direct visual checks It is not a substitute for careful driving Visual and Audio Feedback When you shift to Reverse the Park Assist view displays on the left side of the inst...

Page 76: ...r objects that are detected such as curbs or low barriers can move into the blind spot of the sensors Model S cannot alert you about an object while it is in the blind spot of the sensors Weather conditions heavy rain snow or fog are interfering with sensor operation The object is thin such as a sign post A sensor s operating range has been exceeded The object is sound absorbing or soft such as po...

Page 77: ...lays on the instrument panel whenever Vehicle Hold is actively braking Model S To disengage Vehicle Hold press the accelerator pedal or press and release the brake pedal NOTE Shifting into Neutral also disengages Vehicle Hold NOTE After actively braking Model S for approximately ten minutes Model S shifts into Park and Vehicle Hold cancels Model S also shifts into Park if it detects that the drive...

Page 78: ...heel Drive Model S also features Launch Mode to provide optimum acceleration on surfaces with good traction For the specific driving instructions required to use Launch Mode see Launch Mode on page 77 To choose an acceleration mode touch Controls Driving Acceleration Using Insane or Ludicrous If you choose Insane or Ludicrous additional power is available immediately However to achieve the absolut...

Page 79: ...opriate locations where there is no cross traffic or pedestrians present Launch Mode is designed for use on closed circuit driving courses It is the driver s responsibility to ensure that driving style and acceleration do not endanger or inconvenience other road users To Activate Launch Mode 1 Ensure the brakes are slightly warm by driving for a few minutes and using the brakes a few times 2 Set t...

Page 80: ...e serviced whenever Active Hood has been deployed WARNING Deployment of Active Hood may cause the raised hood to partially obstruct driver vision increasing the risk of a collision If safe to do so Model S can be driven to the nearest Tesla Service Center or Tesla approved body shop If unsafe to drive you cannot clearly see over the raised hood the hood latch has been damaged etc you must have you...

Page 81: ...e enter a new name for the trip then press Save To reset a particular trip meter touch its associated Reset button You can display information for up to three trips on the instrument panel Use the checkboxes to specify the trip s you want to display Then use the scroll bar on the steering wheel to display the chosen trip s see Using Left Steering Wheel Buttons on page 45 or Using Right Steering Wh...

Page 82: ...sure the cabin is at a comfortable temperature and windows are defrosted if needed before your drive Use the mobile app to precondition your vehicle by touching Climate Turn On Climate and customizing your preferences see Mobile App on page 165 Turn on Range Mode see Range Mode on page 81 Features such as Sentry Mode Headlights After Exit and Cabin Overheat Protection can impact range Disable feat...

Page 83: ...d while navigating to a destination You can track actual usage against the initial prediction The green line represents the actual usage whereas the gray line represents predicted usage To change the zoom level touch the zoom icon located in the top right corner of the chart NOTE The Trip chart displays energy usage only if you are currently navigating to a destination Range Mode Range Mode conser...

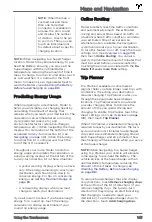
Page 84: ...hin range When you select a charging location from the list Model S provides navigation instructions and the turn by turn direction list displays the predicted amount of energy that will remain when you arrive at the charging destination Trip Planner if equipped routes you through Supercharger locations to minimize the amount of time you spend charging and driving To enable enter an address in the...

Page 85: ...tentially cause damage or injury In addition several external factors can reduce the performance of the camera including a dirty or obstructed lens Therefore depending on the rear view camera to determine if Model S is approaching an obstruction can result in damage to the vehicle and or objects and can potentially cause serious injury Always inspect the area with your own eyes When reversing perf...

Page 86: ...h drive into one of the front USB ports USB Flash Drive Requirements for Videos and Recording To store video from your vehicle s cameras follow these requirements and guidelines for using flash drives The flash drive must have a sustained write speed of at least 4 MB s A sustained write speed is different from the peak write speed Check the product details of your flash drive for more information ...

Page 87: ...der A folder appears in your flash drive space 8 Right click on the folder select Rename and name the folder to TeslaCam without quotation marks Click Save This folder will contain all recent and saved clips from Sentry Mode and Dashcam 9 Properly eject the USB flash drive For Windows 1 Insert the USB flash drive into your personal computer 2 Navigate to File Explorer 3 Right click on your USB fla...

Page 88: ...y move saved videos to another device and delete them from the flash drive You can also review Dashcam and Sentry Mode video recordings on your vehicle s touchscreen by touching the Dashcam icon and selecting Launch Viewer Each video organized by timestamp provides footage of a saved event from each camera Touch the thumbnail of any camera to enlarge the video Pause rewind fast forward and delete ...

Page 89: ...vice appointment where Tesla can provide hydrophobic coating to your windows for a nominal fee Mirrors If ice buildup is expected when parking turn off Auto Fold Mirrors by navigating to Controls Vehicle Mirror Auto Fold ON Ice can prevent exterior side mirrors from folding or unfolding NOTE The side mirrors automatically heat as needed during preconditioning or if the rear defroster is activated ...

Page 90: ...ge 89 After Driving Leave Model S plugged in when not in use This uses the charging system rather than the Battery itself to keep your Battery warm see Battery Information on page 170 Scheduled Departure When parked plug in Model S and set a time at which you want your vehicle to be ready to drive Your vehicle determines the appropriate time to begin charging so that charging is complete and the c...

Page 91: ...ndshield above the rear view mirror 5 A camera is mounted to each front fender 6 Radar is mounted behind the front bumper Model S is also equipped with high precision electronically assisted braking and steering systems NOTE Ensure all cameras and sensors are clean before each drive See Cleaning Cameras and Sensors on page 91 for more information Unclean cameras and sensors as well as environmenta...

Page 92: ...anel Calibration typically completes after driving 32 40 km but the distance varies depending on road and environmental conditions Driving on a straight road with highly visible lane lines allows Model S to calibrate quicker When calibration is complete the Autopilot features are available for use Contact Tesla only if your Model S has not completed the calibration process after driving 160 km NOT...

Page 93: ...ccasionally remove any buildup of dirt by wiping the components with a soft cloth dampened with warm water Condensation can form inside the camera enclosures especially if you park your vehicle outside in cold or wet conditions The instrument cluster may display an alert stating that a camera is blocked and that some or all Autopilot features may be temporarily restricted until the camera vision i...

Page 94: ...equately slow down Model S Always watch the road in front of you and be prepared to take corrective action at all times Failure to do so can result in serious injury or death WARNING Although Traffic Aware Cruise Control is capable of detecting pedestrians and cyclists never depend on Traffic Aware Cruise Control to adequately slow Model S down for them Always watch the road in front of you and be...

Page 95: ...t speed becomes your current driving speed After setting the cruising speed release the accelerator pedal to allow Traffic Aware Cruise Control to maintain your set speed When the cruising speed is set the speedometer icon on the instrument panel turns blue and displays the set speed NOTE Double pulling the cruise control lever toward you engages Autosteer assuming it has been enabled as described...

Page 96: ...ing path and a stationary or slow moving vehicle or object is in front of you Always pay attention to the road ahead and stay prepared to take immediate corrective action Depending on Traffic Aware Cruise Control to avoid a collision can result in serious injury or death In addition Traffic Aware Cruise Control may react to vehicles or objects that either do not exist or are not in the lane of tra...

Page 97: ...Cruise Control resumes operating at the set speed However under the following circumstances Traffic Aware Cruise Control goes into a HOLD state in which case you need to briefly press the accelerator pedal or pull the cruise control lever toward you see Canceling and Resuming on page 97 to resume cruising When the HOLD status is active the instrument panel displays the HOLD icon and a message that...

Page 98: ...from 1 the closest following distance to 7 the longest following distance Each setting corresponds to a time based distance that represents how long it takes for Model S from its current location to reach the location of the rear bumper of the vehicle ahead of you As you rotate the cruise control lever the instrument panel displays the current setting Release the lever when the desired setting is ...

Page 99: ...is important to be aware that your selected following distance is reduced when Overtake Acceleration is active particularly in cases where it may not be your intention to overtake the vehicle you are following Canceling and Resuming To manually cancel Traffic Aware Cruise Control briefly push the cruise control lever away from you or press the brake pedal The speedometer icon on the instrument pan...

Page 100: ...ly controlling your speed until you activate it The number shown in gray is determined by Speed Assist see Controlling Speed Assist on page 124 Traffic Aware Cruise Control is operating and is either maintaining the set speed no vehicle in front or is maintaining a chosen following distance from a vehicle ahead up to the set speed Model S has fully stopped but is in a HOLD state If safe press the ...

Page 101: ...and surrounding traffic Do not use Autosteer on city streets in construction zones or in areas where bicyclists or pedestrians may be present Never depend on Autosteer to determine an appropriate driving path Always be prepared to take immediate action Failure to follow these instructions could cause damage serious injury or death Operating Autosteer Before you can operate Autosteer you must enabl...

Page 102: ... engaged Autosteer reduces your driving speed and limits the set speed to 70 km h Although you can manually accelerate to exceed the limited speed Model S may not brake for detected obstacles Autosteer slows down to the limited speed when you release the accelerator pedal When you leave the road or disengage Autosteer by using the steering wheel you can increase your set speed again if desired Hol...

Page 103: ... change is safe and appropriate Therefore before initiating a lane change always check blind spots lane markings and the surrounding roadway to confirm it is safe and appropriate to move into the target lane WARNING Never depend on Auto Lane Change to determine an appropriate driving path Drive attentively by watching the road and traffic ahead of you checking the surrounding area and monitoring t...

Page 104: ... over steering at any time As you are crossing over into the adjacent lane the instrument panel displays the lane marking as a dashed blue line Once in your new lane lane markings are displayed as solid blue lines again In situations where Auto Lane Change is unable to operate at optimal performance or cannot operate due to inadequate data the instrument panel displays a series of warnings Therefo...

Page 105: ...an impair the operation of Autosteer Always keep this in mind and remember that as a result Autosteer may not assist in steering Model S appropriately Always drive attentively and be prepared to take immediate action Autosteer 103 Autopilot ...

Page 106: ... prepare for an upcoming off ramp whereas speed based lane changes are designed to maintain a driving speed not to exceed your cruising speed that allows you to minimize the time it takes to reach your destination for example moving into an adjacent lane to pass a vehicle in front of you Speed based lanes changes are optional You can use this setting to disable speed based lane changes or to speci...

Page 107: ...Lanes setting is appropriate for your circumstances see Maps and Navigation on page 139 If the setting is off Navigate on Autopilot never uses an HOV lane regardless of time of day If the setting is on Navigate on Autopilot will always include the use of the HOV lane whenever it exists WARNING Even when Navigate on Autopilot deactivates at off ramps Autosteer remains active Always be prepared to t...

Page 108: ...empt to exit at an off ramp or change lanes even when an exit or lane change is determined by the navigation route Always remain alert and be prepared to manually steer onto an off ramp or make a lane change to prepare for or to exit at an off ramp or interchange Be Ready to Assist When attempting to change lanes or maneuver Model S or when approaching construction zones Navigate on Autopilot may ...

Page 109: ...ce is appropriate and safe If so pull forward and stop approximately a car length ahead of the parking space as you normally would when parallel parking or when backing into a perpendicular parking space 3 Release the steering wheel shift Model S into Reverse then touch Start Autopark on the touchscreen 4 When parking is complete Autopark displays the Complete message In situations where Autopark ...

Page 110: ...s designed to operate on flat roads only Visibility is poor due to heavy rain snow fog etc The curb is constructed of material other than stone or the curb cannot be detected The target parking space is directly adjacent to a wall or pillar for example the last parking space of a row in an underground parking structure One or more of the ultrasonic sensors is damaged dirty or obstructed such as by...

Page 111: ... just a few inches of a garage wall Note that this distance applies only to objects that Summon detects directly in front of Model S when moving forward or directly behind Model S when reversing Summon Distance Set a maximum distance that Model S can travel when entering or exiting a parking space Side Clearance Choose an option to specify how much side clearance you want to allow Tight allows Mod...

Page 112: ...E You can also initiate the parking maneuver from inside the vehicle see Starting Summon Before Exiting the Vehicle on page 111 Summon shifts Model S into Drive or Reverse based on the direction you specified and drives into or out of the parking space When parking is complete or if an obstacle is detected Summon shifts Model S into Park Summon shifts Model S into Park when Model S detects an obst...

Page 113: ... forward into the parking space or press the Rear Trunk button to reverse Model S into the parking space Starting Summon Before Exiting the Vehicle To start a Summon parking sequence before exiting Model S 1 On the touchscreen ensure that Require Continuous Press is disabled touch Controls Autopilot Summon Require Continuous Press NO 2 Close all doors and trunks 3 With Model S powered on and the P...

Page 114: ...with sensor operation The sensors are affected by other electrical equipment or devices that generate ultrasonic waves NOTE Summon is disabled if Model S is in Valet mode see Valet Mode on page 43 WARNING The list above does not represent an exhaustive list of situations that may interfere with proper operation of Summon It is the driver s responsibility to remain in control of Model S at all time...

Page 115: ... Smart Summon does not recognize the direction of traffic does not navigate around empty parking spaces and may not anticipate crossing traffic WARNING Smart Summon s performance depends on the ultrasonic sensors the visibility of the cameras and the availability of an adequate cellular signal and GPS data WARNING When using Smart Summon you must maintain a clear line of sight between you and Mode...

Page 116: ...ximity of 6 meters between your phone and Model S is exceeded if moving Model S to a destination away from you you may need to follow the car to maintain this distance The driving path is blocked Model S has moved the maximum distance of 20 meters since the start of the Smart Summon session NOTE If Smart Summon moves Model S forward three meters and then backwards two meters this is considered fiv...

Page 117: ...d when the car stops Smart Summon cancels and requires you to restart it when You press any button on the key A door handle is engaged or a door is opened You interact with the steering wheel brake pedal accelerator pedal or gear stalk Model S is blocked by an obstacle Smart Summon has moved Model S the maximum distance of approximately 20 meters within a 6 meter radius of the phone s location To ...

Page 118: ...of Smart Summon It is the driver s responsibility to remain in control of Model S at all times Pay close attention whenever Smart Summon is actively moving Model S and stay prepared to take immediate action Failure to do so can result in serious property damage injury or death Smart Summon 116 MODEL S OWNER S MANUAL ...

Page 119: ...sist features are for guidance purposes only and are not intended to replace your own direct visual checks Before changing lanes always visually check the lane you are moving into by using side mirrors and performing the appropriate shoulder checks WARNING Never depend on Lane Assist to inform you of unintentionally driving outside of the driving lane or informing you that a vehicle is in your bli...

Page 120: ...lot Emergency Lane Departure Avoidance This feature automatically turns on at the start of every drive Blind Spot Collision Warning Chime If you want a chime to sound when a vehicle is in your blind spot and possible collision is detected touch Controls Autopilot Blind Spot Collision Warning Chime WARNING Blind Spot Collision Warning Chime cannot detect every collision It is the driver s responsib...

Page 121: ...rom oncoming headlights or direct sunlight is interfering with the view of the camera s You are drifting into another lane but an object such as a vehicle is not present A vehicle in another lane cuts in front of you or drifts into your driving lane Model S is traveling less than 48 km h or over 145 km h One or more of the ultrasonic sensors is damaged dirty or obstructed such as by mud ice or sno...

Page 122: ...s it can minimize the impact of a frontal collision by attempting to reduce your driving speed Depending on Automatic Emergency Braking to avoid a collision can result in serious injury or death WARNING Obstacle Aware Acceleration is not designed to prevent a collision In certain situations it can minimize the impact of a collision Depending on Obstacle Aware Acceleration to avoid a collision can ...

Page 123: ...g is designed to apply the brakes to reduce the severity of the impact When Automatic Emergency Braking applies the brakes the instrument panel displays a visual warning and sounds a chime You may also notice abrupt downward movement of the brake pedal The brake lights turn on to alert other road users that you are slowing down If driving 56 km h or faster the brakes are released after Automatic E...

Page 124: ...ration is designed to operate only when all of these conditions are simultaneously met A driving gear is engaged Drive or Reverse Model S is stopped or traveling less than 10 mph 16 km h Model S detects an object in its immediate driving path To disable Obstacle Aware Acceleration touch Controls Autopilot Obstacle Aware Acceleration WARNING Obstacle Aware Acceleration is designed to reduce the sev...

Page 125: ...ay interfere with proper operation of Collision Avoidance Assist features These features may fail to provide their intended function for many other reasons It is the driver s responsibility to avoid collisions by staying alert paying attention and taking corrective action as early as possible CAUTION If a fault occurs with a Collision Avoidance Assist feature Model S displays an alert Contact Tesl...

Page 126: ...124 and exceed the determined speed limit the speed limit sign on the instrument panel increases in size and Model S also sounds a warning chime NOTE Speed limit warnings go away after ten seconds or when Model S slows down below the specified limit WARNING Do not rely on Speed Assist to determine the appropriate speed limit or driving speed Always drive at a safe speed based on traffic and road c...

Page 127: ...snow fog etc Bright light such as from oncoming headlights or direct sunlight is interfering with the view of the camera s Model S is being driven very close to a vehicle in front of it which is blocking the view of the camera s The windshield is obstructing the view of the camera s fogged over dirty covered by a sticker etc Speed limit signs are concealed by objects The speed limits stored in the...

Page 128: ...ket region the options available may be different Summary of Controls 1 List of available controls When you select an item from this list its associated controls display in the main viewing area Touch Manual below the list of tabs to display this owner s manual 2 Main viewing area The options available for the item you chose from the list of control tabs display here and are described in this sect...

Page 129: ...u must engage Jack Mode to disable self leveling see Instructions for Transporters on page 213 and Jacking and Lifting on page 195 Lights Use these settings to control exterior and interior lights Exterior light controls Exterior Lights Front Fog and Rear Fog are also available on the Quick Controls tab and are described in the previous topic For detailed information on lights see Lights on page 5...

Page 130: ...to steering feature available only if your vehicle is equipped with an Autopilot package see Autosteer on page 99 Navigate on Autopilot Beta Navigate on Autopilot automatically exits at off ramps and interchanges based on your navigation route and can also make lane changes designed to prepare for exits and minimize the driving time to your destination available only if your vehicle is equipped wi...

Page 131: ...vehicle carrying your key with you see Walk Away Locking on page 12 Lock Confirmation Sound You can set Model S to sound a soft horn when your car locks or unlocks see Keyless Locking and Unlocking on page 9 Unlock on Park If on doors automatically unlock when you engage the Park gear see Interior Locking and Unlocking on page 11 If Driver Door Unlock Mode is on only the driver s door unlocks Disp...

Page 132: ...omatic Navigation on page 141 Trip Planner If available in your market region Use trip planner to plan your driving and charging routes see Trip Planner on page 143 Online Routing When selected you may be automatically rerouted to avoid heavy traffic see Online Routing on page 143 Avoid Ferries When toggled on navigation routes avoid the use of ferries Avoid Tolls When toggled on navigation routes...

Page 133: ...he temperature of the cabin in extremely hot ambient conditions for a period of up to twelve hours after you exit Model S see Cabin Overheat Protection on page 137 Operates only when the energy remaining in the Battery is above 20 Allow Mobile Access Allow Tesla s mobile applications to access your Model S see Mobile App on page 165 NOTE To disable Allow Mobile Access enter your Tesla account cred...

Page 134: ... approximately 3 mph 5 km h of the selected maximum speed a chime sounds and text appears on the instrument panel above the driving speed Additionally your mobile app sends you a notification To enable Speed Limit Mode 1 Ensure the vehicle is in Park 2 Touch Controls Safety Security Speed Limit Mode on the touchscreen or CONTROLS in your mobile app 3 Select the maximum driving speed that you would...

Page 135: ... seats a popup appears that allows you to switch between heating and cooling When cooling the twisting lines turn blue NOTE If Model S is equipped with rear seat heaters and or the optional subzero weather package you can also control seat heaters in the rear seats heated wipers and heated steering wheel by touching the fan icon then touching the seat tab 2 Touch an up or down arrow to change the ...

Page 136: ...ss individual climate control settings In addition to the settings shown if Model S is in Park the Keep Climate On Dog Mode and Camp Mode setting displays when you touch the fan icon when the vehicle is in Park see Keep Climate On Dog Mode and Camp Mode on page 136 1 Adjust the speed of the fan NOTE Adjusting the fan speed may change your setting for how air is drawn into Model S in order to decre...

Page 137: ...ve pressure inside the cabin minimizes the amount of outside air that can leak into the vehicle NOTE Some gases such as carbon monoxide are not effectively removed by activated carbon 6 Choose how air is drawn into Model S Outside air is drawn into Model S see Ventilation on page 136 Although less efficient than recirculating the air in very hot or cold climate conditions this setting draws more a...

Page 138: ...heck on anything that you have left in Model S The next time you drive Model S the climate control system continues operating using the previous climate settings from your most recent trip NOTE Software updates cannot be performed when Keep Climate On Dog Mode or Camp Mode is active NOTE The intrusion sensor if equipped automatically disables when Keep Climate On Dog Mode or Camp Mode is active Ho...

Page 139: ...hen you use the mobile app to turn on the climate control system it automatically turns off after four hours or if the charge level drops to 20 To cool or heat the cabin for a longer period you must turn it on again To conserve energy turn on Range Mode to limit the power of the climate control system touch Controls Driving Range Mode Cabin heating and cooling may be less effective but you can use...

Page 140: ...oduced by the dehumidifying process is drained underneath To reduce the temperature in the cabin in hot weather conditions the fan may turn on to vent the cabin when the vehicle is parked This occurs only if the battery s charge level is above 20 Climate Controls 138 MODEL S OWNER S MANUAL ...

Page 141: ...ns to customize what the map displays and to access navigation settings NOTE These icons disappear after a few seconds when not in use Touch anywhere on the map to re display them Display hide satellite imagery if equipped with premium connectivity Display hide traffic conditions if equipped with premium connectivity Green lines indicate no traffic orange lines indicate light traffic red lines ind...

Page 142: ...tions on page 144 Navigating To navigate to a location touch Navigate send the destination from your phone or speak a voice command see Using Voice Commands on page 47 You can enter or speak an address landmark business etc You can also choose a saved Home or Work location and select from a list of recently used locations the most recent displays at the top of the list including charging stations ...

Page 143: ... spoken A volume control specific to navigation instructions is also available by touching the settings icon on the map see Overview on page 139 To stop navigating touch CANCEL located below the turn by turn direction list NOTE If a data connection is not available onboard maps allow you to navigate to any location but you must enter the location s exact and complete address Automatic Navigation A...

Page 144: ... out of order in addition to the number available are also displayed NOTE A Supercharger pin is colored black if located on your current navigation route The Supercharger location may be out of operation or is operating at a reduced capacity Touch the pin to display details When you touch the pin for a Supercharger location a popup displays information including the total number of Superchargers t...

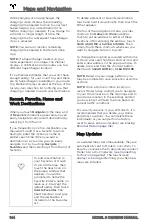
Page 145: ...Online Routing Model S detects real time traffic conditions and automatically adjusts the estimated driving and arrival times based on traffic In situations where traffic conditions will delay your estimated time of arrival and an alternate route is available the navigation system can reroute you to your destination To turn this feature on or off touch the map s settings icon see Overview on page ...

Page 146: ...e the Favorite Enter a name or leave as is to accept the default name then touch Add to Favorites The heart becomes solid gray and the destination is included on the Favorites list To delete a Recent or Favorite destination touch and hold it down briefly then touch the X that appears The top of the navigation list also provides shortcuts for Home and Work locations Touch to set an address to eithe...

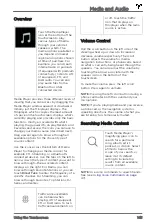
Page 147: ...ough Favorite Stations or you can touch Direct Tune to enter the frequency of a specific channel For Streaming you can browse through Favorites Top Stations DJ Series and Genres Traffic announcements can be heard when playing AM if equipped FM or DAB radio To turn traffic announcements on or off touch the traffic icon that displays on Miniplayer when the radio source is active Volume Control Roll ...

Page 148: ...return to the main browse page You can also use voice commands to play a specific song artist or album from an Internet radio service see Using Voice Commands on page 47 When listening to internet radio or a music streaming service the options available on Miniplayer can vary depending on what you are listening to Touch the next or previous arrows to play the next and in some cases previous availa...

Page 149: ...player or use the buttons on the left side of the steering wheel see Using Left Steering Wheel Buttons on page 45 You can also shuffle tracks in a playlist or repeat a playlist or track using the shuffle repeat icons if available USB Connected Flash Drives Connect a flash drive to a front USB connection see USB Ports on page 20 Touch Media Player USB and then touch the name of the folder that cont...

Page 150: ...d on your vehicle s manufacture date features and market region For example your vehicle may be equipped with options that you can turn on or off such as Dolby Surround and DJ Commentary To adjust any of the five frequency bands Bass Bass Mid Mid Mid Treble and Treble drag the corresponding slider up or down the decibel dB bar To adjust balance touch Balance and drag the center circle of the cross...

Page 151: ... on the top of the touchscreen 4 On the touchscreen touch Add New Device Start Search The touchscreen displays a list of all available Bluetooth devices within operating distance 5 On the touchscreen touch the phone with which you want to pair Within a few seconds the touchscreen displays a randomly generated number and your phone should display the same number 6 Check that the number displayed on...

Page 152: ...e list displays calls in chronological order with the most recent call listed first You can display all calls or just those that are missed incoming or outgoing Contacts Contacts are listed in alphabetical order and can be sorted by first name or last name You can also choose a letter on the right side of the list to quickly scroll to the names that begin with the selected character When you touch...

Page 153: ...ant to use for the incoming call WARNING Stay focused on the road at all times while driving Using or programming a phone while driving even with Bluetooth enabled can result in serious injury or death WARNING Follow all applicable laws regarding the use of phones while driving including but not limited to laws that prohibit texting and require hands free operation at all times In Call Options Whe...

Page 154: ...Low based on the Suspension Lowering setting described below when driving speed reaches 73 km h STANDARD The Standard setting ensures optimum comfort and handling under all loading conditions LOW Lowering the height can improve aerodynamics and make it easier to load or unload cargo and passengers When manually raising the height of Model S to improve ground clearance you should lower the vehicle ...

Page 155: ... location and driving faster than the High and Very High suspension settings allow the suspension does not raise until Model S slows down NOTE After leaving a saved location the suspension may not lower until you are driving faster than the speed threshold at which the suspension lowers NOTE If Model S reaches a saved location and the existing suspension setting is already higher than the level th...

Page 156: ...for the Show Calendar Upon Entry setting If a calendar event includes an address a navigation arrow displays to indicate that you can touch the address to navigate to the event s location if equipped with Navigation When an event on your Calendar takes place within the next hour and has a uniquely specified address the touchscreen notifies you if there is a better route due to traffic even when yo...

Page 157: ...ontrols Safety Security PIN to Drive and follow the on screen prompts to create a driving PIN NOTE When enabled in addition to entering the 4 digit driving PIN to drive you must also use it to enter Valet mode for the first time and create the 4 digit valet PIN that you can use to enter and exit Valet mode When in Valet mode Model S can be driven without the need for the valet to enter a driving P...

Page 158: ...le Location Based Settings You can customize Sentry Mode to automatically activate at specific locations where you park Model S Exclude Home When on Sentry Mode does not automatically activate at the location you set as Home in your Favorites list see Recent Favorite Home and Work Destinations on page 144 but activates at any other parking location NOTE To set up your Home location touch Navigate ...

Page 159: ...our operating system For MacOS 1 Insert the USB flash drive into your personal computer 2 Navigate to Utilities Disk Utility or conduct a Spotlight Search 3 Select your flash drive in the left menu 4 Navigate to Erase in the top menu ribbon 5 In the pop up menu select the correct format MS DOS FAT and click Erase NOTE Selecting Erase removes all existing content from your flash drive If you have c...

Page 160: ...d labeled with a unique timestamp NOTE As the USB flash drive runs out of available space the oldest footage in Sentry Clips is deleted to make room for new footage Once deleted you will be unable to retrieve them When the flash drive is full Sentry Mode and Dashcam can no longer save video footage To prevent the flash drive from getting full you must regularly move saved videos to another device ...

Page 161: ...homelink com or call 1 800 355 3515 Each of your devices can be set to a different mode For example your garage door can be set to Standard Mode your front gate can be set to D Mode etc To change a transmit mode touch the HomeLink icon on the touchscreen s status bar and select the device you want to change Then select Program and choose the desired mode for your device Confirm by touching Set Mod...

Page 162: ...e that is set to operate automatically the HomeLink status icon displays a count down message to let you know when the device will automatically open or close In situations where you don t want the device to automatically open or close touch Skip Auto Open or Skip Auto Close at any time during the count down message Resetting the Location of the HomeLink Device If you experience situations in whic...

Page 163: ...te etc that you are trying to program Make sure you are pressing the receiver s Learn Program Smart button For instructions on how to put the receiver into learning mode refer to the product details provided with your RF device that you are trying to program If you see a screen called Train the receiver while programming the device remember that this is a time sensitive step After pressing the Lea...

Page 164: ...want to use enter the password if necessary then touch Confirm 3 Your vehicle connects to the Wi Fi network and will automatically connect to it whenever the network is within range You can also connect to a hidden network that isn t shown on the list of scanned networks Just touch Wi Fi Settings enter the name of the network in the resulting dialog box select the security setting then touch Add N...

Page 165: ... see Connecting to Wi Fi on page 162 The yellow clock icon becomes a green download icon when a software update is downloading If a yellow download icon displays a software update is available but your vehicle is not connected to Wi Fi Connect your vehicle to Wi Fi to start the download Software Update Preferences You can choose how quickly and often you receive software updates To change your pre...

Page 166: ...Viewing Release Notes When a software update is complete read the release notes displayed on the touchscreen to learn about changes or new features To display release notes about the current version of your vehicle s software at any time touch the Tesla T at the top center of the touchscreen then touch Release Notes You can also view the release notes by touching Controls Software Tesla strongly r...

Page 167: ...of your vehicle if you have one View your vehicle s estimated range See which gear the vehicle is in driving park etc Enable maximum defrost to warm your vehicle in cold conditions Enable keyless driving Open the front trunk Lock or unlock your vehicle At the bottom view your vehicle s odometer VIN and firmware version it is currently running For supported video sources send videos to play in the ...

Page 168: ...es View and purchase the latest upgrades available for your vehicle such as full self driving Schedule Service Scheduling a service visit through the mobile app is easy After touching Schedule Service select the type of service needed and follow the directions in the mobile app Provide as much detail as possible such as Photos sound recordings or videos Date s time s and time zone when the issue o...

Page 169: ...ondary user already has a Tesla account use the email address associated with their existing Tesla account They can then access your Model S from the mobile app If they do not have a Tesla account a welcome email will be sent to their registered email address Once the account is created they can access your vehicle from the mobile app With mobile app access secondary users can view and control you...

Page 170: ...voltage system has no user serviceable parts Do not disassemble remove or replace high voltage components cables or connectors High voltage cables are typically colored orange for easy identification WARNING Read and follow all instructions provided on the labels that are attached to Model S These labels are there for your safety WARNING In the unlikely event that a fire occurs immediately contact...

Page 171: ...al available on the touchscreen Additional adapters can be purchased from Tesla Tesla offers adapters for example J1772 CHAdeMO and CCS Combo to allow you to plug into the most commonly used public charging stations in your region Open the charge port door using the touchscreen see Charging Instructions on page 172 plug the adapter into the charging port on Model S and then connect the station s c...

Page 172: ... may vary depending on environmental factors such as cold weather vehicle configuration and your selected settings on the touchscreen Situations can arise in which you must leave Model S unplugged for an extended period of time for example at an airport when traveling In these situations keep the 1 in mind to ensure that you leave the Battery with a sufficient charge level For example over a two w...

Page 173: ...for an extended period can also result in permanent Battery damage If you are unable to charge Model S contact Tesla immediately CAUTION The Battery requires no owner maintenance Do not remove the coolant filler cap and do not add fluid If the instrument panel warns you that the fluid level is low contact Tesla immediately CAUTION Do not use the Battery as a stationary power source Doing so voids ...

Page 174: ...ation purposes only Depending on market region your charge port may be slightly different NOTE The charge port lights up white when you open the charge port door If you do not insert a charge cable into the charge port within a few minutes after opening the charge port door the charge port door closes If this happens use the touchscreen to open the charge port door again CAUTION Do not try to forc...

Page 175: ...ally not affected by charging However under certain circumstances for example you are charging at high currents during a particularly warm day the air coming from the vents may not be as cool as expected and a message displays on the instrument panel This is normal behavior and ensures that the Battery stays within an optimum temperature range while charging to support longevity and optimum perfor...

Page 176: ...side trim CAUTION The release lever is designed for use only in situations where the charge cable cannot be released from the charge port using the usual methods Continuous use may result in damage to the release lever or charging equipment WARNING Do not perform this procedure while your vehicle is charging or if any orange high voltage conductors are exposed Failure to follow these instructions ...

Page 177: ...d market region NOTE If charging at a Tesla Supercharger and paid supercharging is potentially in effect the charging screen also displays information about your previous or current Supercharger session see Supercharger Usage Fees and Idle Fees on page 177 NOTE To reduce congestion at high usage supercharger sites you may be automatically limited to a maximum charge of 80 when not using Trip Plann...

Page 178: ...e on the next day To override this setting touch Start Charging or Stop Charging When you set a scheduled charging time Model S displays the set time on the instrument panel and touchscreen Scheduled Departure For any location such as Home you can simply plug in Model S and select a time for when you want your vehicle to be ready to drive Once your specified time is set Model S prepares itself by ...

Page 179: ...t it saves the reduced current at the charging location Although you can manually increase it Tesla recommends charging at the lower current until the underlying problem is resolved and the charging location can provide consistent power Supercharger Usage Fees and Idle Fees When charging using a Tesla supercharger SUPERCHARGING information displays at the bottom of the charging screen This informa...

Page 180: ... deposits underneath Model S that might indicate a leak It is normal for a small pool of water to form caused by the air conditioning system s dehumidifying process Look around the exterior of Model S and immediately remove any corrosive substances such as bird droppings tree resin tar spots dead insects industrial fallout etc to prevent damage to the paint see Cleaning on page 186 Monthly Checks ...

Page 181: ...lision occurs do not touch any high voltage wiring connectors or components connected to the wiring In the unlikely event that a fire occurs immediately contact your local fire emergency responders WARNING Always disconnect the charge cable before working underneath Model S even if charging is not in progress WARNING Keep your hands and clothing away from cooling fans Some fans operate even when M...

Page 182: ...ion or blowout which causes unexpected loss of vehicle control and increased risk of injury Under inflation also reduces the vehicle s range and tire tread life WARNING Check tire pressures using an accurate pressure gauge when tires are cold It takes only about 1 6 kms of driving to warm up the tires sufficiently to affect tire pressures Parking the vehicle in direct sunlight or in hot weather ca...

Page 183: ...t of wheels NOTE When replacing only two tires install the new tires on the rear if your vehicle s front and rear tires are the same size Punctured Tires A puncture eventually causes the tire to lose pressure which is why it is important to check tire pressures frequently Permanently repair or replace punctured or damaged tires as soon as possible Your tubeless tires may not leak when penetrated p...

Page 184: ... on the sidewall of your tires see Understanding Tire Markings on page 208 Asymmetric Tires Model S tires are asymmetric and must be mounted on the wheel with the correct sidewall facing outward The sidewall of the tire is marked with the word OUTSIDE When new tires are installed make sure that the tires are correctly mounted on the wheels WARNING Road holding is seriously impaired if the tires ar...

Page 185: ... the instrument panel Resetting the TPMS Sensors After replacing one or more wheels but not after replacing a tire or rotating wheels the TPMS sensors need to be reset to ensure tire pressure warnings are accurate On newer versions of Model S the TPMS sensors are reset automatically after driving over 25 km h for longer than 10 minutes But for older versions follow these steps 1 Inflate all tires ...

Page 186: ...esigned to provide adequate traction in most conditions year round but may not provide the same level of traction as winter tires in snowy or icy conditions All season tires can be identified by ALL SEASON and or M S mud and snow on the tire sidewall Winter Tires Use winter tires to increase traction in snowy or icy conditions When installing winter tires always install a complete set of four tire...

Page 187: ... suspension should remain in the STANDARD ride height setting to avoid damage CAUTION Using non recommended tire chains or using tire chains on other sized tires can damage the suspension body wheels and or brake lines Damage caused by using non recommended tire chains or incorrectly installing tire chains is not covered by the warranty CAUTION Do not use chains on a Model S equipped with 21 tires...

Page 188: ...edients that can damage exterior components Damage or discoloration resulting from cleaning products is not covered by the warranty 3 Rinse with Clean Water After washing rinse with clean water to prevent soap from drying on the surfaces 4 Dry Thoroughly and Clean Exterior Glass After washing and rinsing dry thoroughly with a chamois If necessary dry the brakes by going on a short drive and applyi...

Page 189: ...d the heating elements in the rear window Airbags Do not allow any substance to enter an airbag cover This could affect correct operation Dashboard and Plastic Surfaces Do not polish the upper surfaces of the dashboard Polished surfaces are reflective and could interfere with your driving view Leather Seats Leather is prone to dye transfer which can cause discoloration particularly on light colore...

Page 190: ...uchscreen or instrument panel WARNING If you notice any damage on an airbag or seat belt contact Tesla immediately WARNING Do not allow any water cleaners or fabric to enter a seat belt mechanism WARNING Exposure to chemical cleaners can be hazardous and can irritate eyes and skin Read and observe the instructions provided by the manufacturer of the chemical cleaner Polishing Touch Up and Body Rep...

Page 191: ...s and Accessories on page 196 Maintain floor mats by regularly cleaning them and checking that they are properly attached Replace floor mats if they become excessively worn WARNING To avoid potential interference with a foot pedal ensure that the driver s floor mat is securely fastened and never place an additional floor mat on top of it Floor mats should always rest on top of the vehicle carpetin...

Page 192: ...iper blades at least once a year NOTE Only install replacement blades that are identical to the original blades Using inappropriate blades can affect the operation of the rain sensor and damage the wiper system and windshield To replace the wiper blades 1 Shift into Park and turn off the wipers 2 Touch Controls Service Wiper Service Mode ON to move the wipers to the service position 3 Lift the wip...

Page 193: ... Do not operate the washers while cleaning Model S Windshield washer fluid can irritate eyes and skin Read and observe the washer fluid manufacturer s instructions Wiper Blades and Washer Jets 191 Maintenance ...

Page 194: ...vel can be seen by looking at the outside marks on the side of the reservoir The fluid level should be between the MIN and the MAX marks If you notice that the fluid level has dropped significantly contact Tesla before using Model S Do Not Top Up Battery Coolant WARNING Battery coolant can be hazardous and can irritate eyes and skin Under no circumstances should you remove the filler cap and or ad...

Page 195: ...rvoir 2 Unscrew the cap and remove it 3 Top up the reservoir to the MAX mark using the appropriate brake fluid 4 Replace the filler cap ensuring it is fully secured WARNING Only use new fluid from a sealed air tight container Never use previously used fluid or fluid from a previously opened container fluid absorbs moisture which decreases braking performance WARNING Brake fluid is highly toxic Kee...

Page 196: ...sistance for all climates in which you drive Model S NOTE Local regulations prohibit the use of methanol based washer fluid Use ethanol based washer fluid instead CAUTION Do not add formulated washer fluids that contain water repellent or bug wash These fluids can cause streaking smearing and squeaking or other noises WARNING In temperatures below 4 C use a washer fluid with antifreeze In cold wea...

Page 197: ...lift manufacturer s instructions NOTE Jack mode cancels when Model S is driven over 7 km h NOTE Jack mode may be unexpectedly enabled in situations where an object is supporting the vehicle s weight for example the bumper of the vehicle is resting on a curb WARNING If your Model S is equipped with air suspension it automatically self levels even when power is off You MUST disable this system by en...

Page 198: ...ifications Body Repairs If your Model S is in a collision contact Tesla or a Tesla approved Body Shop to ensure that it is repaired with genuine Tesla parts Tesla has selected and approved body shops that meet strict requirements for training equipment quality and customer satisfaction Some repair shops and insurance companies might suggest using non original equipment or salvaged parts to save mo...

Page 199: ...llar Can be seen when the front door is open On vehicles manufactured as of August 2015 the VIN is stamped on the chassis and can be seen by removing the sill panel on the front passenger door by gently prying it upward using a flat bladed tool CAUTION Removing the sill panel to view the VIN is not recommended because damage is likely to occur The panel is held in place with fragile clips that bre...

Page 200: ...ge CAUTION Never store large amounts of liquid in Model S A significant spill can cause electrical components to malfunction Tire and Loading Information Label The Tire and Loading Information label provides The maximum number of occupant seating positions The maximum vehicle capacity weight The size of the original tires The cold inflation pressures for the original front and rear tires These pre...

Page 201: ...g calculated load limit examples assume passengers weigh 68 kg If passengers weigh more or less available cargo weight decreases or increases respectively Table 1 Driver and one passenger Description Total Vehicle capacity weight 433 kg Subtract occupant weight 2 x 68 kg 136 kg Available cargo weight 297 kg Table 2 Driver and four passengers Description Total Vehicle capacity weight 433 kg Subtrac...

Page 202: ...CAUTION Do not use roof racks or place any load on the roof of a Model S that is equipped with a solid roof Doing so can cause significant damage Vehicle Loading 200 MODEL S OWNER S MANUAL ...

Page 203: ... Suspension Rear Wheel Drive vehicle 5 5 in 139 7 mm G Ground Clearance Coil Suspension All Wheel Drive vehicle 5 3 in 134 6 mm G Ground Clearance Air Suspension 4 6 6 3 in 116 8 160 mm H Track Front Track Rear 65 4 in 66 9 in 1 662 mm 1 700 mm Values are approximate Dimensions can vary depending on a vehicle s options and various other factors Interior Dimensions Head Room Front Rear 38 8 in 35 3...

Page 204: ...e 5 048 lbs 2 290 kg Curb Weight Model S Performance 5 105 lbs 2 316 kg GVWR Model S 5 939 lbs 2 694 kg GVWR Model S Performance 5 997 lbs 2 720 kg Gross Axle Weight Rating Front 2 866 lbs 1 300 kg Gross Axle Weight Rating Rear 19 wheels 3 307 lbs 1 500 kg Gross Axle Weight Rating Rear 21 wheels 3 196 lbs 1 450 kg Towing Capacity Towing is not permissible Curb Weight weight of the vehicle with cor...

Page 205: ...oltage 320 volts Maximum Motor Power Rated Max Power Standard Range Front Rear 205 kW 193 kW Long Range Front Rear 205 kW 193 kW Performance Front Rear 205 kW 375 kW Tested in accordance with ECE R85 Maximum Motor Torque Nm Standard Range Front Rear 420 335 Long Range Front Rear 420 335 Performance Front Rear 420 720 Transmission Type Single speed fixed gear Subsystems 203 Specifications ...

Page 206: ...ntegrated Advanced Stability Control and Electronic Accelerator pedal actuated regenerative braking system Calipers Front Four piston fixed Rear Single piston floating Rotor Diameters ventilated Front 13 98 355 mm Rear 14 37 365 mm Front Rotor thickness New 1 26 32 mm Service limit 1 18 30 mm Rear Rotor thickness New 1 10 28 mm Service limit 1 02 26 mm Front Brake Pad Thickness excluding back plat...

Page 207: ... damper sway bar air suspension vehicles only Battery 12V Rating 33 amp hour or higher Voltage and Polarity 12V negative ground Battery High Voltage Type Liquid cooled lithium ion Li ion Nominal Voltage 350 V DC Temperature Range Do not expose Model S to ambient temperatures above 60 C or below 30 C for more than 24 hours at a time Subsystems 205 Specifications ...

Page 208: ...ilver standard Front 8 5J x 21 1 575 40 mm 21 Grey standard Rear 8 5J x 21 1 575 40 mm 21 Silver and Grey optional Performance Plus vehicles Rear 9 0J x 21 1 575 40 mm Lug Nut Torque 129 lb ft 175 Nm Lug Nut Socket Size 21 mm NOTE For instructions on how to jack lift Model S see Jacking and Lifting on page 195 Wheels and Tires 206 MODEL S OWNER S MANUAL ...

Page 209: ...th P245 35R21 tires on both front and rear Tire pressures vary depending on the type of tires fitted Refer to the tire pressures printed on the Tire and Loading Information label This label is located on the center door pillar and is visible when the driver s door is open see Maintaining Tire Pressures on page 180 Winter tires can be purchased from a Tesla service center or may be available for pu...

Page 210: ...s of the tire from sidewall edge to sidewall edge 3 Aspect ratio This 2 digit number is the sidewall height as a percentage of the tread width So if the tread width is 205 mm and the aspect ratio is 50 the sidewall height is 102 mm 4 Tire construction R indicates that the tire is of Radial ply construction 5 Wheel diameter This 2 digit number is the diameter of the wheel rim in inches 6 Load index...

Page 211: ...he plant code where it was manufactured and the last 4 digits represent the week and year of manufacture For example the number 1712 is used to represent the 17th week of 2012 The other numbers are marketing codes used at the manufacturer s discretion This information can be used to contact consumers if a tire defect requires a recall 12 Treadwear grade This number indicates the tire s wear rate T...

Page 212: ...seen on the upper dashboard by looking through the driver s side of the windshield Your exact location The nature of the problem Roadside service professionals can also contact Tesla Roadside Assistance 24 hours a day 365 days a year to answer any questions and explain the proper procedure for transporting your Model S NOTE For a detailed description of Tesla s Roadside Assistance policy go to the...

Page 213: ... 0880 3141 Finland Local 075 3263818 France Local 09 70 73 08 50 Germany Local 08921 093303 Gibraltar Toll 31 13 799 9513 Greece Local 02111 984867 Hungary Local 01 700 8549 Iceland Toll 31 13 799 9516 Ireland Local 01 513 4727 Israel Local 97239150724 Italy Local 069 480 1252 Jordan Local 06 5803144 Latvia Local 066 088 114 Liechtenstein Toll 31 13 799 9520 Lithuania Local 067 859 774 Luxembourg ...

Page 214: ...257 San Marino Toll 31 13 799 9531 Slovakia Local 023 300 26 43 Slovenia Local 08 288 00 33 Spain Local 911 98 26 24 Sweden Local 0775 88 80 36 Switzerland Local 061 855 30 21 UK Local 0162 845 0660 United Arab Emirates Local 045217699 Contacting Tesla Roadside Assistance 212 MODEL S OWNER S MANUAL ...

Page 215: ... covered by the warranty A flatbed truck or comparable transport vehicle is the recommended method of transporting Model S The vehicle can face either direction when using a flatbed If Model S must be transported without a flatbed truck then wheel lifts and dollies must be used to ensure that all four wheels are off of the ground This method may only be used for a maximum of 55 km and must not exc...

Page 216: ...ge Activate Transport Mode Transport Mode keeps the parking brake disengaged while winching Model S onto a flatbed truck When active Transport Mode displays a message indicating that the vehicle will remain free rolling The following are required to enable Transport Mode 12V power is required You are unable to use the touchscreen to activate Transport Mode if Model S has no power Model S must dete...

Page 217: ...wever if a situation arises in which the tow eye is not available lost misplaced etc the following instructions describe how to attach tow straps 1 Attach the tow straps to each of the lower suspension arms underneath the front of the vehicle 2 To protect the underbody from damage place a protective barrier such as a piece of wood between the tow strap and underbody 3 Activate Transport Mode by to...

Page 218: ...Instructions for Transporters 216 MODEL S OWNER S MANUAL ...

Page 219: ...007 air suspension vehicles only Press and hold the Tesla T top center of the touchscreen and enter 007 in the access code popup You are no longer a Driver you re a Diver Touch Controls Suspension to change your depth Ludicrous Speed P100D vehicles only Press and hold the Ludicrous setting Controls Driving Acceleration Ludicrous for approximately five seconds Touch Yes bring it on if you want to g...

Page 220: ...dio While in Park choose from an array of instruments and unique sounds to create the next hit song Access TRAX through your Easter Egg tray on the touchscreen and get jamming Microphone and headset not included depending on vehicle configuration and market region this may not be available on your vehicle Easter Eggs 218 MODEL S OWNER S MANUAL ...

Page 221: ...owner information does not guarantee they are available on your specific vehicle Errors or Inaccuracies All specifications and descriptions are known to be accurate at time of publishing However because continuous improvement is a goal at Tesla we reserve the right to make product modifications at any time To communicate any inaccuracies or omissions or to provide general feedback or suggestions r...

Page 222: ...r respective owners and their use herein does not imply sponsorship or endorsement of their products or services The unauthorized use of any trademark displayed in this document or on the vehicle is strictly prohibited About this Owner Information 220 MODEL S OWNER S MANUAL ...

Page 223: ... vehicle s owner or the leasing company for a leased vehicle is obtained Officially requested by the police or other authorities Used as a defense for Tesla Ordered by a court of law Used for research purposes without disclosing details of the vehicle owner or identification information Disclosed to a Tesla affiliated company including their successors or assigns or our information systems and dat...

Page 224: ...testing process includes extensive inspections during and after production The final inspection takes place at Tesla and includes a road test conducted by a technician Disclaimers 222 MODEL S OWNER S MANUAL ...

Page 225: ... page then view contact information NOTE You can also use voice commands to provide feedback to Tesla Say Note Report Bug note or Bug report in the English language followed by brief comments in your language of choice Model S takes a snapshot of its systems including your current location vehicle diagnostic data and screen captures of the touchscreen and instrument panel Tesla periodically review...

Page 226: ...t expressly approved by Tesla could void your authority to operate the equipment Radiation Exposure Statement The product complies with the FCC IC RF Exposure for Low Power Consumer Wireless Power Transfer The RF exposure limit set forth for an uncontrolled environment and are safe for intended operation as described in this manual The furthest RF exposure that compliance was demonstrated at 20cm ...

Page 227: ...terference and 2 This device must accept any interference received including interference that may cause undesired operation Changes or modifications not expressly approved by Tesla could void your authority to operate the equipment SRIM Approval Malaysia Model Number s Mfr Frequency Tested For A 0749G01 and A 0749G11 Pektron 433 435 MHz Malaysia Compliance Label Singapore Model A 0749G11 Model A ...

Page 228: ...or Tesla could void your authority to operate the equipment Radio Frequency Information This equipment has been tested and found to comply with the limits for a Class B digital device pursuant to Part 15 of the FCC Rules These limits are designed to provide reasonable protection against harmful interference in a residential installation This equipment generates uses and can radiate radio frequency...

Page 229: ... Body Security Controller Transmit 134 2 kHz Receive 433 9 MHz n a magnetic field Front passenger footwell TPMS Sensor 433 9 MHz 2 5 mW Each wheel TPMS Module Antenna Receive 433 9 MHz n a Receive only Left side C pillar AM FM 522 1620 kHz 88 108 MHz n a Receive only Rear Window DAB 174 241 MHz n a Receive only Rear Window Homelink 433 9 MHz 10 mW Above front bumper beam Passive Entry Transmit 134...

Page 230: ...0 915 MHz Receive 758 803 791 821 859 894 925 960 MHz 200 mW Transmit Right side mirror Receive Right side mirror LTE band 21 32 Transmit 1447 9 1462 9 MHz Receive 1452 1510 9 MHz 200 mW Transmit Right side mirror Receive Right side mirror LTE band 1 2 3 4 Transmit 1710 1785 1850 1910 1920 1980 MHz Receive 1805 1880 1930 1990 2110 2170 MHz 200 mW Transmit Right side mirror Receive Right side mirro...

Page 231: ...U Estonian Käesolevaga kinnitab Tesla Inc seadme KEY FOB and PASSIVE ENTRY SYSTEM vastavust direktiivi 2014 53 EL põhinõuetele ja nimetatud direktiivist tulenevatele teistele asjakohastele sätetele German Hiermit erklärt Tesla Inc dass sich das Gerät KEY FOB and PASSIVE ENTRY SYSTEM in Übereinstimmung mit den grundlegenden Anforderungen und den übrigen einschlägigen Bestimmungen der Richtlinie 201...

Page 232: ...z zasadniczymi wymogami oraz pozostałymi stosownymi postanowieniami Dyrektywy 2014 53 UE Portugese Tesla Inc declara que este KEY FOB and PASSIVE ENTRY SYSTEM está conforme com os requisitos essenciais e outras disposições da Directiva 2014 53 UE Slovak Tesla Inc týmto vyhlasuje že KEY FOB and PASSIVE ENTRY SYSTEM spĺňa základné požiadavky a všetky príslušné ustanovenia Smernice 2014 53 EÚ Sloveni...

Page 233: ...n the vehicle like a bike rack Obstructions caused by adding paint or adhesive products like wraps stickers or rubber coatings to your vehicle A damaged or misaligned bumper The solution might be as simple as washing your vehicle If you do not find any obvious obstructions or you find damage to the vehicle schedule service at your convenience Your vehicle is OK to drive in the meantime For more in...

Page 234: ...g to the installation guide for the Wall Connector Wall Connector installation guides can be found here CC_a041 Charging speed reduced High temperature detected by Wall Connector High temperature detected by Wall Connector alerts indicate the building connection to the Wall Connector is getting too warm so charging has been slowed to protect the wiring and Wall Connector This is not typically an i...

Page 235: ...hicle still does not charge the issue may be with the vehicle If this alert appears while a charge cable is not connected or if the issue is suspected to be with the vehicle inspect the charge port inlet and the charge cable connector for any obstructions use a flashlight as necessary Debris moisture and or foreign objects present in the charge port inlet or the charge cable connector can prevent ...

Page 236: ...external charging equipment is powered by looking for any status lights displays or other indicators on the equipment If the equipment is not powered try to restore the external charging equipment s power source If attempting to charge at a public station and power is unable to be restored contact the station operator If attempting to charge at a private station for example charging at home and po...

Page 237: ...t or at a different charging station If the vehicle starts to charge the issue was likely with the equipment If using a Tesla Mobile Connector or Wall Connector first check the status lights on the front If no status lights are visible check the power source and contact an electrician to inspect the building wiring connection to the wall outlet or the Wall Connector to confirm that all wires are p...

Page 238: ...through the map on your vehicle s touchscreen display See Range Assurance on page 81 for more details Additional third party charging stations may also be available in your area to help you to pinpoint the issue For more information on troubleshooting Mobile Connector or Wall Connector status lights refer to the product s Owner s Manual at Charging Adapter Product Guides If using other external ch...

Page 239: ...Fade Compensation is active This brake assist function activates temporarily to make sure you have full braking capability in conditions where reduced braking performance is detected by your vehicle Continue to press the brake pedal as you normally would and do not pump repeatedly press and release the pedal as this will interrupt the function This alert will clear when your vehicle comes to a sto...

Page 240: ...ed to maintain the recommended cold tire pressure The alert may clear as the vehicle is driven This is because the tires will warm up and the tire pressure will increase Even if the alert clears the tires should still be refilled with air once they have cooled The recommended cold tire pressure should be maintained If you repeatedly see this alert for the same tire have the tire inspected for a sl...

Page 241: ...nd equipment at your normal charging location without finding any possible cause only then should you contact Tesla service UMC_a017 Charging speed reduced High temperature detected by Mobile Connector High temperature detected by Mobile Connector alerts indicate the outlet used to charge is becoming too warm so charging has been slowed to protect the outlet This is not typically an issue with you...

Page 242: ...r to the product s owner s manual UMC_w004 Unable to charge with Mobile Connector Voltage too high Try a different wall outlet The vehicle cannot charge or charging is interrupted because either the Mobile Connector Detects the wall outlet voltage is too high OR Detects an unexpected increase in supply voltage from the wall outlet Try charging the vehicle with a different wall outlet If the vehicl...

Page 243: ... can be located through the map on your vehicle s touchscreen display See Range Assurance on page 81 for more details Additional third party charging stations may also be available in your area to help you to pinpoint the issue For more information on troubleshooting Mobile Connector status lights and charging issues refer to the product s owner s manual UMC_w008 Charging stopped High temperature ...

Page 244: ...ehicle may shut down unexpectedly The electrical system cannot maintain the voltage required to support all vehicle features If you drive the vehicle while this alert is present certain features may be disabled or function at a reduced level due to the low voltage It is also possible the vehicle will shut down unexpectedly Try turning off non critical features like seat heaters or cabin fans to he...

Page 245: ...d spot collision warning 117 side collision warning 117 staying inside lane markings 117 Autopilot 89 92 99 101 107 109 120 124 Auto Lane Change 101 automatic emergency braking 120 Autopark 107 Autosteer 99 collision avoidance assist 120 forward collision warning 120 overtake acceleration 92 overview 89 speed assist 124 speed limit warning 124 staying within speed limits 124 Summon 109 Traffic Awa...

Page 246: ... installing and using 30 child protection 12 disabling liftgate and rear door handles 12 Chill acceleration 76 cleaning 186 climate controls 133 cold weather driving 87 collision avoidance assist 120 connecting to Wi Fi 162 console 20 21 22 12V power socket 21 cup holders 22 USB ports 20 consumption chart 81 contact information 210 roadside assistance 210 copyrights 219 Creep 70 cruise control 92 ...

Page 247: ...lash drives playing audio files from 147 flashers warning 58 floor mats 189 fluids 178 192 replacement intervals 178 reservoirs checking 192 fog lights 55 forward collision warning 120 front passenger detection 39 front trunk 18 G garage doors opening 159 gates opening 159 GAWR 198 gears 53 glove box 20 Gross Axle Weight Rating 198 Gross Vehicle Weight Rating 198 ground clearance 201 GVWR 198 H ha...

Page 248: ...nformation 198 lane assist 117 lane change automatic 101 lane departure warning 117 Launch Mode 76 77 liftgate 15 16 adjust opening height 16 opening 15 lifting 195 lights 55 57 58 adaptive headlights 57 hazard warning 58 headlights after exit 57 turn signals 58 load limits 198 location tracking 139 location based suspension 152 locking and unlocking doors 9 Ludicrous acceleration 76 lumbar adjust...

Page 249: ...agement 81 power socket 21 power windows 14 powering on and off 51 public charging stations 169 R radar 89 radio 145 Radio Frequency information 224 range 59 69 80 displayed on instrument panel 59 driving tips to maximize 80 regenerative braking 69 range assurance 81 Range mode 80 Re route 143 rear seats folding and raising 25 rear view camera 83 rear window switches disabling 14 recent Media Play...

Page 250: ...uspension 206 tires 207 transmission 203 wheels 206 speed assist 124 Speed Limit Mode 132 speed limit warning 124 Sport acceleration 76 stability control 72 Standard acceleration 76 starting 51 Statutory Plate 198 steering specifications 204 steering wheel 45 adjusting position 45 adjusting sensitivity 45 buttons 45 heated 45 scroll buttons 45 steering automatic 99 Stopping Mode 70 streaming servi...

Page 251: ...ifications 203 transponders attaching 196 Transport Mode 214 transporting 213 214 trip chart 81 trip meter 79 Trip Planner 143 trunk front 18 trunk rear 12 15 child protection lock 12 disabling interior handle 12 turn signals 58 U ultrasonic sensors 89 Unlock on Park 9 unlocking when key doesn t work 12 USB devices 20 147 connecting 20 playing audio files from 147 USB flash drive 155 USB ports 20 ...

Page 252: ...windshield washer fluid topping up 193 winter tires 184 wiper blades replacing 190 wipers de icing 66 wipers using 66 Work location 144 Index ...

Page 253: ...Publication date May 26 2020 ...

Reviews: