25
ENG
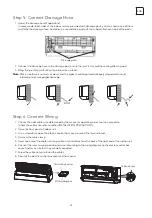
Step 5: Connect Drainage Hose
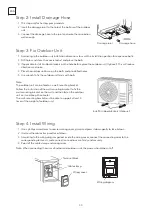
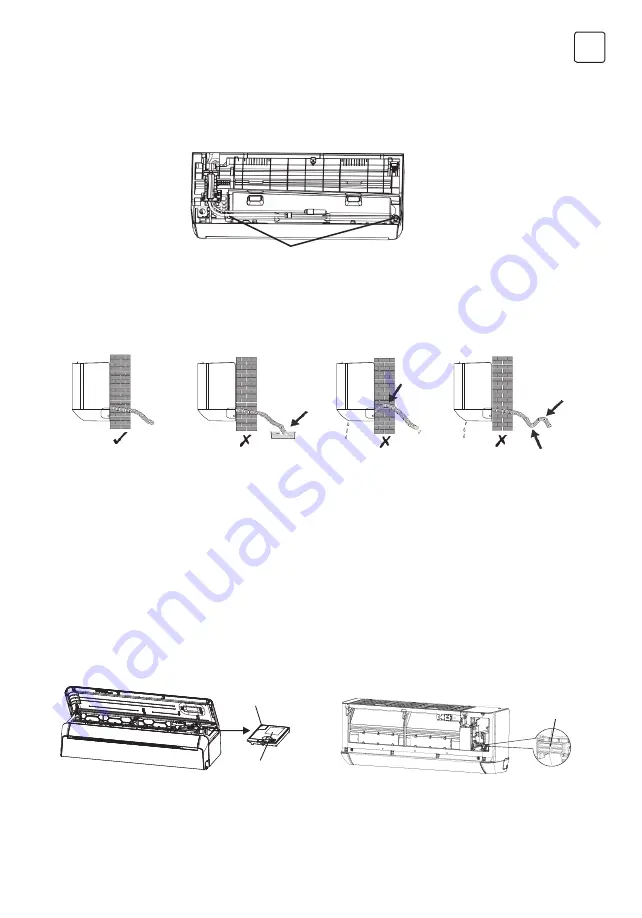
1. Adjust the drainage hose(if applicable)
In some model, both sides of the indoor unit are provided with drainage ports, you can choose one of them
to attache the drainage hose. And plug the unused drain port with the rubber attached in one of the ports.
2. Connect the drainage hose to the drainage port, ensure the joint is firm and the sealing effect is good.
3. Wrap the joint firmly with teflon tape to ensure no leaks.
Note
: Make sure there is no twists or dents, and the pipes should be placed obliquely downward to avoid
blockage, to ensure proper drainage.
Drainage ports
Step 6: Connect Wiring
1. Choose the right cables size determined by the maximum operating current on the nameplate.
(Check the cables size refer to section INSTALLATION PRECAUTIONS)
2. Open the front panel of indoor unit.
3. Use a screwdriver, open the electric control box cover, to reveal the terminal block.
4. Unscrew the cable clamp.
5. Insert one end of the cable into the position of control box from the back of the right end of the indoor unit.
6. Connect the wires to corresponding terminal according to the wiring diagram on the electric control box
cover. And make sure that they are well connected.
7. Screw the cable clamp to fasten the cables.
8. Reinstall the electric control box cover and front panel.
Control box cover
Wiring diagram
Cable clamp
Summary of Contents for TT37AF-1232IAW
Page 353: ......
Page 354: ...www tesla info ...

