background image

Bedienungsanleitung

de

Instruction manual

en

Mode d’emploi

fr

Inhalt

Allgemeine Hinweise ............................................2

1.

Sicherheitshinweise ..............................................3

2.

Bestimmungsgemäße Verwendung ......................4

3.

Produktbeschreibung ..........................................5

3.1

Anzeige- und Bedienelemente ........................................5

3.2

Schnittstellen ..................................................................6

3.3

Spannungsversorgung ....................................................6

4.

Inbetriebnahme ....................................................7

5.

Bedienung............................................................8

5.1

Fühler anschließen ..........................................................8

5.2

Gerät ein- / ausschalten ..................................................8

5.3

Displaybeleuchtung ein- / ausschalten ............................8

5.4

Einstellungen vornehmen ................................................9

6.

Messen ..............................................................12

7.

Wartung und Pflege............................................14

8.

Fragen und Antworten........................................15

9.

Technische Daten ..............................................16

10. Zubehör / Ersatzteile ..........................................17

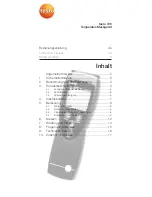
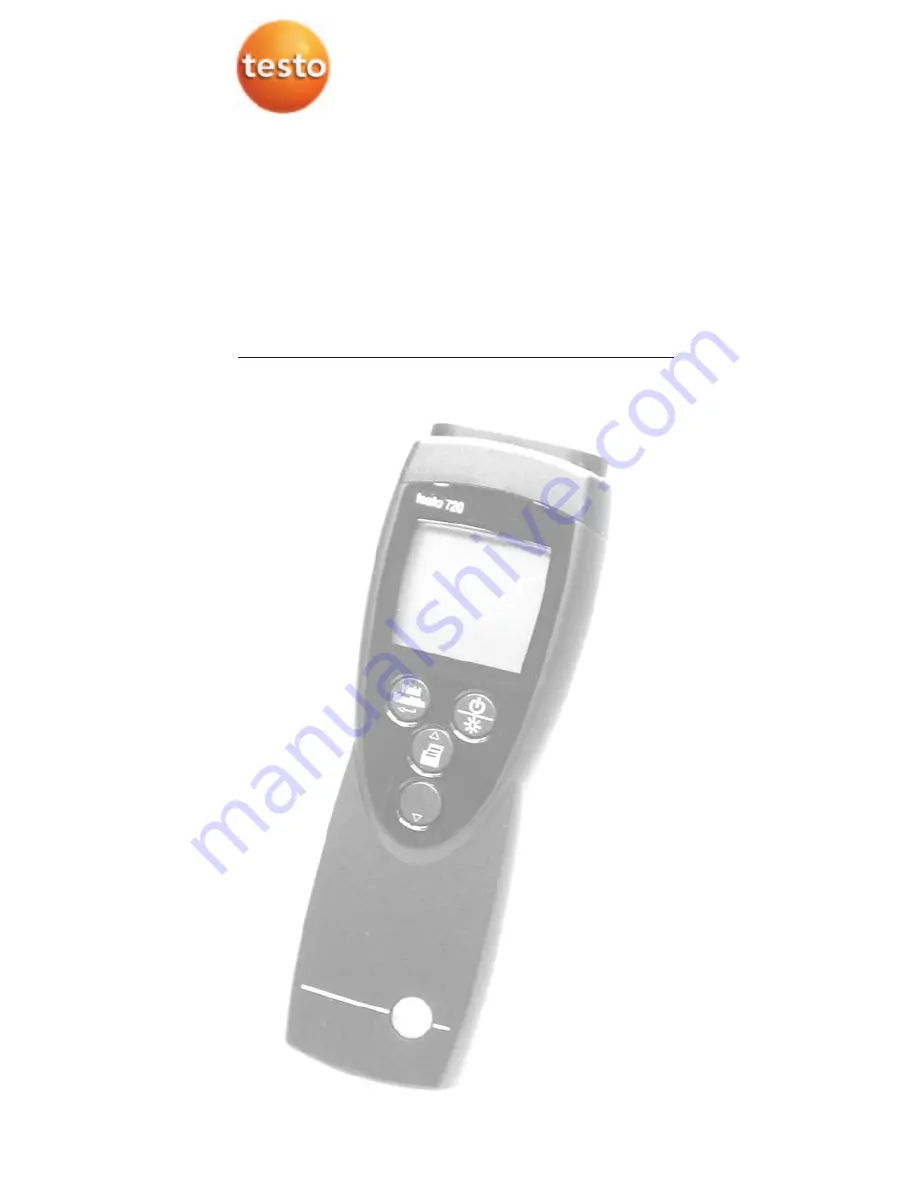
testo 720

Temperatur-Messgerät

Summary of Contents for 720

Page 1: ...1 Anzeige und Bedienelemente 5 3 2 Schnittstellen 6 3 3 Spannungsversorgung 6 4 Inbetriebnahme 7 5 Bedienung 8 5 1 Fühler anschließen 8 5 2 Gerät ein ausschalten 8 5 3 Displaybeleuchtung ein ausschalten 8 5 4 Einstellungen vornehmen 9 6 Messen 12 7 Wartung und Pflege 14 8 Fragen und Antworten 15 9 Technische Daten 16 10 Zubehör Ersatzteile 17 testo 720 Temperatur Messgerät ...

Page 2: ... Bemerkungen Hinweis Gibt hilfreiche Tipps und Informationen 1 2 Handlungsziel Nennt das Ziel welches durch nach folgend beschriebene Handlungsschritte erreicht wird Bei nummerierten Hand lungszielen die vorgegebene Reihen folge beachten Voraussetzung Voraussetzung muss erfüllt sein damit eine Handlung wie beschrieben aus geführt werden kann i 1 2 Handlungs Schritt Handlungsschritte ausführen Bei ...

Page 3: ... anwenden i Handgriffe und Zuleitungen nicht Temperaturen über 70 C aussetzen wenn diese nicht ausdrücklich für höhere Temperaturen zugelassen sind Temperaturangaben auf Sonden Fühlern beziehen sich nur auf den Messbereich der Sensorik i Das Messgerät nur öffnen wenn dies zu Wartungs oder Instandhaltungszwecken ausdrücklich in der Dokumentation beschrieben ist Nur Wartungs und Instandsetzungsarbei...

Page 4: ...wurde Im Zweifelsfall bitte bei Testo nachfragen Das testo 720 ist ein kompaktes Messgerät zur Messung von Temperaturen über steckbare Temperaturfühler Das Produkt wurde für folgende Aufgaben Bereiche konzipiert Luft Oberflächen und Tauch Messungen Laborbereich In folgenden Bereichen darf das Produkt nicht eingesetzt werden In explosionsgefährdeten Bereichen Für diagnostische Messungen im medizini...

Page 5: ...iefach Rückseite Servicefach Rückseite Tastenfunktionen Taste Funktionen Gerät einschalten Gerät ausschalten gedrückt halten Displaybeleuchtung ein ausschalten Messwert halten Maximal Minimal wert anzeigen Konfigurationsmodus öffnen verlassen gedrückt halten Im Konfigurationsmodus Eingabe bestätigen Im Konfigurationsmodus Wert erhöhen Option wählen Im Konfigurationsmodus Wert verringern Option wäh...

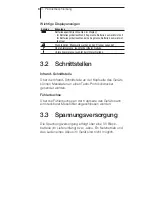
Page 6: ...tet bei Überschreitung Untere Alarmgrenze leuchtet bei Unterschreitung 3 2 Schnittstellen Infrarot Schnittstelle Über die Infrarot Schnittstelle an der Kopfseite des Geräts können Messdaten an einen Testo Protokolldrucker gesendet werden Fühlerbuchse Über die Fühlerbuchse an der Kopfseite des Geräts kann ein steckbarer Messfühler angeschlossen werden 3 3 Spannungsversorgung Die Spannungsversorgung...

Page 7: ...tzfolie e entfernen i Schutzfolie vorsichtig abziehen Batterie Akku e einlegen 1 Batteriefach auf der Rückseite des Gerätes öffnen Batteriefachdeckel in Pfeilrichtung schieben und abnehmen 2 Batterie Akku 9V Block einlegen Polung beachten 3 Batteriefach schließen Batteriefachdeckel aufsetzen und gegen die Pfeilrichtung schieben de en fr es it pt sv nl ...

Page 8: ...iese vom Messgerät erkannt werden i Anschlussstecker des Fühlers in die Fühlerbuchse des Messgeräts stecken 5 2 Gerät ein ausschalten Gerät e einschalten i drücken Die Messansicht wird geöffnet Der aktuelle Messwert wird angzeigt bzw leuchtet wenn kein Messwert verfügbar ist Gerät a ausschalten i gedrückt halten ca 2s bis die Display Anzeige erlischt 5 3 Displaybeleuchtung ein ausschalten Displayb...

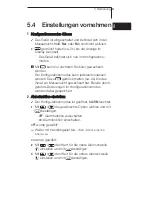
Page 9: ...rückt halten ca 2s bis das Gerät zur Messansicht gewechselt hat Bereits durch geführte Änderungen im Konfigurationsmodus werden dabei gespeichert 2 Alarmfunktion e einstellen Der Konfigurationsmodus ist geöffnet ALARM leuchtet 1 Mit die gewünschte Option wählen und mit bestätigen oFF Alarmfunktion ausschalten on Alarmfunktion einschalten oFF wurde gewählt º Weiter mit Handlungsziel MAX MIN DRUCKFU...

Page 10: ...blinkt i Mit die gewünschte Option wählen und mit bestätigen on Das Messgerät schaltet sich nach 10min ohne Tastenbetätigung automatisch aus Ausnahme Im Display wird ein festgehaltener Messwert angezeigt Hold oder Auto Hold leuchten oFF Das Messgerät schaltet nicht selbständig aus 5 Datum Uhrzeit e einstellen Der Konfigurationsmodus ist geöffnet Year leuchtet 1 Mit das aktuelle Jahr einstellen und...

Page 11: ...it die gewünschte Option wählen und mit bestätigen no Keinen Reset durchführen Yes Einen Reset durchführen Dabei wird das Gerät auf die Werkseinstellungen zurückgesetzt Die Einstellung von Datum Uhrzeit wird nicht zurückgesetzt Das Gerät wechselt zurück zur Messansicht de en fr es it pt sv nl ...

Page 12: ...enn der Messwert die Alarmschwelle wieder unter bzw überschritten hat erlischt der Alarm i Signalton manuell ausschalten drücken Messwert h halten M Maximal Minimalwert a anzeigen Der aktuelle Messwert kann festgehalten werden Die Maximal und Minimalwerte seit dem letzten Einschalten des Geräts können angezeigt werden i mehrmals drücken bis der gewünschte Wert angezeigt wird Es wird rollierend ang...

Page 13: ...rte d drucken Die im Display angezeigten Messwerte aktueller Mess wert festgehaltener Messwert oder Max Min Wert können ausgedruckt werden Ein Testo Protokolldrucker ist erforderlich Zubehör Bei eingeschalteter Max Min Druckfunktion werden neben dem aktuellen Messwert bzw dem festgehalte nen Messwert auch die Minimal und Maximalwerte ausgedruckt º Siehe Kapitel EINSTELLUNGEN VORNEHMEN 1 Gerät so e...

Page 14: ... feuchten Tuch Seifenlauge reinigen Keine scharfen Reinigungs oder Lösungsmittel verwenden Batterie Akku w wechseln Das Gerät ist ausgeschaltet 1 Batteriefach auf der Rückseite des Gerätes öffnen Batteriefachdeckel in Pfeilrichtung schieben und abnehmen 2 Verbrauchte Batterie leeren Akku herausnehmen und neue Batterie neuen Akku 9V Block einlegen Polung beachten 3 Batteriefach schließen Batteriefa...

Page 15: ...erät ausschalten Fühler stecken und Gerät wieder ein schalten Fühlerbruch Bitte kontaktieren Sie Ihren Händler oder den Testo Kundendienst Displayanzeige reagiert Umgebungstemperatur Umgebungstemperatur träge ist sehr niedrig erhöhen Anzeige uuuuu Zulässiger Messbereich Zulässigen Mess wurde unterschritten bereich einhalten Anzeige ooooo Zulässiger Messbereich Zulässigen Mess wurde überschritten b...

Page 16: ... Mw restl Bereich NTC Fühler 0 2 C 0 4 F 25 0 40 0 C 13 0 104 0 F 0 3 C 0 6 F 40 1 80 0 C 104 1 176 0 F 0 4 C 0 8 F 80 1 125 0 C 176 1 257 0 F 0 5 C 0 9 F restl Bereich Fühler 1x Mini DIN Buchse für Temperaturfühler Pt100 oder NTC Messrate 2 s Betriebstemperatur 20 50 C 4 122 F Lagertemperatur 30 70 C 22 158 F Stromversorgung 1x 9V Blockbatterie akku Standzeit ca 70h Schutzart mit TopSafe Zubehör ...

Page 17: ...tfühler NTC 0613 1712 Pt100 Fühler Robuster wasserdichter Pt100 Tauch Einstechfühler 0609 1273 Präziser robuster Luftfühler Pt100 0609 1773 Sonstiges TopSafe testo 720 schützt vor Stoß und Schmutz 0516 0221 Eine vollständige Liste aller Zubehör und Ersatzteile finden Sie in den Produktkatalogen und broschüren oder im Internet unter www testo com 10 Zubehör Ersatzteile 17 de en fr es it pt sv nl ...

Page 18: ...18 ...

Page 19: ...elements 23 3 2 Interfaces 24 3 3 Voltage supply 24 4 Commissioning 25 5 Operation 26 5 1 Connecting a probe 26 5 2 Switching the instrument on off 26 5 3 Switching the display light on off 26 5 4 Performing settings 27 6 Measuring 30 7 Care and maintenance 32 8 Questions and answers 33 9 Technical data 34 10 Accessories spare parts 35 testo 720 Temperature measuring instrument ...

Page 20: ...entification Representation Meaning Comments Note Offers helpful tips and information 1 2 Objective Denotes the objective that is to be achieved via the steps described Where steps are numbered you must always follow the order given Condition A condition that must be met if an action is to be carried out as described i 1 2 Step Carry out steps Where steps are numbered you must always follow the or...

Page 21: ...not expose handles and feed lines to temperatures in excess of 70 C unless they are expressly permitted for higher temperatures Temperatures given on probes sensors relate only to the measuring range of the sensors i Open the instrument only when this is expressly described in the documentation for maintenance and repair purposes Carry out only the maintenance and repair work that is described in ...

Page 22: ...ned Ask Testo if you are in any doubt testo 720 is a compact measuring instrument for measuring temperatures by means of plug in temperature probes The product was designed for the following tasks applications Air surface and immersion measurements Laboratories The product should not be used in the following areas Areas at risk of explosion Diagnostic measurements for medical purposes ...

Page 23: ...ons Battery compartment rear Service compartment rear Button functions Button Functions Switch instrument on switch instrument off press and hold Switch display light on off Keep reading display maximum minimum value Open leave configuration mode press and hold In configuration mode Confirm input In configuration mode Increase value select option In configuration mode Reduce value select option Pr...

Page 24: ...exceeded Lower alarm limit Lit if undershot 3 2 Interfaces Infrared interface Measurement data can be sent to a Testo printer via the infrared interface on the head of the instrument Probe socket A plug in measuring probe can be connected via the probe socket on the head of the instrument 3 3 Voltage supply Voltage is supplied by means of a 9V monobloc battery included in delivery or rechargeable ...

Page 25: ... b battery rechargeable b battery 1 To open the battery compartment on the rear of the instrument push the lid of the battery compartment in the direction of the arrow and remove it 2 Insert a battery rechargeable battery 9V monobloc Observe the polarity 3 To close the battery compartment replace the lid of the battery compartment in position and push it against the direction of the arrow de en fr...

Page 26: ...d by the instrument i Insert the connector of the probe into the probe socket 5 2 Switching the instrument on off Switching t the iinstrument o on i Press Measurement view is opened The current reading is displayed or lights up if no reading is available Switching t the iinstrument o off i Press and hold for approx 2s until the display goes out 5 3 Switching the display light on off Switching t th...

Page 27: ... 2s until the instrument has changed to measurement view Any changes that have already been made in configuration mode will be saved 2 To s set t the a alarm f function Configuration mode is opened ALARM is lit 1 Select the desired option with and confirm with oFF Switches the alarm function off on Switches the alarm function on oFF was selected º Continue with objective TO SET THE MAX MIN PRINT F...

Page 28: ...d AutoOff is flashing i Select the desired option with and confirm with on The measuring instrument switches off automatically if no button is pressed for 10min Hold or Auto Hold is lit oFF The measuring instrument does not switch itself off automatically 5 To s set t the d date time Configuration mode is opened Year is lit 1 Use to set the current Year and confirm with 2 Use to set the other valu...

Page 29: ...T is lit i Select the desired option with and confirm with no Instrument is not reset Yes Instrument is reset The instrument is reset to the factory settings The setting of date time is not reset The instrument returns to measurement view de en fr es it pt sv nl ...

Page 30: ...goes out if the reading goes below the upper or above the lower threshold again i Switch off signal tone manually Press Holding t the r reading d displaying t the m maximum minimum value The current reading can be recorded The maximum and minimum values since the instrument was last switched on can be displayed i Press several times until the desired value is displayed The following are displayed ...

Page 31: ...reading Printing r readings The readings shown on the display current reading recorded reading or max min reading can be printed out A Testo printer is required accessory part With the Max Min print function switched on the maximum and minimum values are printed out as well as the current reading or recorded reading º See the chapter PERFORMING SETTINGS 1 Configure the instrument so that the value...

Page 32: ...lvents Changing t the b battery rechargeable b battery The instrument is switched off 1 To open the battery compartment on the rear of the instrument push the lid of the battery compartment in the direction of the arrow and remove it 2 Remove the spent battery rechargeable battery and insert a new battery rechargeable battery 9 V monobloc Observe the polarity 3 To close the battery compartment rep...

Page 33: ...not plugged in Switch instrument off connect probe and switch instrument back on again Probe break Please contact your dealer or Testo Customer Service Display reacts slowly Ambient temperature Raise ambient is very low temperature Display uuuuu Permitted measuring Keep to permitted range was undershot measuring range Display ooooo Permitted measuring Keep to permitted range was exceeded measuring...

Page 34: ...NTC probe 0 2 C 0 4 F 25 0 40 0 C 13 0 104 0 F 0 3 C 0 6 F 40 1 80 0 C 104 1 176 0 F 0 4 C 0 8 F 80 1 125 0 C 176 1 257 0 F 0 5 C 0 9 F rest of range Probe 1x mini DIN socket for Pt100 or NTC temperature probe Measuring rate 2 s Operating temperature range 20 50 C 4 122 F Storage temperature 30 70 C 22 158 F Voltage supply 1x 9V monobloc battery rech battery Battery life approx 70h Protection clas...

Page 35: ...nt robust air probe NTC 0613 1712 Pt100 probes Robust water proof Pt100 immersion penetration probe 0609 1273 Efficient robust air probe Pt100 0609 1773 Miscellaneous TopSafe testo 720 protects from impact and dirt particles 0516 0221 For a complete list of all accessories and spare parts please refer to the product catalogues and brochures or look up our website www testo com de en fr es it pt sv...

Page 36: ...36 ...

Page 37: ...42 4 Mise en service 43 5 Fonctionnement 44 5 1 Raccorder la sonde 44 5 2 Allumer éteindre l appareil 44 5 3 Allumer éteindre l éclairage de l écran 44 5 4 Paramétrage 45 6 Mesures 47 7 Maintenance et entretien 49 8 Questions Réponses 50 9 Caractéristiques techniques 51 10 Accessoires pièces de rechange 52 testo 720 Appareil de mesure de température Bedienungsanleitung de Instruction manual en Mod...

Page 38: ... des astuces et une aide efficace 1 2 Objectif de la Indique l objectif devant être atteint par les manipulations décrites par la suite En cas de numérotation des manipulations respectez l ordre indiqué Condition La condition doit être remplie afin que la manipulation décrite puisse être réalisée i 1 2 Etape de la manipulation Réalisez les étapes de la manipulation En cas d étapes numérotées respe...

Page 39: ...i Ne soumettez pas les poignées ni les éléments de raccordements à des températures supérieures à 70 C si ceux ci ne sont pas expressément prévus pour des températures supérieures Les indications de température des capteurs sondes ne sont basées que sur l étendue de mesure des capteurs pas des composants de la poignée i Ouvrez l appareil de mesure que si ceci est expressément décrit dans la notice...

Page 40: ...Le testo 720 est un appareil de mesure compact pour la mesure de températures à l aide de sondes de température à raccorder Le produit a été conçu pour les tâches domaines suivants Mesures en immersion dans l air et de surface Applications en laboratoires Le produit ne doit pas être utilisé dans les domaines suivants Dans les milieux explosifs Pour les mesures de diagnostics dans le domaine médica...

Page 41: ...dos Fonctions des touches Touche Fonctions Allumer l appareil Eteindre l appareil maintenir appuyé Allumer éteindre l éclairage de l affichage Conserver une donnée de mesure afficher valeurs max min Ouvrir quitter module de configuration Maintenir appuyé En mode configuration Confirmer la saisie En mode configuration Augmenter la valeur sélectionner l option En mode configuration Diminuer la valeu...

Page 42: ...rme supérieur s affiche en cas de dépassement de limite Seuil d alarme inférieur s affiche dès que la valeur inférieure est atteinte 3 2 Interfaces Interface infrarouge L interface infrarouge dans la partie supérieure de l appareil permet d envoyer les données de mesure vers l imprimante testo Connecteur s pour sondes Les connecteurs pour sondes dans la partie supérieure de l appareil permettent d...

Page 43: ...fficheur Insérer lla p pile ll accu 1 Ouvrez le compartiment pile au dos de l appareil Faites glisser le couvercle du compartiment pile dans le sens de la flèche puis retirez le 2 Insérer la pile accu 9V monobloc Respectez la polarité 3 Fermez le compartiment pile Repositionnez le couvercle du compartiment pile et faites glisser dans le sens opposé de la flèche de en fr es it pt sv nl 4 Mise en se...

Page 44: ...appareil de mesure i Raccordez la fiche de la sonde dans le connecteur de l appareil de mesure 5 2 Allumer éteindre l appareil Allumer ll appareil i Appuyez sur La valeur de mesure actuelle est affichée ou apparaît si aucune valeur de mesure n est disponible Eteindre ll appareil i Maintenez appuyé env 2 s jusqu à ce que l affichage s éteigne 5 3 Allumer éteindre l éclairage de l écran Allumer étei...

Page 45: ...e gardées 2 Paramétrage d de lla f fonction a alarme Le mode configuration est ouvert ALARM apparaît 1 Sélectionnez l option souhaitée avec et validez avec OFF Eteindre la fonction alarme On Allumer la fonction alarme OFF a été sélectionné º Etape suivante avec PARAMÉTRER LA FONCTION MAX MIN PRINT ON a été sélectionné 2 Paramétrez la valeur du seuil d alarme supérieur avec et validez avec 3 Paramé...

Page 46: ...ode configuration s ouvre Year apparaît 1 Paramétrez l année en cours avec et validez avec 2 Avec paramétrez les données suivantes concernant le mois Month le jour Day et l heure Time et validez respectivement avec 6 Paramétrer ll unité Le mode configuration s ouvre UNIT apparaît i Paramétrez l unité souhaitée avec et validez avec 7 Réaliser u un r reset Le mode configuration s ouvre RESET apparaî...

Page 47: ...e le signal sonore mauellement Appuyer sur Conserver lles v valeurs m mesurées a afficher lles v valeurs Min Max La valeur mesurée actuelle peut être conservée Les valeurs maximales et minimales depuis le dernier allumage de l appareil peuvent être affichées i Appuyez plusieurs fois sur jusqu à ce que la valeur souhaitée soit affichée L affichage alternatif se fait de la façon suivante Hold Valeur...

Page 48: ...minimales sont mises à jour par rapport à la valeur actuelle Imrpimer lles v valeurs m mesurées Les valeurs mesurées affichées valeur de mesure actuelle valeur de mesure conservée ou valeurs Max Min peuvent être imprimées Une imprimante testo est nécessaire accessoire Lorsque Impression Max Min est en fonction les valeurs minimales maximales sont imprimées en complément de la valeur mesurée actuel...

Page 49: ...ttoyage forts Remplacement d des p piles accus L appareil doit être éteint 1 Ouvrez le compartiment pile au dos de l appareil Faites glisser le couvercle du compartiment pile dans le sens de la flèche puis retirez le 2 Sortez la pile usagée l accu vide et insérez une nouvelle pile un nouvel accu Bloc 9V Respectez la polarité 3 Fermez le compartiment pile Repositionnez le couvercle du compartiment ...

Page 50: ...on raccordée Eteignez l appareil raccordre la sonde puis rallumez l appareil Casse de sonde Veuillez contacter votre revendeur ou notre SAV L affichage est ralenti La température ambiante Augmenter la est très basse température ambiante Affichage uuuuu Mesures hors tolérances Respectez l étendue de mesure admissible Display ooooo Passage sous létendue de Respectez l étendue mesure admissible de me...

Page 51: ...5 0 40 0 C 13 0 104 0 F 0 3 C 0 6 F 40 1 80 0 C 104 1 176 0 F 0 4 C 0 8 F 80 1 125 0 C 176 1 257 0 F 0 5 C 0 9 F reste de l étendue Sonde 1x fiche mini DIN pour des sondes de température Pt100 ou CTN Fréquence de mesure 2 s Temp d utilisation 20 50 C 4 122 F Temp de stockage 30 70 C 22 158 F Alimentation 1x 9V bloc pile accu Autonomie env 100 h Type de protection AvecTopSafe Accessoires et sonde r...

Page 52: ...des Pt100 Sonde de pénétration d immersion Pt100 étalonnable 0609 1273 Sonde d ambiance CTN Pt100 étalonnable 0609 1973 Sonde de surface Pt100 étanche 0609 1773 Divers TopSafe testo 720 0516 0221 Vous trouverez une liste complète de tous les accessoires et toutes les pièces détachées dans nos catalogues produits et nos brochures ou sur Internet sous www testo fr 10 Accessoires pièces de rechange ...

Page 53: ...53 de en fr es it pt sv nl ...

Page 54: ...54 ...

Page 55: ...55 de en fr es it pt sv nl ...

Page 56: ...0977 7200 02 T dr 02 11 2005 www testo com testo AG Postfach 1140 79849 Lenzkirch Testo Straße 1 79853 Lenzkirch Telefon 07653 681 0 Fax 07653 681 100 E Mail info testo de Internet http www testo com ...

Reviews: