background image

ATLAS 2.0 (MADE IN EUROPE) 

~ 27 ~ 

TESUP 


11.1 FINAL DECOMMISSIONING OF WIND TURBINE SYSTEM: 


Shut down the wind turbine system (section 8). 


Have the electrical systems and equipment removed from service by a qualified 
electrician. 


Make sure all rotors are braked. 


Carefully tilt the tower. 


On the ground: Detach the rotor blades from the generator. 


Detach the generator from the tower and disconnect the electrical wiring 


11.2 DISPOSAL OF THE WIND TURBINE SYSTEM AND 
COMPONENTS: 


Where necessary, dispose of the individual components in consultation with the 
responsible local authorities. 

Wind turbine system 

Wiring, electrical components 

Dispose of as electronic scrap 

Mechanical components 

Segregate prior to disposal 


DISPOSAL DETAIL TABLE


11.


 REMOVAL FROM SERVICE AND DISPOSAL 

WARNING: Risk of injury due to unqualified dismantling, e.g.  


Persons without suitable training  


Stored energy 


Breakage during dismantling Important note on dismantling and disposal. 


The system must be dismantled in the proper way by a suitably qualified person. 

Summary of Contents for ATLAS2.0

Page 1: ...ATLAS2 0 MADE IN EUROPE TESUP ATLAS2 0 Vertical turbine USER MANUAL Made in Europe WIND POWER NOW AT YOUR DOORSTEP Revision Index 00 Revision Date ...

Page 2: ...ATLAS 2 0 MADE IN EUROPE 2 TESUP A GLIMPSE OF ATLAS 2 0 ...

Page 3: ...General Arrangement Drawing 13 5 Controller 14 5 1 Technical Details 14 5 2 Wiring Diagram 15 5 3 Permissible Storage Operation 16 6 Safety Information 17 6 1 Modifications or changes by the user 17 6 2 Residual Risks 17 6 3 Personnel Requirements 17 6 4 Important Safety Instructions 17 7 Pre Use Preparation 18 7 1 Shipping Conditions 18 7 2 Prerequisites at the place of use 18 7 2 1 Permissible w...

Page 4: ...0 1 Safety precautions during maintenance work 25 10 2 Inspection and maintenance schedule 25 10 3 Maintenance and cleaning by the user 26 11 Removal from service and disposal 27 11 1 Final decommissioning of the wind turbine system 27 11 2 Disposal of the wind turbine system and components 27 12 Declaration of Conformity 28 13 Appendix 29 14 Manufacturer Details Customer Support 30 15 Notes 31 ...

Page 5: ...proper grounding techniques as established by the National Electrical Code o Your Wind Turbine must be installed in accordance with this manual and local and national building code Incorrect installation may void your warranty o Wind Turbine blades spin at a potentially dangerous speed this must be respected Never approach a Turbine in motion o Note wire size prior to wiring Any under sizing of wi...

Page 6: ...ake a note DANGER Immediate danger can cause serious injury WARNING Potential Danger can cause Serious injury CAUTION Potential Danger can cause moderate injury NOTE Useful Tips OTHER SIGNS USED GENERAL WARNING HIGH VOLTAGE MAY START WITHOUT WARNING ENVIORNMENTAL HAZARD SAFETY SYMBOLS ...

Page 7: ...thorised representative apply 2 4 PRODUCT FEEDBACK Please notify the manufacturer or his authorised representative about any of the following o Accidents o Potential safety hazards associated with the wind turbine system o Ambiguities in this translation of the original instructions o Description of the wind turbine system ...

Page 8: ...iability will be accepted by the manufacturer if the equipment has been altered as well as in the event of improper assembly installation start up operation maintenance or repair Only original parts supplied by the manufacturer are approved as spare parts or accessories Any spare parts or accessories not supplied by the manufacturer have not been tested for operation and could be detrimental to re...

Page 9: ...AS 2 0 MADE IN EUROPE 9 TESUP 3 3 SYSTEM COMPONENTS NOTE Several Batteries can be connected in Parallel Or series depending upon the system voltage ATLAS2 0 WIND TURBINE INVERTER BATTERY CHARGE CONTROLLER ...

Page 10: ...DE IN EUROPE 10 TESUP 3 4 WIND TURBINE COMPONENTS Item No Description Quantity 1 Turbine Blades 6 2 Bottom Flange 1 3 Mounting Base 1 4 Wing Support 12 5 Mounting Shaft 1 6 Top Flange 1 PART LIST TABLE 6 1 5 3 2 4 ...

Page 11: ...F ROTATION Clockwise TEST STANDARDS EN 61000 6 1 electromagnetic compatibility immunity EN 61000 6 3 electromagnetic compatibility emissions ROTOR BLADES MATERIAL Composites HUB FLANGE Aluminium DIAMETER 600 cm 1 97 Feet WEIGHT PER ROTOR BLADES 750 g 1 65 lbs DIRECTION OF ROTATION Clockwise STARTING WIND SPEED 2 m s NO OF BLADES 9 MAX RPM 150 MAX SPEED 50 m s NOISE 30 dB PARAMETER 4 PARAMETER DIME...

Page 12: ...ATLAS 2 0 MADE IN EUROPE 12 TESUP 4 1 1 POWER CURVE POWER CURVE ...

Page 13: ...ATLAS 2 0 MADE IN EUROPE 13 TESUP 4 2 GENERAL ARRANGEMENT DRAWING DIMENSIONS IN mm inches ...

Page 14: ...e has high efficiency and no load losses The version of the controller will significantly increase the life and sustainability of all the component of the system The special features and product information are listed below o Use of solid state components o Manual brake function o Increasing the life of the controller Microprocessor controlled charge with integrated voltage and current limiting o ...

Page 15: ...ATLAS 2 0 MADE IN EUROPE 15 TESUP 5 2 WIRING DIAGRAM WIRING DIAGRAM ...

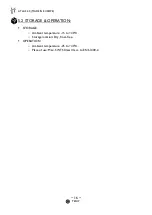
Page 16: ...DE IN EUROPE 16 TESUP 5 2 STORAGE OPERATION STORAGE o Ambient temperature 15 to 40 C o Storage location Dry frost free OPERATION o Ambient temperature 25 to 40 C o Place of use Max SWTS Class III acc to EN 61400 2 ...

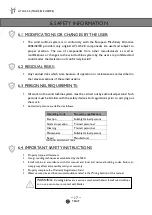
Page 17: ...h persons must be familiar with the safety devices and regulations prior to carrying out the work Authorised persons are defined as follows Operating mode Necessary qualifications Erection Suitably trained persons Normal operation Trained personnel Cleaning Trained personnel Maintenance Suitably trained persons Repair Manufacturer PERSONNEL REQUIREMENT TABLE 6 4 IMPORTANT SAFETY INSTRUCTIONS Prope...

Page 18: ... meteorological office The place of use must be free of obstacles alternatively the wind turbine must be erected with a sufficient height refer to Fig As this is specifically for home use the location on top of the house or terrace should be good for proper functioning of the turbine 7 PRE USE PREPARATION WARNING Danger to life due to operation in non approved wind classes The wind turbine system ...

Page 19: ...ATLAS 2 0 MADE IN EUROPE 19 TESUP 7 2 2 Mounting Details MOUNTING DETAILS NOTE Use of M10 hex bolts or Anchor Fasteners recommended ...

Page 20: ...flange 1 the flange union should be on top So Now our Turbine Body Is ready Turbine Wings Three thin and long three thick and long three thin and small lamas come out of the box for the blades First we take thick thin and long lamas and mount the thin ones to the outside of the blade in the direction of TESUP the thick ones to the inside of the blade with the corresponding hole centres We apply th...

Page 21: ...ATLAS 2 0 MADE IN EUROPE 21 TESUP TURBINE BODY WING ASSEMBLY TURBINE ASSEMBLY ASSEMBLY PROCEDURE SHAFT BOTTOM FLANGE TOP FLANGE TOP LAMAS BOTTOM LAMAS WING ASSEMBLY ATLAS 2 0 ...

Page 22: ...harge controller can be connected to the power grid using the inverter The cables from charge controller to the battery or the power grid will be DC Shown in Blue connection Cable Lengths and cross sections should be as follows Length 11 m 18 m 29 m 44 m 68 m 110 m Cross section 2 5 sq mm 4 sq mm 6 sq mm 10 sq mm 16 sq mm 25 sq mm CABLE DETAILS WARNING All work on electrical equipment must be carr...

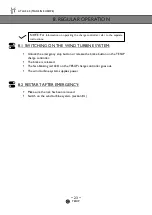
Page 23: ...controller The brake is released The fast blinking red LED on the TESUP charge controller goes out The wind turbine system supplies power 8 2 RESTART AFTER EMERGENCY Make sure the risk has been removed Switch on the wind turbine system section 8 1 8 REGULAR OPERATION NOTE For information on operating the charge controller refer to the separate instructions ...

Page 24: ...TEMPORARY SHUTDOWN Switch on the brake The wind turbine is short circuited via the TESUP charge controller This type of shutdown can occur during the stormy weather when the wind speed is higher than 27 m s 9 3 PROLONGED SHUTDOWN Switch on the brake The wind turbine is short circuited via the TESUP charge controller 9 SHUTTING DOWN THE WIND TURBINE ...

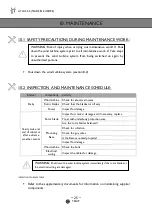
Page 25: ...x Are the rotor blades balanced Mounting Base Check for vibration Check the guy wires Is the Base mounted properly Inspect for damage Wind turbine Check the bolts Electrical wiring Inspect the cables for damage INSPECTION SCHEDULE TABLE Refer to the supplementary documents for information on maintaining supplier components 10 MAINTENANCE WARNING Risk of injury when carrying out maintenance work X ...

Page 26: ...E USER Coat the wind turbine and the rotor blades regularly with commercially available underbody protection wax using a soft cloth NOTE A wax film protects the surfaces of the wind turbine and the rotor blades from the weather and increases the efficiency of the blades ...

Page 27: ...1 2 DISPOSAL OF THE WIND TURBINE SYSTEM AND COMPONENTS Where necessary dispose of the individual components in consultation with the responsible local authorities Wind turbine system Wiring electrical components Dispose of as electronic scrap Mechanical components Segregate prior to disposal DISPOSAL DETAIL TABLE 11 REMOVAL FROM SERVICE AND DISPOSAL WARNING Risk of injury due to unqualified disman...

Page 28: ...ATLAS 2 0 MADE IN EUROPE 28 TESUP 12 DECLARATION ...

Page 29: ...TABLE PAGE 11 PARAMETERS PAGE 12 POWER CURVE PAGE 15 WIRING DIAGRAM PAGE 17 PERSONNEL REQUIREMENT TABLE PAGE 19 MOUNTING DETAILS PAGE 21 ASSEMBLY PROCEDURE PAGE 22 CABLE DETAILS PAGE 25 INSPECTION SCHEDULE TABLE PAGE 27 DISPOSAL DETAIL TABLE 13 APPENDIX 14 MANUFACTURER DETAILS CUSTOMER SUPPORT ...

Page 30: ...ATLAS 2 0 MADE IN EUROPE 30 TESUP TESUP HEADQUATERS 22 SUTTON LANE NORTH CHISWICK LONDON W4 4LD UNITED KINGDOM TESUP OFFICIAL WEB STORE ONLINE CHAT ...

Page 31: ...ATLAS 2 0 MADE IN EUROPE 31 TESUP 15 NOTES ...

Reviews:

Related manuals for ATLAS2.0