19
• MediaStation 6
3.5 Changing Network Settings
Use this menu to confi gure Ethernet and
WLAN (Wireless Local Area Network)
settings.
3.5.1 Wired LAN Setup
DHCP IP (Auto)
Select to obtain IP address automatically.
Typical situation: A household with an
existing internet connection via a pre-
confi gured DSL router. In this case, the DSL
has an integrated DHCP service, which is
pre-confi gured and working properly. In
this case, you only need to select the item
“DHCP Auto”, the required IP will be found
automatically on the network.
FIX IP (MANUAL
Select to manually input the IP Address,
Subnet Mask, Default Gateway, and DNS
Server IP Address.
If you intend to have MS 6 readily available
via the network or if the automatic search is
unsuccessful, the device should be assigned
a fi xed IP address.
An example: You assign – as described
below – the IP address “192.168.46.2” to
the MS 6. You can then access the device
from any Windows PC by entering the line
“\\192.168.46.2\” in the Windows Explorer
and save and/or retrieve data.
Note: Entries in the Windows Explorer must
be made in the format “\\<address>\” (see
above for an example), in Internet Explorer,
on the other hand, always make entries in
the format “http://<Adresse>/” (in the exam-
ple, therefore: “http://192.168.46.2/”).
3.5.1.1 LAN Setup manually
Note:
While setting up your LAN /
WLAN you will need a lot of data. We
recommend to create a form in which you
can input these data. Please refer to our
example on page 26.
1. With your network-linked PC, click
“Start” and “Run” (under Windows 7
click the fi eld “Search programmes/
fi les”). Enter “CMD” and press ENTER –
the black window “Command prompt”
will appear on the screen.
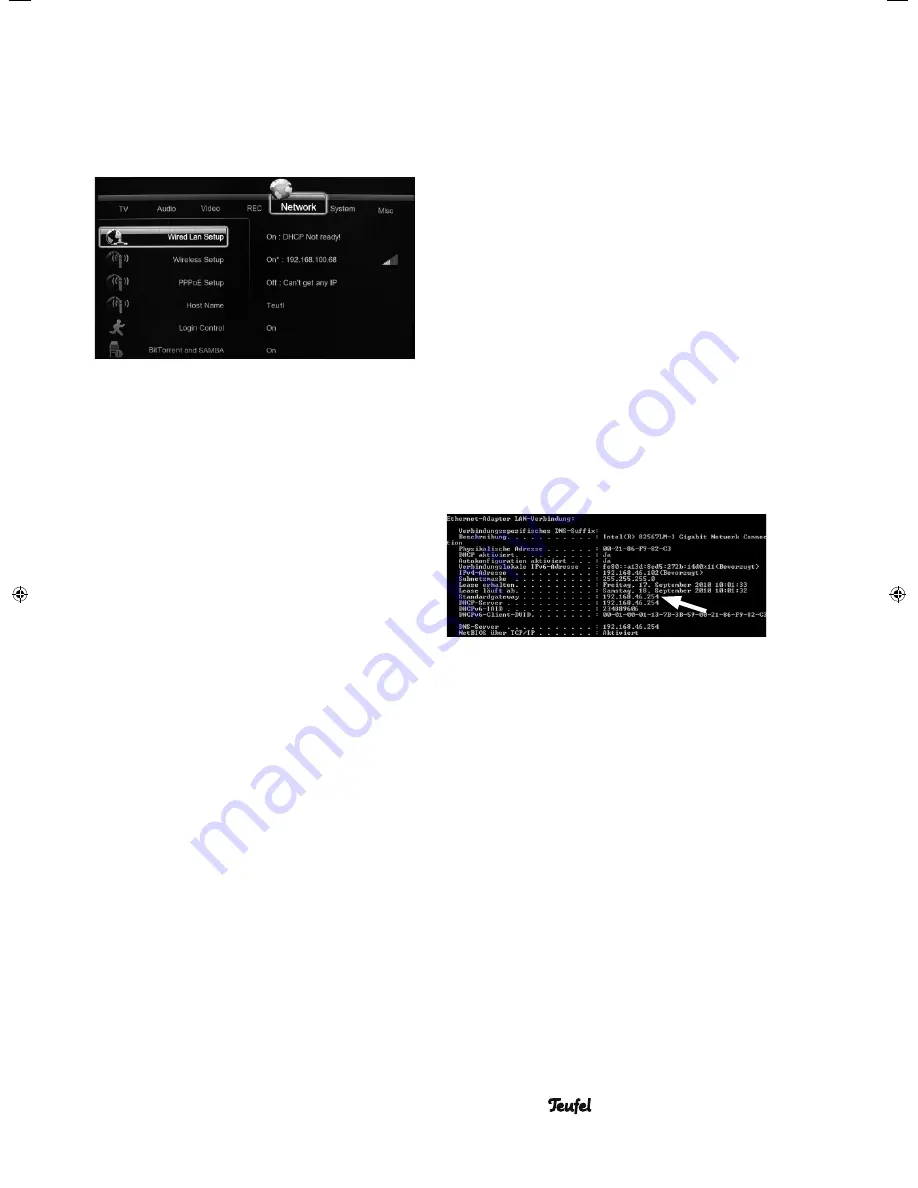
2. Enter “ipconfi g /all” (make sure there is
a space between “ipconfi g” and “/all”)
and press ENTER. The PC’s network
confi guration will appear.
3. Search for the entry “Standard gate-
way” (to do so, scroll the bar up) and
enter the corresponding IP address in
the form (see last page) – in our exam-
ple “192.168.46.254”, see the fi gure on
the right, upper frame. You now know
the IP address of your DSL router.
4. Also enter the address of your DNS
server (see the second frame on the
right) in the form.
5. Enter the previously determined
router address (“Standard gateway”)
in Internet Explorer, in our example
“http://192.168.46.254/”; then press
ENTER – the log-on screen for your DSL
router will appear.
6. Now enter the router access data (for
this, consult the instructions of your
router).
91691 GB A5 20110901.indd 19
91691 GB A5 20110901.indd 19
01.09.11 15:09
01.09.11 15:09
Summary of Contents for MediaStation 6
Page 4: ......


