background image

31

After Sales Support   1300 886 649

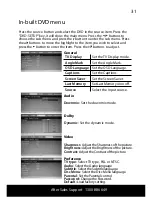
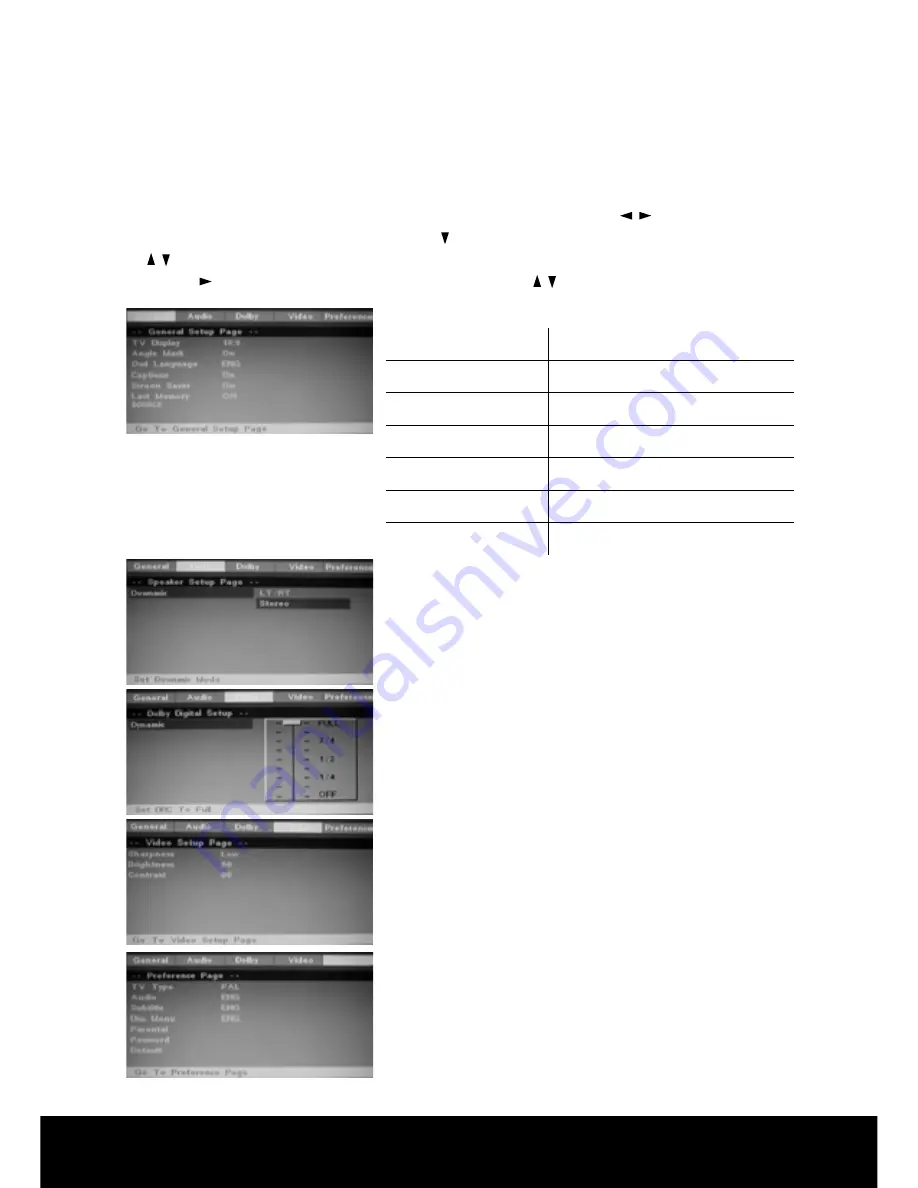
In-built DVD menu

Press the source button and select the DVD in the source item. Press the 

“DVD-SETUP” key, it will show the main menu. Press the 

/

 buttons to 

choose the sub menu and press the   button to enter the sub menu. Press 

the 

/

 buttons to move the highlight to the item you wish to select and 

press the   button to enter the item. Press the 

/

 buttons to adjust.

General

TV Display

Set the TV Display mode.

Angle Mark

Set the Angle Mark.

OSD Language

Set the OSD Language.

Captions

Set the Captions.

Screen Saver

Set the Screen Saver.

Last Memory

Set Last Memory on or off.

Source

Select the input source.

Audio

Downmix:

 Set the downmix mode.

Dolby

Dynamic:

 Set the dynamic mode.

Preference

TV type:

  Select TV type, PAL or NTSC.

Audio:

 Select the Audio language.

Subtitle:

 Select the Subtitle language.

Disc Menu:

 Select the Disc Menu language.

Parental: 

Set the Parental control.

Password: 

Change the Password. 

Default:

 Load factory setting.

Video

Sharpness: 

Adjust the Sharpness of the picture. 

Brightness: 

Adjust the Brightness of the picture.

Contrast:

 Adjust the Contrast of the picture. 

Summary of Contents for AJ-19LHC3

Page 1: ...48cm 19 HD LCD TV with DVD Player Instruction Manual Model Number AJ 19LHC3 After Sales Support TEL 1300 886 649...

Page 2: ...t failure within its intended use over the course of the 1 year after the date of purchase we will remedy the problem as quickly as possible once it has been brought to our attention In the unlikely e...

Page 3: ...the antenna 11 Remote control 12 Inserting the batteries in the remote control 14 Connecting your VCR or Video Camera 15 Satellite Cable TV set top box connections 16 Connecting an external DVD Playe...

Page 4: ...products brought to you by TEVION are manufactured to the highest standards of performance and safety and as part of our philosophy of customer service and satisfaction are backed by our comprehensive...

Page 5: ...as radiators heat registers stoves or other TV s including amplifiers that produce heat 10 Do not alter the grounding type plug provided with the TV A grounding type plug has two blades and a third g...

Page 6: ...user to the presence of non insulated dangerous voltage within the product s enclosure that may be of sufficient magnitude to constitute a risk of electric shock to persons The exclamation point withi...

Page 7: ...ose or improperly inserted power plug may cause a fire Do not bend the power cord excessively or place heavy objects on top of it Doing so may cause a fire or an electric shock When disconnecting the...

Page 8: ...ut anchoring both the furniture and the television to a suitable support Not standing the televisions on cloth or other materials placed between the television and supporting furniture Educating child...

Page 9: ...lectric shock If you notice any unusual odours or smoke around the unit immediately disconnect the unit from the outlet and contact the service centre Failure to do so may result in fire or electric s...

Page 10: ...TV channel down down orientation CH 5 MENU ENTER MENU 6 Select the input signals Exit the menu INPUT 7 POWER ON OFF 8 DVD Play 9 DVD Pause 10 DVD Open Close 11 DVD Stop 12 DVD Previous 13 DVD Next 1 D...

Page 11: ...10 After Sales Support 1300 886 649 User s guide Power cord AC Adaptor Remote control Batteries The configuration of the components may look different from the following illustration Accessories list...

Page 12: ...s Support 1300 886 649 Make sure to connect the coaxial cable to the analogue digital input of the TV Installing the antenna Wall Jack with F Connector External antenna Analogue Digital 75 RF Coaxial...

Page 13: ...xt page number select LIST 10 LIST Display the channel list 10 Select the part more than 10 under DVD mode PROGRAM Return to the previous channel viewed PROGRAM Change the display effect edit the play...

Page 14: ...nt display page SIZE Change display size REVEAL CARD REVEAL Reveal hidden the hidden words CARD Change source under DVD mode to select CARD MIX D MENU MIX MIX the teletex under ATV mode D MENU Bring u...

Page 15: ...is powered and that it is properly plugged in Inserting the batteries in the remote control CAUTION Risk of explosion if the battery is replaced by an incorrect type Dispose of used batteries accordin...

Page 16: ...CE on the remote control of the LCD TV and use to select AV then press OK 4 Press the PLAY button of your VCR NOTE Make sure that you have connected your VCR to the TV properly Connect the LCD TV s Co...

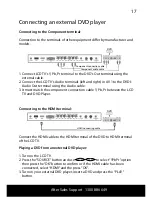
Page 17: ...e Cable Broadcasting receiver Composite Out terminal using the Composite cable NOTE Make sure the colour of the terminals and the colour of the cable are the same Connecting to the HDMI terminal Watch...

Page 18: ...your external DVD player insert a DVD and press the PLAY button Connecting to the HDMI terminal Connect the HDMI cable to the HDMI terminal of the DVD to HDMI terminal of the LCD TV 1 Connect LCD TV...

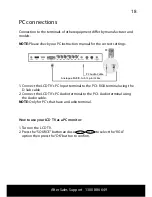
Page 19: ...ut terminal to the PC s RGB terminal using the D Sub cable 2 Connect the LCD TV s PC Audio terminal to the PC s Audio terminal using the Audio cable NOTE Only for PC s that have an Audio terminal PC c...

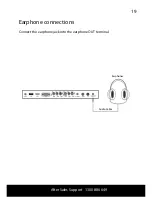
Page 20: ...19 After Sales Support 1300 886 649 Connect the earphone jack into the earphone OUT terminal Earphone connections Earphones Audio Cable...

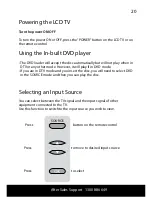
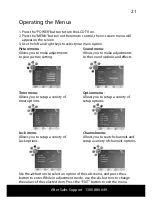
Page 21: ...ch to the input source you wish to view The DVD loader will accept the disc automatically but will not play when in DTV or any other mode However it will play if in DVD mode If you are in DTV mode and...

Page 22: ...tment mode use the buttons to change the values of the selected item Press the EXIT button to exit the menu Picture menu Allows you to make adjustments to your picture setting Lock menu Allows you to...

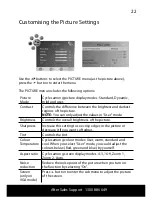
Page 23: ...verall brightness of the picture Sharpness Increase this setting to see crisp edges in the picture or decrease it if you want soft edges Tint Controls the tint Colour Temperature Cycles among colour m...

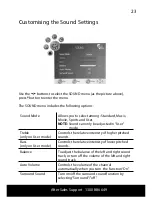
Page 24: ...d can only be adjusted in User mode Treble only on User mode Controls the relative intensity of higher pitched sounds Bass only on User mode Controls the relative intensity of lower pitched sounds Bal...

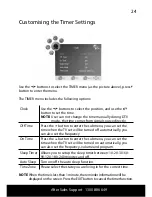
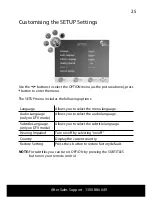
Page 25: ...you can set the time when the TV set will be turned off automatically you can also set the frequency On Time Press the button to enter the submenu you can set the time when the TV set will be turned...

Page 26: ...ou to select the menu language Audio Language only on DTV mode Allows you to select the audio language Subtitle Language only on DTV mode Allows you to select the subtitle language Hearing Impaired Tu...

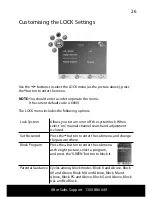
Page 27: ...tem Allows you to turn on or off the system lock When select on manual channel search and adjustment is closed Set Password Press the button to enter the submenu and change the password here Block Pro...

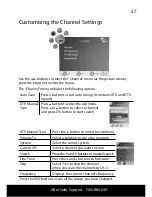
Page 28: ...ess the button to enter the menu The Channel menu includes the following options ATV Manual Scan Press the button to enter the submenu Storage To Select a position to store the program System Select t...

Page 29: ...ttons to change the character press the buttons to confirm the change Move Select a channel and press the YELLOW button then you can use the buttons to change the position of the channel in the list p...

Page 30: ...activate it Some channels work in groups if you activate the channels 10 20 30 70 and 90 almost all available EPG information will be displayed The numerical buttons will not work when in the EPG mod...

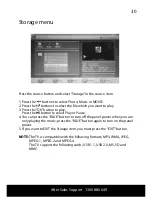
Page 31: ...OK button to play Press the button to select Play or Pause 4 You can press the BLUE button to turn off the panel power when you are only playing the music press the BLUE button again to turn on the pa...

Page 32: ...Set the Angle Mark OSD Language Set the OSD Language Captions Set the Captions Screen Saver Set the Screen Saver Last Memory Set Last Memory on or off Source Select the input source Audio Downmix Set...

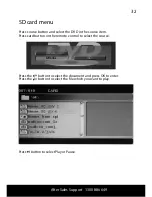
Page 33: ...utton and select the DVD in the source item Press card button on the remote control to select the source Press the button to select the document and press OK to enter Press the button to select the fi...

Page 34: ...st for 720P VGA input 1 PC Audio input 1 USB reader Multimedia Format support MOVIE MPEG4 AVI MP4 DIVX4 DIVX5 XVID MAX Resolution 720 576 MAX BAUDRATE 6Mbps MPEG1 2 MPG MPE VOB DAT TRP TS MAX BAUDRATE...

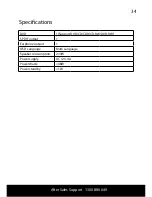
Page 35: ...Support 1300 886 649 Specifications DVD 1 Support DVD CD CDR CD RW DVD RW SPDIF output 1 Earphone output 1 OSD Language Multi Language Speaker consumption 2 3W Power supply DC 12V 4A Power Waste 48W P...

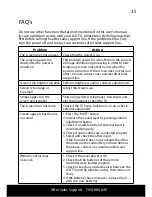
Page 36: ...Screen is too large or too small Adjust the screen size Stripes appear on the screen and it shakes Stop using wireless telephones hair dryers and electrical appliances near the TV The screen does not...

Reviews: