background image

MODEL

DR2501

DVD


HOME


THEATRE

INSTRUCTION


MANUAL

Summary of Contents for DR2501

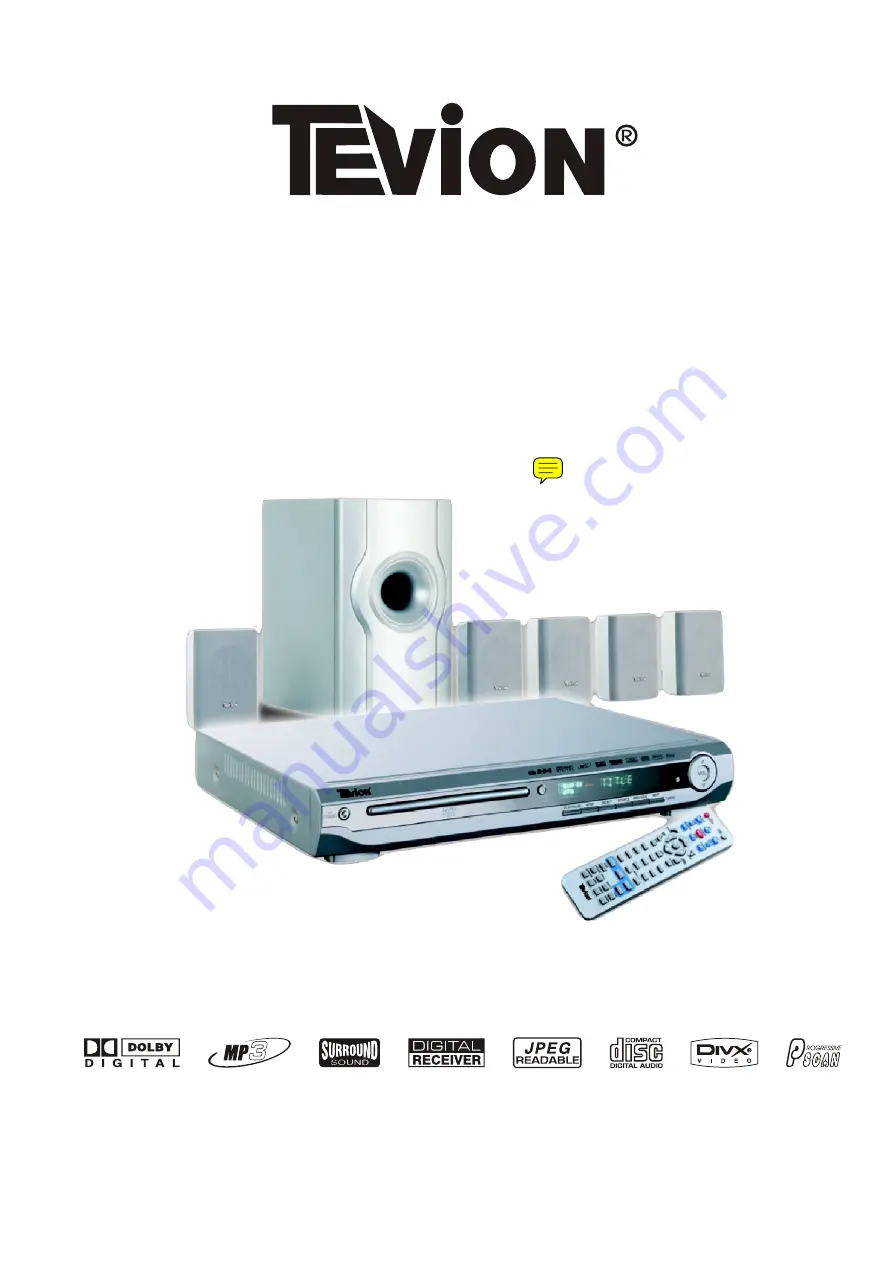
Page 1: ...MODEL DR2501 DVD HOME THEATRE INSTRUCTION MANUAL...

Page 2: ...that produce heat Do not leave in direct sunlight 10 WARNING Do not place any naked flame source such as lighted candles on any electrical apparatus 11 Connect to a suitable 230 240 50 Hz power supply...

Page 3: ...all servicing to qualified personnel This unit operates on 230 V 50Hz If it is not to be used for a long time the AC power cord should be unpluged The unit must not be exposed to moisture or rain The...

Page 4: ...ion of this system please review the Trouble Shooting Guide at the end of this manual Thank you for purchaseing this DVD Home Theatre System This Home Theatre sys tem includes everything you need to e...

Page 5: ...Language 26 Speaker Setup 27 Audio Setup 28 Preference Setup Getting Your System into the Stop Mode 29 Setting Audio Subtitle Disc Menu Language 29 Setting PARENTAL ratings 30 Setting PASSWORD 31 Retu...

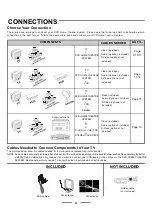
Page 6: ...r VCR audio or tape player to the DVD HOME THEATRE SYSTEM Most people will only need a TV set with a video input jack and no extra cables CONNECTIONS FM antenna AM antenna S Video cable not included I...

Page 7: ...onnect the Subwoofer to the SUB terminals Connect the supplied speaker system by matching the colours of the terminals to those of the cords NOTE 1 Video cable is included for connecting to your TV se...

Page 8: ...es Unwind and stretch out the speaker wires attached with each speakers then push and hold down the set terminal tab on the back of the main set to insert each wire Make sure the wire is fully inserte...

Page 9: ...SPEAKERS APPROXIMATELY AT THE SAME DISTANCE FROM YOUR LISTENING POSITION POSITION THE SUBWOOFER AS BELOW POSITION THE SPEAKERS LIKE THIS FOR OPTIMAL LISTENNING EXPERIENCE All 5 satellite speakers shou...

Page 10: ...in your normal listening position We have provided 2 way keyhole openings on the back of all the satellite speakers that allow the satellite speakers to be wall mounted in either a vertical or horizo...

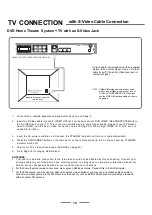
Page 11: ...ct and enjoy this DVD HOME THEATRE SYSTEM with Video Cable Connection ANTENNAS 1 Your cable or antenna connection to the television should not be affected by this connection Connect your antenna cable...

Page 12: ...o your television as you normally would You may need to consult your television manual for details but no changes will be made to your current antenna connections NOTE Yellow Video plug and wire are n...

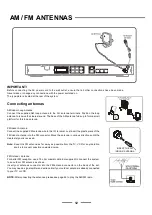
Page 13: ...mally would You may need to consult your television manual for details but no changes will be made to your current antenna connections 2 For the home theatre antenna connections we supply an AM loop a...

Page 14: ...a wire to the FM terminal Just insert the plastic piece of the FM indoor antenna into the FM connector Move the antenna in various directions until the clearest signal is received Note Keep this FM an...

Page 15: ...yellow into the VIDEO OUT jack on the back of your VCR player and into the VIDEO IN jack on your TV 4 using a coaxial antenna cable 5 Connections of your other antenna cables are not changed when you...

Page 16: ...rn on the set and the STANDBY indicator will be off 6 Select your TV s Video channel to match your RF Modulator s Video channel see the NOTE on page 23 7 Go to Page 32 for playing DVDs discs IF YOU OW...

Page 17: ...d into the VIDEO your TV 5 Connect VCR to your TV using a coaxial 6 Connections of your other antenna cables are not changed when you add your DVD HOME THEATRE SYSTEM 7 Insert the AC power cord into a...

Page 18: ...the factory s default setting for the sound output is PRO LOGIC Press the SURROUND button if you want to return to STEREO sound output and the sound will only come out of 2 speakers plus subwoofer 3 I...

Page 19: ...to DVD FM AM AUX1 IN or AUX2 IN 12 PREVIOUS RADIO SCAN button Skips to previous chapter ba ckwards or tunes the rad io to a lower frequency station 13 NEXT RADIO SCAN button Skips to next chapter for...

Page 20: ...or selects stereo left or right audio channel of a VCD disc 20 SURROUND button Press to change the surround audio effect or to change 2 speakers sound to all 5 speakers sound STEREO or SURROUND 21 OP...

Page 21: ...cked Replace the door 2 Reverseing polarities will damage the batteries and possibly your REMOTE Be sure to follow polarity and as indicated Do not mix different types of batteries together or old bat...

Page 22: ...deo disc is playing 10 MP3 indicator Shows an MP3 disc is playing 17 18 11 DTS indicator Illuminates when the playing disc is recorded with DTS format DIGITAL THEATRE SYSTEM 12 STEREO indicator Illumi...

Page 23: ...ecorded in another format such as NTSC SECAM and regions other than REGION 4 This set will also not play damaged scratched or dirty discs JPEG or JPG picture discs also play on this set you may not se...

Page 24: ...ct sunlight or near heat sources Do not store discs or the set in places subject to moisture and dust such as a bathroom or near a humidifier Store discs vertically in their case Stacking or placing o...

Page 25: ...for initial settings is as follows 23 General Setup NOTE 1 Most people will not adjust the setup functions and will go directly to Page 32 for basic play See Page 24 to 31 for details if you need to...

Page 26: ...PONENT follow the steps below General Setup 1 Press the SETUP button on the remote control GENERAL SETUP is highlighted 2 Press the ENTER button 4 Press the button to open the VIDEO OUTPUT submenu 5 S...

Page 27: ...X 9 Widescreen 16 9 Choose this setting if your HOME connected to a WIDESCREEN TV If you choose this setting and you don t have a WIDESCREEN TV the images on the screen may appear distorted due to ve...

Page 28: ...confirm 6 To exit press the SETUP button 26 This is the language which your HOME THEATRE will use to give you directions or instructions during use This is not the language in which the movie actors...

Page 29: ...akers If you want to change the surround timing delay you may select other delay timings in millisecond mS We suggest you leave these settings as is This allows you to select and adjust the delay time...

Page 30: ...ery loud and thus the loudest sounds must be compressed downwards in level Likewise the very quiet sounds may be inaudible and must be brought upwards in level to be heard Dolby Digital satisfies thes...

Page 31: ...uage These items allow you to preset the audio language subtitle language and Disc menu language that will always be used for every disc the language selected is available 1Press the SETUP button on t...

Page 32: ...ou can lock your DVD player to prevent children from viewing higher rated movies even when you are not at home 7 NC 17 restricted to over 17 8 Adult adult can view any DVD 9 NO PARENTAL no restriction...

Page 33: ...4A new display will ask you to enter your old 4 digit password 5Enter the initial password 3308 to unlock the setting for the first time or enter your old 4 digit password if you have already previous...

Page 34: ...yback 1 NOTE The disc door can only open in DVD mode when the DVD indicator is on NOTE Refer to Page 23 for the correct VIDEO input 6 Press the STOP button to stop playing 1 Press the SOURCE button on...

Page 35: ...press the ENTER button In the example on the left Language has been selected An example of a disc menu The menus on discs vary because the disc menu is created by the disc s author and direc tor 3 Pre...

Page 36: ...order You can raise or lower each speaker s volume or all the speakers To raise or lower the master volume press the VOLUME or VOLUME button on the remote control or main unit The level of all 6 spea...

Page 37: ...utton on the REMOTE CONTROL continuously or repeatedly to search forward at a faster speed X2 X4 X6 or X8 the larger the number the faster the speed then press the PLAY PAUSE button to resume normal p...

Page 38: ...rt repeating playback of the selected segments A to B over and over till you press A B REPEAT button again Note This function is available for VCD in PBC OFF mode only press the REPEAT 1 ALL button th...

Page 39: ...led titles Normally a title is composed of several chapters When you play a DVD which contains several titles you can select the title or chapter you want by using the SEARCH button NOTE Press the ENT...

Page 40: ...During the slow motion playback the sound is muted no sound 2 For VCD discs press the SLOW button the playback speed will become 1 2 1 4 or 1 8 of normal speed forwards only 2 To return to normal play...

Page 41: ...DVD disc play the screen will display the number of current soundtrack languages available 3 To play another language press the LANGUAGE button again 39 2 Repeat pressing the LANGUAGE button again to...

Page 42: ...ur favourite music tone type NOTE There are 6 types of equaliser settings available for your selection classic jazz rock pops ballad dance SUBTITLE 01 02 ENGLISH SUBTITLE 02 02 FRENCH SUBTITLE OFF NOT...

Page 43: ...ou press the STOP button 3 In STOP mode press the REPEAT 1 ALL button twice FOLDER REPEAT will show in the screen select one track in the folder you want to repeat then press the PLAY PAUSE button the...

Page 44: ...eric buttons 4 Press the ENTER button to execute your selection and begin play Only when using the UP DOWN buttons for numeric input there is no need to press ENTER 5 Follow the instructions on the me...

Page 45: ...the factory s default setting mode AC 3 automatically You may press the LANGUAGE button to hear different sound tracks which may be recorded on your disc MONO RIGHT When listening to a VCD disc with d...

Page 46: ...een 2 Press the DISPLAY button a second time to view the single track remaining time on the TV screen 3 Press the DISPLAY button a third time to view the total tracks elapsed time on the TV screen mus...

Page 47: ...normal view press ZOOM button again ZOOM OFF will show on the screen When you press the FORWARD button ZOOM 100 PCT ZOOM 150 PCT ZOOM 200 PCT Whe you press the BACKWARD button ZOOM 100 PCT ZOOM 50 PCT...

Page 48: ...mber buttons to select the desired preset stations If your FM program is noisy press MONO STEREO on the remote control so that MONO appears on the front panel display There will be no stereo effect bu...

Page 49: ...a blank audio channel on a multiple language disc please reset your set to the main language or English Also try pressing the SURROUND button 6 Ensure that the input settings for the TV are correct 7...

Page 50: ...et all functions to the factory s default settings see Page 31 The sound comes from the centre speaker only Depending on the disc at times the sound may come from the centre speaker only This is norma...

Page 51: ...disc if disc is very badly scratched or dirty it will not play 3 Check if the DVD disc is for Region 4 4 Some illegally copied discs will not play on this set 1 If faces seem stretched and too long y...

Page 52: ...the disc is busy loading or during play the disc must stop reading the data and spinning first then the tray will open Please be patient it may take over 30 seconds 2 If you put a disc into the tray U...

Page 53: ...oup of experts nominated to produce standards for continuous tone image coding In other words your HOME THEATRE can view picture CDs or CDs you made on your computer with names that end in the JPG for...

Page 54: ...han 85 dB EIAJ Audio Line Outputs Audio L R 1 Vrms 1 kilohms Audio Power Outputs Stereo Mode 21W 4 ohms at 1kHz THD 10 Surround Mode Front 21W 21W 4 ohms at 1kHz THD 10 Centre 21W 4 ohms at 1kHz THD 1...

Reviews: