1
.
C
o
nne
c
t t
h
e 5 s
a
t
e
ll
i
te s
pea
k
e
rs and s
u
b
w
oo
f
e
r as shown on Page 5
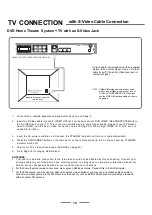
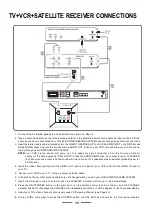
2. Insert the s
te
reo audio cables (included) into the HOME
THEATRE
A
UX
1
o
r
AU
X
2
A
UD
IO I
NP
UT L (
L
e
ft
=
W
h
i
te
) a
nd
R (Right=Red) jacks and into the corresponding AUDIO OUT jacks on your VCR, this will allow your VCR s sound to
play through your HOME
THEATRE
SY
STE
M.
NOTE
: Your VCR s tereo s ou nd will c ome out of 5 spea kers plus s ub woo fer s inc e the f c tory s de fault
setting for the sound output is
PRO LOGIC .
Press the SURROUND button if you want to return to STEREO
(2 channel) sound output, and the sound will only come out of 2 speakers plus subwoofer (probably best for
VCR sound).
3. Insert the video cable (yellow) into the VIDEO OUT j ack on the back of your VCR player, and into the VIDEO IN
ja
ck on y
o
u
r T
V
.
4
.
u
s
ing
a
co
ax
ia
l
an
te
nn
a
c
ab
le.
5. Connections of your other antenna cables are not changed when you add your DVD HOME
THEATRE
SY
ST
EM.
6. Insert the AC power cord into an AC socket, the STANDBY indicator will turn on in red automatically.
7. Press the ON/STANDBY
button
on
the
main
set
or
on
the
remote
control
to turn on the set, and the STANDBY
indicator will be off.
8. Press the SOURCE button repeatedly until AUX 1 or AUX 2 appear on the front panel display.
9. Select your TV s video channel or previously used VCR viewing channel (see the NOTE on page 23).
10 . To play DVD s, remembe r to press the SOU RCE bu tton until the DVD icon sho ws on the front pane l display.
TV + VCR CONNECTIONS
13
a
,
,,
,
Component YUV
.
P b P r
Extra Video Cable (not included)
Connect your VCR with your TV


