background image

VI

G

ETTING 

S

TARTED WITH THE 

CBL 2™ S

YSTEM

© 2000, 2003 T

EXAS 

I

NSTRUMENTS 

I

NCORPORATED

Collecting Data Out of the Box Using the CBL 2™ System

1.

Insert batteries into the CBL 2.

2.

Connect CBL 2 to a TI graphing calculator using the unit-to-unit link cable. (Use
the cradle if desired; see diagram on the cradle or the instructions on page 4.)

If you are using the TI-83 Plus or TI-83 Plus Silver Edition, proceed to step 4.

If you are using the TI-89, TI-92 Plus, or Voyage™ 200 PLT (personal learning
tool) proceed to step 5.

3.

Reset the memory of your calculator. Reset is necessary
only for the TI-73, TI-82, and TI-83. To reset RAM, press

y


L

, choose 

7:Reset

, then choose 

1:All RAM

, and

then choose 

2:Reset

.

This is a required step due to the size of the DataMate
programs that are stored in RAM.

4.

Put calculator in Receive Mode (waiting to receive information):

♦ 

For TI-73, press 

9

, choose 

Y

 LINK, press 

"

 to RECEIVE, and then press

b

.

♦ 

For the TI-82, TI-83, TI-83 Plus, and TI-83 Plus Silver Edition, press 

y


8

,

press 

~

 to RECEIVE, then press 

Í

.

5.

Press the 

TRANSFER

 button on the CBL 2. The CBL 2 detects the calculator to

which it is connected and sends the appropriate version of the built-in
DataMate software. (This software controls the CBL 2 and how it collects data.)

6.

Plug your Stainless Steel Temperature sensor into Channel 1 (CH1) of the CBL 2.

7.

Run DataMate:

♦ 

For TI-83 Plus and TI-83 Plus Silver Edition, press 

9

. Press 

 or 

}

 to

highlight DATAMATE and press 

Í

.

♦ 

For the TI-73, TI-82, and TI-83, press 

. Press 

À

 DATAMATE or press

Í

. DATAMATE is pasted to your home screen; press 

Í

 again to

confirm your choice.

♦ 

For the TI-89, TI-92 Plus, and Voyage 200 PLT, if the Apps desktop is turned
on, press 

O

, highlight DataMate, and press 

¸

.

or
If the Apps desktop is turned off, press 

¹


O

, highlight DataMate, and

press 

¸

.

8.

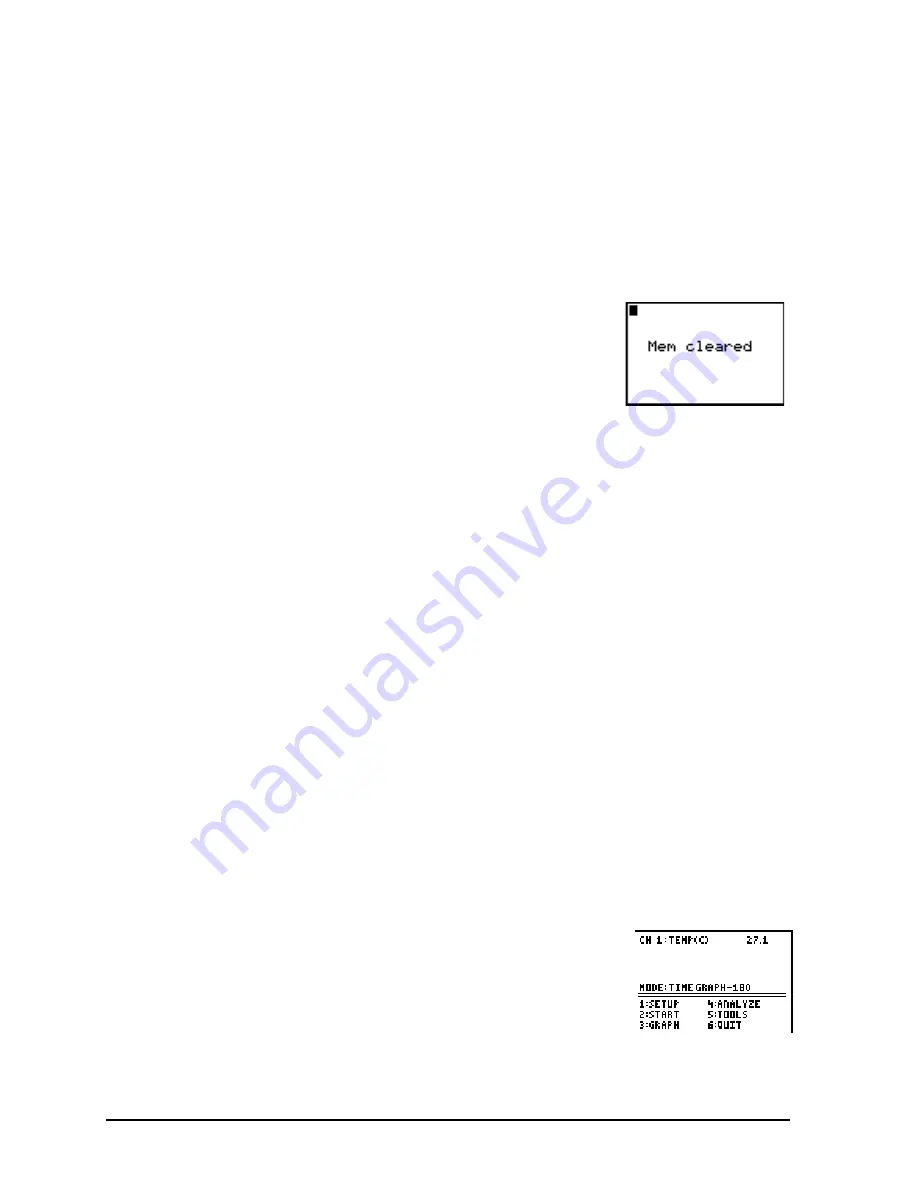
DataMate automatically identifies the Stainless Steel
Temperature sensor, loads its calibration factors, and
displays the name of the sensor, as well as the
temperature in degrees C. It also loads a default
temperature experiment.

9.

Start collecting data with the default experiment. Hold the temperature sensor
in your hand and press 

Á

 START to begin data collection.

Summary of Contents for CBL 2

Page 1: ... Getting Started with the CBL 2 System LabPro is a trademark of Vernier Software Technology Radio Shack is a trademark of Technology Properties Inc ...

Page 2: ...cur in a particular installation If this equipment does cause harmful interference to radio or television reception which can be determined by turning the equipment off and on you can try to correct the interference by one or more of the following measures Reorient or relocate the receiving antenna Increase the separation between the equipment and receiver Connect the equipment into an outlet on a...

Page 3: ...ate a Sensor optional 7 Zero a Sensor optional 9 Select the Data Collection Mode 9 Change the Time Graph Settings optional 10 Change the Advanced Time Graph Settings optional 11 Collect the Data 12 Store Latest Run 13 Graph the Data 13 Select Region optional 14 Rescale Graph optional 14 More Graphs optional 15 Analyze the Data 15 Collect Data with Quick Set Up 16 Save and Retrieve Experiments 17 S...

Page 4: ...27 Select Sensor 28 Setup 28 Time Graph Settings 29 Tools 29 Activity 1 Add Them Up 31 Activity 2 Light from Afar 41 Activity 3 Dueling Sensors Which Temperature is Which 49 Activity 4 Fruit Battery 59 Activity 5 Lights Out 69 Activity 6 Night and Day 79 Appendix A General Information A 1 Battery and Adapter Information A 1 Operating Power Requirements A 1 When to Replace Batteries A 1 Recommended...

Page 5: ...her TI Products and Services A 11 Warranty Information A 12 Customers in the U S and Canada Only A 12 Australia New Zealand Customers only A 12 All Other Customers A 13 Appendix B Command Tables B 1 Command 0 B 1 Command 1 B 1 Command 2 B 3 Command 3 B 3 Command 4 B 5 Command 5 B 6 Command 6 B 7 Command 7 B 8 Command 8 B 9 Command 9 B 9 Command 10 B 10 Command 12 B 10 Command 102 B 12 Command 115 ...

Page 6: ...Edition press y 8 press to RECEIVE then press Í 5 Press the TRANSFER button on the CBL 2 The CBL 2 detects the calculator to which it is connected and sends the appropriate version of the built in DataMate software This software controls the CBL 2 and how it collects data 6 Plug your Stainless Steel Temperature sensor into Channel 1 CH1 of the CBL 2 7 Run DataMate For TI 83 Plus and TI 83 Plus Sil...

Page 7: ...e graph of temperature Wait about 30 seconds and then press to stop collecting data When finished your graph will be similar to the one shown here 11 You just successfully collected data See the rest of the manual for other DataMate options other sensors analysis saving data etc 12 Explore the world around you ...

Page 8: ...VIII GETTING STARTED WITH THE CBL 2 SYSTEM 2000 2003 TEXAS INSTRUMENTS INCORPORATED ...

Page 9: ...cluded with the CBL 2 for this purpose For added portability the CBL 2 unit comes with a cradle which attaches the calculator to the unit so the whole thing fits easily into one hand With a TI GRAPH LINK cable sold separately you can also link the CBL 2 to a personal computer As future software upgrades become available on the TI web site you can download the software to your PC and then use a TI ...

Page 10: ...y loaded DataMate is a multi purpose user program containing the basic information needed to run experiments with a CBL 2 a TI graphing calculator and various sensors DataMate is provided for the following TI graphing calculators TI 73 TI 82 TI 83 TI 83 Plus TI 83 Plus Silver Edition TI 86 TI 89 TI 92 TI 92 Plus and Voyage 200 PLT For the TI 83 Plus TI 83 Plus Silver Edition TI 89 TI 92 Plus and V...

Page 11: ...r Dissolved Oxygen Sensor Extra Long Temperature Sensor Biology Gas Pressure Sensor Current Voltage Sensor System Gas Pressure Sensor Vernier Photogate Respiration Monitor Belt Direct Connect Temp Sensor EKG Sensor Stainless Steel Temp Sensor Exercise Heart Rate Monitor Relative Humidity Sensor Heart Rate Monitor pH Sensor Barometer Note For updated lists of available sensors see the web site for ...

Page 12: ...gure 2 Connecting CBL 2 to a Calculator 1 Insert the upper end of the calculator into the cradle 2 Press down on the lower end of the calculator until it snaps in place 3 Slide the back of the cradle onto the front of the CBL 2 until it clicks in place 4 Plug one end of the 6 inch unit to unit link cable into the I O port in the end of the CBL 2 and plug the other end of the cable into the I O por...

Page 13: ... written with the DataMate app for TI 83 Plus and show TI 83 Plus screen examples See page 2 for information about the differences between DataMate programs apps for the various TI graphing calculators The basic steps for conducting an experiment with CBL 2 sensor s and a TI graphing calculator are 1 Connect the sensor s to the CBL 2 system connect CBL 2 and your calculator and run the DataMate pr...

Page 14: ...on DataMate programs from the calculator before loading DataMate See step 3 on page vi 1 Connect the CBL 2 to the calculator 2 Press Œ 3 Press h if needed to move the cursor to DATAMATE and press Í The DataMate title screen displays This screen shows both the DataMate program version number VER 1 14 in the example and the operating system version number ROM 1 12 in the example Then the Main Screen...

Page 15: ...pressure display another screen and require you to select a particular sensor preferred unit of measure or calibration 7 When you finish choosing sensors press À OK to return to the Main Screen Calibrate a Sensor optional When a sensor is selected DataMate automatically loads the default calibration settings Although it is not necessary if you choose to calibrate a sensor use the following procedu...

Page 16: ...en press Í 5 Key in the value of the buffer solution 6 Repeat steps 3 and 4 for the 10 buffer solution 7 Press À OK to return to the Setup screen Note Refer to the documentation provided with your sensor for calibration procedures and default calibration values You can also calibrate the pH sensor by entering values This procedures is used if a full calibration has been done previously and you wan...

Page 17: ...d during the current session Also new calibrations and zeros can be reset to defaults during the current session by going to the Main Screen and pressing Select the Data Collection Mode For each sensor from Vernier DataMate loads a default experiment data collection mode appropriate for the sensor The default data collection mode for all sensors is Time Graph collecting data points at a predetermi...

Page 18: ...e Graph on the Select Mode screen the Time Graph Settings screen appears Each sensor has a default time interval between samples in seconds and default number of samples data points To change the settings from the default follow the steps below If you press Á TIME GRAPH on the Select Mode screen the Time Graph Settings screen appears 1 Press Á CHANGE TIME SETTINGS 2 Key in the time interval betwee...

Page 19: ... range is 20 to 125 1 To change the window range to be graphed press Á CHANGE GRAPH SETTINGS A list of the connected sensors appears 2 Press the number beside the sensor you want 3 To change the type of triggering press  CHANGE TRIGGERING In the example shown there are two types of triggering For option 1 or 2 the CBL 2 will trigger the start of data collection based on a change in the data being...

Page 20: ...ant to keep 10 percent 20 percent and so on From the time the experiment begins until the threshold is reached CBL 2 collects data in its buffer When the threshold is reached CBL 2 begins storing the data it is collecting and discards the data it collected before the threshold was reached unless a prestore value is entered 8 Press À OK to exit the screen 9 Press À OK again to return to the Setup s...

Page 21: ... 4 the data is List 2 is moved to List 3 and new data is collected in List 2 Graph the Data 1 If you have multiple sensors attached to the CBL 2 the Graph Menu screen displays automatically when you finish collecting data Note If you have only one sensor attached to the CBL 2 the graph itself displays 2 Press or h as needed to move the cursor to the channel data you want to view as a graph and pre...

Page 22: ...16 To view a portion or region of your graph follow these steps 1 On the Graph Menu screen press Á SELECT REGION 2 Change X and Y at the bottom of the screen by pressing or to move the cursor to the point on the graph that you want for the left side of the graph Press Í 3 Press or to move the cursor to the point on the graph that you want for the right side of the graph and press Í The Graph Menu ...

Page 23: ...ng option 2 on the More Graphs screen you can see a graph of the data stored in List 3 L3 versus the data stored in List 2 L2 To select more graphs to see follow these steps 1 On the Graph Menu screen press MORE L1 L2 L3 and L4 refer to the lists in which your data is stored For example L3 VS L1 will graph the data is List 3 versus the data in List 1 2 Press the number beside the graph you want to...

Page 24: ...he option you want 3 When you finish press Í The Analyze Options screen appears Collect Data with Quick Set Up Quick Set Up is used to collect data without a calculator connected to the CBL 2 system In this mode only auto ID sensors CBR and the new Vernier auto ID sensors can be used Up to four sensors can be used at the same time and CBL 2 samples at default rates pre set in DataMate Data will be...

Page 25: ...he CBL 2 system s FLASH memory recall them later and delete them when you no longer need them You can save your experiment set ups sensor selections data collection mode calibrations graph settings and so forth as well as any data you have collected Note This option is available in DataMate for TI 83 Plus TI 83 Plus Silver Edition TI 86 TI 89 TI 92 TI 92 Plus and Voyage 200 PLT Screens shown in th...

Page 26: ... name for example temp1 temp2 and so forth The CBL 2 cannot distinguish between files with the same name All files are displayed in the order in which they were saved Load an Experiment To re load an experiment from the CBL 2 system s FLASH memory follow these steps 1 On the DataMate Main Screen press À SETUP 2 Press SAVE LOAD 3 Press Á LOAD EXPERIMENT 4 Press the number beside the experiment you ...

Page 27: ...llow these steps to delete an experiment 1 On the DataMate Main Screen press À SETUP 2 Press SAVE LOAD 3 Press  DELETE EXPERIMENT 4 Press the number beside the experiment you want to delete CAUTION Deleted files cannot be retrieved The experiment is deleted and the Experiment Menu appears Delete All Experiments In addition to deleting one experiment at a time you can delete all the experiments th...

Page 28: ...uide for the CBL 2 commands If you want to create your own programs for CBL 2 we encourage you to consult the Technical Reference document on the Resource CD or the TI web site for detailed explanations and additional information on the commands Storing and Retrieving Programs with DATADIR The DATADIR program allows you to store programs in the CBL 2 system s FLASH memory and then later retrieve t...

Page 29: ...tructions below 1 On the Directory Main Menu press Á STORE PROGRAM 2 Press y 8 3 Press  Prgm 4 Press to move the cursor to the program you want to store and then press Í A dot appears beside the program name Repeat this instruction until you have selected all the programs you want to store 5 Press to highlight TRANSMIT and press Í When the program s have been stored the calculator displays the me...

Page 30: ...s 3 5 below 3 Press y 8 4 Press to highlight RECEIVE and press Í 5 When the calculator screen displays WAITING press TRANSFER on the CBL 2 When the program has been loaded on the calculator the calculator displays the message Done Note The calculator exits the DATADIR program to make the transfer Delete a Program from Storage The DATADIR program provides two options for deleting programs from stor...

Page 31: ...ars Check Memory The DATADIR program also allows you to check available memory space on the CBL 2 Follow the directions below to check memory 1 On the Directory Main Menu press CHECK MEMORY 2 When you finish viewing the screen press Í The Directory Main Menu appears Collect Garbage The DATADIR program allows you to optimize the available memory on the CBL 2 1 On the directory main menu press COLLE...

Page 32: ...collected data is shown The values shown on the screen are the default range of the sensor in channel 1 In this example it is the stainless steel temperature sensor 1 OK Returns to the Time Graph Mode screen 2 CHANGE GRAPH SETTINGS Allows you to change the minimum and maximum of the y axis and the y scale values for the graph displayed during live graph data collection 3 CHANGE TRIGGERING Allows y...

Page 33: ...aved This screen is available in DataMate for TI 83 Plus TI 83 Plus Silver Edition TI 86 TI 89 TI 92 TI 92 Plus and Voyage 200 PLT 1 SAVE EXPERIMENT Saves the experiment to CBL 2 FLASH memory 2 LOAD EXPERIMENT Reloads an experiment from CBL 2 FLASH memory 3 DELETE EXPERIMENT Deletes an experiment from CBL 2 FLASH memory 4 DELETE ALL EXPERIMENTS Deletes all experiments from CBL 2 FLASH memory 5 RET...

Page 34: ...cted loads a default experiment appropriate to the sensor and shows the current reading All active channels are shown and the Main Screen is updated as auto ID sensors are added or removed Sensors that are not auto ID such as pressure sensors and pH sensors must be set up manually See instructions for Connect a Sensor to the CBL 2 on page 6 The Main Screen defaults to meter mode which updates read...

Page 35: ...e for CBL 2 is Time Graph To change the mode follow the steps in Select the Data Collection Mode on page 9 1 LOG DATA Asks you to start the Quick Set Up Procedure 2 TIME GRAPH Allows you to set the interval between samples and the number of data points collected It is the default mode 3 EVENTS WITH ENTRY Collects one data point each time you press Í and then asks you to correlate that data point t...

Page 36: ...TION M Tells the CBL 2 that the sensor attached to this channel measures data in meters 2 MOTION FT Tells the CBL 2 that the sensor attached to this channel measures data in feet 3 NONE Returns to the Setup screen without selecting a sensor Setup option 1 on the Main Screen From this screen you can change the current experiment setup including change the sensors change the data collection mode cal...

Page 37: ...orm various functions including store data runs retrieve data from the CBL 2 to the calculator and check battery status 1 STORE LATEST RUN DataMate places the data from your first run in List 2 L2 of the calculator When you STORE LATEST RUN this data in List 2 is moved to List 3 of the calculator so that new data can be collected in List 2 You can store up to two runs which enables you to compare ...

Page 38: ...30 GETTING STARTED WITH THE CBL 2 SYSTEM 2000 2003 TEXAS INSTRUMENTS INCORPORATED ...

Page 39: ...ket of your batteries You should see a positive terminal and a negative terminal at the ends of the battery You also will see the size for example AAA and the voltage for example 1 5 VOLTS If you look at the position of the batteries in many flashlights you will notice that they are lined up in a column or a series The batteries in the flashlight are lined up so that the positive terminal touches ...

Page 40: ... device The batteries can be held in place using a battery holder a ruler with a ridge down the center or even the grout line between tiles on a table or floor The batteries should be lined up with a positive terminal touching a negative terminal Data Collection 1 Connect the CBL 2 to your calculator using the unit to unit cable Connect the voltage sensor to the CBL 2 in Channel 1 CH 1 2 On the ca...

Page 41: ...asure each time you press ENTER 8 Now press À OK 9 Press Á START 10 Press Í to take the first measurement of one battery When you see ENTER VALUE press À then press Í for the first entry Each time you press Í to save a voltage the calculator asks you to enter a value to keep track of the number of batteries 11 Now line up two batteries in series Again touch the red voltage leads to the terminal an...

Page 42: ... is called the slope intercept form which is Y AX B where A the slope and B the intersection of the line and the Y axis or the value of Y when X 0 which is also called the Y intercept You may have seen this equation written as y mx b where m is the slope 2 Answer question 7 on the Student Data Reporting Sheet 3 From the graph screen press Í then press À for Main Screen 4 Press ANALYZE 5 Press Á CU...

Page 43: ...he voltage of the batteries used See how the voltage of the series of five batteries decreases over time by using the TIME GRAPH mode over several hours You will need to ensure that the voltage leads are touching the battery terminals for the entire investigation Investigate the configuration of a parallel circuit and explore the total voltage of batteries set up in parallel ...

Page 44: ...he graph of the data collected from measuring the series of one battery then two batteries then three and so on Label the axes with the appropriate words 3 If you connected the points on the graph describe the general shape of the graph 4 Press the arrow keys to trace along the data points and record your data the voltage in the table below of Batteries X Voltage Y 1 2 3 4 5 5 What do you notice a...

Page 45: ... voltage Use your equation to fill in A _____ B _____ where Y AX B 8 Record the values from the calculator when you used Curve Fit A _____________ B _____________ Y _____________ 9 For the equation of the line Y AX B A is called the and B is called the Are the calculator values of A and B the same as your values for A and B Write a comparison 10 Summarize your investigation Write a description of ...

Page 46: ...tage is 1 4 volts per battery The Y intercept is at 0 0 no batteries no volts Have students write the equation using variable names that fit the problem Students should compare their formula developed using their reasoning and number sense with the Linear Regression Line Line of Best Fit Curve Fit calculated using the calculator Point out that for this simple problem they were able to develop the ...

Page 47: ... 4 5 8 5 7 2 5 As you add a battery to the series the total voltage increases by about 1 4 volts 6 8 6 14 28 1 4X 7 Y 1 4X A 1 4 B 0 8 See the sample screens Answers will vary depending on the voltage of each individual battery 9 A slope and B Y intercept If the batteries have slightly different voltages the value of the calculated slope will be the mean of the voltages Responses will vary 10 Look...

Page 48: ...ies of five batteries decreases over time by using the TIME GRAPH mode over several hours You will need to ensure that the voltage leads are touching the battery terminals for the entire investigation Investigate the configuration of a parallel circuit and explore the total voltage of batteries set up in parallel Reference Data Collection Activities for the Middle Grades with the TI 73 CBL and CBR...

Page 49: ...noticed that the intensity of light from a light bulb decreases as you move further away Theoretically the intensity of light I is related to the distance d from the light source by a function of the form 2 d A I where the value of the constant A depends on the light bulb In this experiment you will compare theoretical predictions with actual measurements You will need a TI light sensor included w...

Page 50: ...played 3 On the Main Screen press À SETUP 4 Use or to scroll to MODE and press Í The Select Mode screen appears 5 Press  to select EVENTS WITH ENTRY The Setup screen is displayed again 6 Press À to select OK to return to the Main Screen 7 Press Á START You should see a screen similar to the one on the right Notice that the reading changes as you move the light probe You are now ready to make a se...

Page 51: ...ight measurements from different distances Six to eight measurements should be sufficient After you have made all your measurements press to end the data collection phase of this experiment The screen below shows the results from a typical run Analysis Work through the questions on the Student Data Reporting Sheet This experiment looks at a simple relationship but there are many potential sources ...

Page 52: ...s this say about the relationship between a light intensity reading made at 5 meter and one made at 1 meter What if the reading that was supposed to be made at 5 meter was actually made at 45 cm and the reading that was supposed to be made at 1 meter was actually made at 1 05 meters If you do everything you can to minimize all the sources of error what sources are left For example you can never me...

Page 53: ...y and distance is given by a function of the form 2 d A I where I is the intensity of the light and d is the distance from the tip of the light probe to the light bulb If this is correct what would you expect the ratio to be between the light intensity measurements made at 5 meter and 1 meter What would you expect the ratio to be between the light intensity measurements made at 1 meter and 2 meter...

Page 54: ... in the light intensity readings 7 There are a number of things you can do to try to minimize this source of error Describe some possibilities 8 You can investigate the effects of errors in measuring the distance from the tip of the light probe to the light bulb by deliberately making errors What is the effect of an error of 5 cm when the distance is supposed to be 5 meter 9 What is the effect of ...

Page 55: ...mpting to identify and compensate for experimental error The main sources of error your students should identify are Errors in measuring distance Extraneous light in the room Errors in aiming the light probe The light probe may not be zeroed that is with no light the light probe may not read zero One way to convey the idea that not all discrepancies can be dismissed as experimental error is by hav...

Page 56: ...uring distance the light probe is not zeroed the light probe may not be aimed directly at the light bulb 6 depends on results 7 Cut pieces of string to very precise lengths and hold the light probe in place by holding one end of a piece of string against the tip of the light probe and the other end in a fixed position near the light bulb Be careful not to burn yourself on the light bulb 8 roughly ...

Page 57: ...will start with a glass of lukewarm water and add ice cubes to cool the water to a refreshingly cold temperature Two temperature sensors will be used to take measurements in degrees Celsius and degrees Fahrenheit From the data gathered you will investigate the Celsius to Fahrenheit conversion formula which is a linear equation in the form Y AX B Set up Have one cup of lukewarm water and one cup wi...

Page 58: ...p CBL 2 automatically identifies the temperature sensors either the flexible TI temperature sensor or then stainless steel temperature sensor in Channels 1 and 2 and loads a default experiment 5 From the DataMate Main Screen press À SETUP 6 Change the sensor in Channel 2 to measure in degrees Fahrenheit Press or to move the cursor to CH 2 and press Í 7 Press À TEMPERATURE 8 Press STAINLESS TEMP F ...

Page 59: ...s Á START A screen similar to this will appear 2 Follow the directions on the screen by pressing Í to collect your first two data points one in C and one in F Note Your goal is to collect about 10 data points of varying temperatures 3 Add a few ice cubes to the water stir with the temperature sensor and wait about 5 seconds Watch the calculator screen as the temperature falls and when ready press ...

Page 60: ... CH2 VS CH1 to calculate a linear model of this physical relationship A screen with the linear regression equations appears Answer question 2 on the Student Data Reporting Sheet 7 Press Í to see the scatterplot and the graph of the linear regression Use and to record data points from the linear regression graph Complete question 3 on the Student Data Reporting Sheet 8 Press Í to return to the Anal...

Page 61: ...asurement by dividing List 5 by List 4 and multiplying by 100 On the Home screen find the mean average of these percents Set up an inverse scatterplot where your x list is List 3 and y list is List 2 Derive the inverse formula for converting from F to C Find the Celsius temperature when Fahrenheit is 0 degrees Graph both formulas on the graphing calculator and trace the Celsius line to find the Fa...

Page 62: ... slope and y intercept Round A and B to the nearest tenths Approximate Conversion Formula Slope A Y Intercept B 3 Here is another method to find the conversion formula Record two different data points that appear to be on the regression line and that are not very close together Record the values in the table Celsius X Fahrenheit Y X1 Y1 X2 Y2 4 Use the points in the table in question 3 to calculat...

Page 63: ...Y2 A ______________________ B ______________________ Y AX B Y ______________________ 7 Press o Enter the following equations Y1 Linear regression equation from question 2 Y2 Calculated approximate formula from question 5 Y3 The exact conversion formula from question 6 Graph the functions one at a time and then simultaneously Write about the similarities and differences in the graphs Explain why yo...

Page 64: ...ar function F 1 8 C 32 that is developed in this activity Answers 1 Answers will vary The general shape of the first two plots will be similar The third plot of F versus C will be linear Sample data 2 Answers will vary Sample data Y 1 7X 39 4 A 1 7 and B 39 4 3 Answers will vary Sample answers Celsius X Fahrenheit Y X1 9 Y1 55 2 X2 41 9 Y2 113 4 4 Answers will vary A 1 8 ...

Page 65: ...ind the absolute value of the difference of the measured and calculated Fahrenheit temperatures In List 6 find the percent of error for each measurement by dividing List 5 by List 4 and multiplying by 100 On the Home Screen find the mean average of these percents Set up an inverse scatterplot where your x list is List 3 and y list is List 2 Derive the inverse formula for converting from F to C Fin...

Page 66: ...H THE CBL 2 SYSTSEM 2000 2003 TEXAS INSTRUMENTS INCORPORATED Reference Data Collection Activities for the Middle Grades with the TI 73 CBL and CBR Johnston and Young Activity 2 A Tale of Two Temperatures TI Explorations Book ...

Page 67: ...n this investigation you will explore several items for their ability to become a battery The material of the potato or other object serves as an electrolyte in the battery These electrolytes allow ions to dissociate and this allows for the flow of electricity The reaction is a result of many factors the two metal terminals the type of material they are connected through electrolyte the distance b...

Page 68: ... one item to the next You also need paper towels a plastic knife to cut notches in the fruit and a ruler to measure the 2 cm distance between the notches This distance should be the same for all batteries 3 Collect the 5 fruits to test The order in which you test them is not important but you will need to give each fruit a number before you start the experiment Fill in the first two columns in the...

Page 69: ...This is a control for the experiment to see what happens when you do nothing Collect the Data 1 Press Á START to begin data collection 2 Touch the penny and washer together to take the control reading This number should be about 0 V Press Í on the calculator to take the data point and press Ê when prompted by the calculator 3 Now insert the penny and washer into fruit number 1 The voltage reading ...

Page 70: ...etch the graph on question 3 of the Student Data Reporting Sheet 3 Answer questions 4 8 Part 2 To see if the best battery has any staying power you will need to collect data on the battery over a long period of time Set up the Experiment 1 Return to Main Screen by pressing Í while on the graph screen 2 Press À SETUP to go to the Setup Screen 3 Press or to move the cursor to MODE and then press Í 4...

Page 71: ...re it will not be disturbed for 4 hours but where it will be accessible if you want to check the status of the experiment periodically 3 Press Á START to begin the experiment You can press Í on your calculator to quit the program and detach the calculator from the CBL 2 This will not affect your data collection You may want to do this if you need to use your calculator during the 4 hour data colle...

Page 72: ...screen press Í to return to the Main Screen 3 Press  GRAPH to go to the graph and press Í to go to the Graph Options screen 4 Press Á SELECT REGION and follow the instructions on the screen to select the linear part of the graph 5 Press Í to see the new graph 6 From the Graph Menu screen press À to return to the Main Screen and press ANALYZE to go to the Analyze Options menu 7 Press Á CURVE FIT 8...

Page 73: ... table below using the name of each fruit and the number assigned to it Name of the fruit Number Voltage control 0 3 Sketch the graph of the collected data below 4 Voltage without the electrolyte the control 0 5 Which item produced the highest voltage 6 Which item produced the lowest voltage 7 As the experiment progressed did you see any change in the condition of the washer or the penny 8 Which i...

Page 74: ...ts below 12 What do the values A and B represent 13 How much did the voltage drop over the time observed 14 Based on the regression equation how long would it take for the voltage to reach 0 15 Compare this number to the original data From the long term trend of the original data does the calculated time for the voltage to reach 0 match What does happen to the data 16 What factors do you think did...

Page 75: ...age of the battery A couple of hours should be fine The distance between the penny and washer for all of the batteries needs to remain constant A change in distance will affect the voltage Sample Answers 1 The open voltage or control will usually read close to zero The reason it may not is due to the nature of the internal workings of the CBL 2 2 Table of batteries used for this sample data Name o...

Page 76: ... the rate at which the voltage is dropping The value of B is the y intercept This should be close to the voltage at the beginning of the long term experiment 13 73 52 21 volts 14 16 667 seconds 4 hours 38 minutes 15 No it does not The original data taken shown that the voltage had leveled off at about 5 volts at 1 5 hours and stayed there 16 The fruit chosen the electrolyte juice of the fruit dryi...

Page 77: ...curring in regular time intervals The time required to observe one complete cycle of the behavior is called the period The number of times the cycle occurs per unit of time is known as the frequency In the following activities you will use the CBL 2 and a light sensor to collect data for two different types of periodic phenomena You will then analyze this data with your calculator to find the peri...

Page 78: ...toward a light source while the CBL 2 is sampling 4 The top right corner of the DataMate Main Screen shows the light intensity readings from the light sensor as it is covered and uncovered Collect the Data 1 Press Á START to begin data collection using the default experiment 2 Cover and uncover the sensor in regular time intervals about once per second 3 If your data is not satisfactory press Á ST...

Page 79: ... complete plateau shown on the screen Record this time value below rounding to the nearest hundredth of a second B ____________________ seconds 4 How many cycles were completed between time A and time B That is how many times did you uncover then re cover the sensor during this time interval Record this number below C ____________________ At this point you can press Í and then press to quit the pr...

Page 80: ...s do not stay on continuously but rather flicker off and on very rapidly in a periodic way Since the human eye cannot distinguish between flashes that occur more than about 50 times a second the light appears to be on all the time The data you collect will be used to determine the period and frequency at which the bulb flickers Set up the experiment 1 Make sure the TI light sensor is connected to ...

Page 81: ... to return to the Setup screen and press À OK again to return to the Main Screen Collect the Data 1 Hold the light sensor close to the fluorescent light bulb and press Á START to begin collecting data The CBL 2 beeps when it begins collecting data The data collection will be finished almost immediately 2 If your data is not satisfactory press Á START to perform another trial Your data should resem...

Page 82: ...irst and last peaks The calculator should now be in Trace Mode Use the arrow keys to move the cursor to the apparent maximum of the first peak The x value at the bottom of the screen represents the time when this maximum occurred Record this value below A ____________________ seconds 3 Next move the cursor to the maximum of the last peak on the graph Record this value below B ____________________ ...

Page 83: ...ciprocal of the period Frequency ____________________ cycles per second 7 In the United States electric utilities use a current whose frequency is 60 cycles per second Is this consistent with your findings from this activity Hint The so called alternating current used in households actually switches polarity two times per cycle 8 If the light source really is turning off every half cycle why isn t...

Page 84: ...ed that it remains relatively constant from cycle to cycle For Part 2 of the activity use a single fluorescent bulb if possible If more than one bulb is used undesirable interference patterns may show up on the plot of intensity versus time Answers Part 1 Answers based on our sample data 1 The plateaus represent instances when the sensor is uncovered minimums represent instances when it is covered...

Page 85: ... Period is 0084 seconds 6 Frequency is 119 05 cycles per second 7 Since the polarity switches twice per cycle we would expect to observe a frequency of 120 cycles per second This is very close to the calculated value 119 05 cycles per second 8 The minimum y value is non zero due to the presence of background light Reference Real World Math with the CBL System Activities for the TI 83 and TI 83 Plu...

Page 86: ...78 GETTING STARTED WITH THE CBL 2 SYSTEM 2000 2003 TEXAS INSTRUMENTS INCORPORATED ...

Page 87: ...sed with a solar cell or in a circuit that measures conductivity as it relates to changes in climate the conductivity of a banana battery as the room heats or cools Other sensors are designed for weather data such as Barometric Pressure and Relative Humidity Check out the TI web page for a listing of all sensors available for the CBL 2 at education ti com cblprobes Use the TI 9920 AC adapter to su...

Page 88: ...This is an essential part of the experiment design What makes sense for our experiment Do we want to collect a data point every second for 24 hours Should we collect 1 000 data points What are we trying to accomplish with our experiment The calculator has limited memory so we do not want to collect more data points than the calculator can handle On some TI calculators a selection of more than 180 ...

Page 89: ...n for the timing of the experiment We will be collecting data every 16 minutes 960 seconds for 90 samples Key in 960 for TIME BETWEEN SAMPLES IN SECONDS and key in 90 for NUMBER OF SAMPLES Note we can change the time settings again if we miscued on the last attempt It is important that careful consideration be given to the experiment time settings 6 We are now ready to start our experiment Press À...

Page 90: ...cting data Note When the experiment is active the green LED on the CBL 2 flashes as data is being collected After 24 hours the data collection will be completed Retrieve the Data Once the experiment is complete follow these instructions to get the data from the CBL 2 into the calculator 1 Connect the calculator to the CBL 2 2 Run the DataMate program or app 3 On the DataMate Main Screen press TOOL...

Page 91: ...eriment 3 What would or could we do to help better explain the phenomena 4 Did we determine another relationship to be explored Going Further Repeat the experiment during different weather patterns Collect data as a cold front or warm front passes your location Use different sensors such as relative humidity and barometric pressure to explore other more complex aspects of the weather Surf the Inte...

Page 92: ...rientation of each sensor in relationship to the weather factors Make sure you label these factors sun wind heating or cooling vents etc 2 State the type and units used for each sensor in the table below Channel Sensor Units 1 2 3 DIG SONIC 3 Calculate the length of the experiment in the most appropriate units Rate of data collection seconds per point Number of data points Length of experiment ...

Page 93: ... data how would you modify the experiment to better understand the relationship s that you are exploring Address the need for additional or different sensors changes in the times used for data collections and location and or environment of the experimental setup 6 Using your answers from questions 1 5 write a lab report about your experiment Tell a story about the data you collected What happened ...

Page 94: ...g through the area differences between day and night radiation cooling and so forth monitoring seasons by collecting data throughout the year and various storms including hurricanes and tornadoes are some ideas for data collection Sample data from the experiment might look like this Time s Temp C Light Intensity 960 23 8333 0 7882 2880 23 6429 0 718241 7680 23 7381 0 523911 14400 22 6136 0 196464 ...

Page 95: ...er point 960 seconds point Number of data points 90 points Length of experiment 24 hrs 4 The sketches could have Time as the x axis but greater insight might come from the relationship between the data from the two sensors like temperature versus light intensity In addition using two y variables as a function of time might be an informative graph temperature versus light intensity Make sure units ...

Page 96: ...INK computer software your students can include graphs and data from their experiment in their lab reports Also if you are using TI InterActive your students can include local temperature data downloaded from the Internet For more information about TI InterActive visit education ti com interactive References Data Collection Activities for the Middle Grades with the TI 73 CBL and CBR Johnston and Y...

Page 97: ...displayed in the lower right corner of the calculator while running the DataMate program In addition you can check the batteries at any time by choosing option  CHECK BATTERY on the DataMate Tools screen Note Save any collected data before removing batteries All collected data is lost if the batteries are removed CBL 2 FLASH memory is not affected Recommended Batteries Four 1 5 Volt size AA LR6 a...

Page 98: ...to accept voltage input from an external AC to DC power adapter that provides a regulated 6 Volts DC output when plugged into an electrical wall outlet The Texas Instruments model AC 9920 power supply is an AC to DC power adapter approved for use with the CBL 2 The model AC 9201 power supply can also be used with the CBL 2 Use of other power adapters may result in RF interference and or unacceptab...

Page 99: ...s Á NO to quit This screen appears when CBL 2 is not connected to the calculator or when CBL 2 needs new batteries Check the connection between CBL 2 and your TI calculator Firmly push in the link cable and then choose 1 INTERFACE Check batteries in the CBL 2 Disconnect the calculator from the CBL 2 then press TRANSFER on the CBL 2 If the CBL 2 does not make a sound or light the red LED change the...

Page 100: ...when the CBL 2 loses power When the CBL 2 and calculator are reconnected the calculator may not recheck the sensor setup and this error results Press to reset and then set up the channel again These three screens usually appear when there is not enough memory available in the calculator to collect any or all of the data and then graph it Reduce the number of data points you are trying to collect F...

Page 101: ...ry All of the subprograms must be present in order for DataMate to function properly All related programs begin with DATxxxx Reset the RAM on the calculator then transfer the DataMate program from CBL 2 to the calculator and begin again This screen appears on a TI 83 Plus calculator when one of the variables accessed by the DataMate app has been archived in the calculator memory These variables ar...

Page 102: ... screen appears when the user tries to run the Ranger program using the TI 89 TI 92 TI 92 Plus or Voyage 200 PLT after using the DataMate program This is caused by a conflict in some information left over in List 5 The information in the list cannot be used properly so the calculator gives a Dimension error To correct this go into the calculator s memory management and delete List 5 L5 This screen...

Page 103: ...ode were set up in DataMate Then Triggering was set up When data collection started the live graph did not display When triggering is selected the CBL 2 does not allow a live graph On the CBL 2 you can have either a live graph or triggering but not both The CBL 2 will use the one that was set up last and will turn off the other one ...

Page 104: ... a result sampling was aborted 5 The list being sent contains a number that is too large to be represented internally This can only happen when the list being sent contains an error 6 The list being sent contains a non integer number where only integers are allowed For example command numbers must be integers and a command of 3 5 will produce this error 8 The list being sent contained too many num...

Page 105: ...34 Trigger type must be an integer between 0 and 6 Any other value will produce this error 35 The trigger channel must be a valid channel number e g 1 3 or 11 and must be have been enabled using the channel select command 36 The trigger threshold must be a value between the maximum and minimum legal values for the sensor selected For example for the 10V probe legal values are from 10V to 10V 37 Th...

Page 106: ...ected A number outside of this range will produce this error message In addition the end of the data must not be before the beginning of the data 59 Digital probe has failed to read or write as commanded by the host 61 An attempt has been made to collect more data than can be stored in one data collection This unit has 24K of memory dedicated to data storage allowing up to 12K samples to be stored...

Page 107: ...an item in the FLASH memory that does not exist 85 This error indicates that an attempt was made to access an item that is in the FLASH memory but hasn t been properly opened for access 86 This error indicates that the archive data type is not one of the data formats supported This error can result from trying to archive a dataset that has not been properly stored 87 The data to be archived must b...

Page 108: ...ti com Customer Support Center support education ti com srvs International Information Click the link on Customer Support Center Page For Technical Questions Phone 1 972 917 8324 For Product hardware Service Customers in the U S Canada Mexico Puerto Rico and Virgin Islands Always contact Texas Instruments Customer Support before returning a product for service All other customers Refer to the leaf...

Page 109: ...econditioned model of an equivalent quality at TI s option when the product is returned postage prepaid to Texas Instruments Service Facility The warranty of the repaired or replacement unit will continue for the warranty of the original unit or six 6 months whichever is longer Other than the postage requirement no charge will be made for such repair and or replacement TI strongly recommends that ...

Page 110: ...th a new or reconditioned model of an equivalent quality at TI s option when the product is returned to the original point of purchase The repaired or replacement unit will continue for the warranty of the original unit or six 6 months whichever is longer Other than your cost to return the product no charge will be made for such repair and or replacement TI strongly recommends that you insure the ...

Page 111: ...og Channel 3 11 Sonic Channel 21 Digital Input Channel 31 Digital Output Channel 1 1 3 operation post processing delta equ Analog channel setup operation 0 Turns channel off 1 Runs auto ID sequence for this channel 2 TI Voltage sensor Reads data from the 10V input 3 Current sensor Reads data from the 10V input but scales data in Amps when using a current sensor 4 Resistance sensor Reads resistance...

Page 112: ...operation Results 0 Resets channel 1 Scales distance in meters Returns distance and time RT and NON RT 2 Scales distance in meters Returns distance and time RT and NON RT 3 Scales distance in feet Returns distance and time RT and NON RT 4 Scales distance in meters Returns distance velocity and time RT or distance and time NON RT 5 Scales distance in feet Returns distance velocity and time RT or di...

Page 113: ...channel until reprogrammed 1 32 Count number of data elements in list list of values Lists values output to digital output port Note The list of values must have one element for each count Command 2 Data Type This command is not used and should not be sent However it is included for compatibility with older CBL programs Command 3 Trigger Setup 3 1 Repeats last Command 3 used to quickly collect new...

Page 114: ...channel 1 channel must be active 2 Software only Triggers on channel 2 channel must be active 3 Software only Triggers on channel 3 channel must be active 11 Software only Triggers on channel 11 channel must be active trigthresh Results channel limit to channel limit Begins taking data when signal crosses threshold in trigtype direction channel limit is determined by the sensor that is attached to...

Page 115: ...5 000 samples second Command 4 Conversion Equation Setup 4 channel equtype equord Analog Channels Only const s channel Results 0 Clears the equations for all channels 1 Sets the equation for input channel 1 2 Sets the equation for input channel 2 3 Sets the equation for input channel 3 equtype Results 1 Unary equation returns raw data for the channel 0 Clears the equation for the selected channel ...

Page 116: ... units Results 0 Celsius Temperature in degrees Celsius 1 Fahrenheit Temperature in degrees Fahrenheit 2 Celsius Temperature in degrees Celsius 3 Kelvin Temperature in Kelvin 4 Rankin Temperature in Rankin Command 5 Data Control 5 channel dataselect databegin dataend channel Results 1 Sends the recorded time 0 Sends the lowest active channel 1 Sends data from channel 1 2 Sends data from channel 2 ...

Page 117: ...Data End must be greater than or equal to Data Begin unless Data End 0 and both must be less than or equal to the number of samples sent to the CBL 2 in the last Command 3 Command 6 System Setup 6 command command Results 0 Abort sampling 2 Abort sampling 3 Turns sampling sound off default on power up 4 Turns sampling sound on 6 command parm command Results 5 parm number you specify Sets an ID numb...

Page 118: ... condition commanded by host during last sample run channel function Triggering channel commanded by host during last sample run channel post Post processing setting commanded by host during last sample run channel filter Filter commanded by host during last sample run num samples Number of samples commanded by host during last sample run or if sampling was aborted the actual number of samples tak...

Page 119: ...ns a list with three elements E1 E2 E3 E1 sensor type one of the operation options shown under Command 1 E2 last valid data read from sensor if any only valid when sampling is active not applicable to CH1 ops 5 6 7 or CH21 or CH31 E3 last valid data position data buffer location number where that data is deposited only valid when sampling is active request type 0 or 1 0 returns current data such a...

Page 120: ...a transitions from low to high P3 Results RejectThld Determines the minimum difference in data between UpperThld and LowerThld Command 12 12 channel mode channel 41 Works only with digital channels 12 41 1 Samples digital input Send the following commands to return the data from the CBL 2 to the host Command Results 12 41 0 number of points available 12 41 1 Start Stop state state state state 12 4...

Page 121: ...ing commands to return the data from the CBL 2 to the host Command Results 12 41 0 number of points available 12 41 1 Start Stop time time time time 12 41 2 Start Stop time time time time 12 41 5 Counts the transitions on the digital input line Send the following commands to return the data from the CBL 2 to the host Command Results 12 41 0 number of points available 12 41 1 Start Stop count count...

Page 122: ...L 2 significant figures LabPro sig LabPro significant figures Y min Suggested Y min for graphing Y max Suggested Y max for graphing Y scale Suggested Y scale for graphing sample rate Typical sample rate number of samples Typical number of samples to collect operation command Typical operation command calculation equation Suggested calculation equation for Command 4 sensor warm up time Sensor warm ...

Page 123: ...sensor name in a format that the calculator can handle Command 1998 Set LED Command 1998 P1 P2 P1 Selects the LED 1 Red 2 Yellow 3 Green P2 Turns the LED off or on 0 Off 1 On Note Leaving a LED turned on will run down the batteries in the CBL 2 Command 1999 Sound Command 1999 length Pd1 length Sound stays on this long in 100ms steps Pd1 Tone half period in 100ms steps You can enter up to 32 pairs ...

Page 124: ...D Command 201 Archive Operations Command 201 operation operand1 operand2 related_info_list This command allows the calculator to determine the contents of FLASH memory Please see the CBL 2 Technical Reference provided on the TI web site for detailed instructions on using this command ...

Reviews: