Graphs & Geometry
451
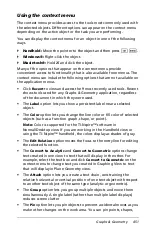
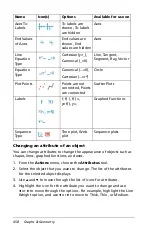
Using the context menu
The context menu provides access to the tools most commonly used with
the selected objects. Different options can appear on the context menu
depending on the active object or the task you are performing.
You can display the context menu for an object in one of the following
ways.
`
Handheld:
Move the pointer to the object and then press
/ b
.
`
Windows®:
Right-click the object.
`
Macintosh®:
Hold
“
and click the object.
Many of the options that appear on the context menu provide
convenient access to functionality that is also available from menus. The
context menu can include the following options that are not available on
the application menus.
•
Click
Recent
to view and access the 9 most recently used tools. Recent
shows tools used for any Graphs & Geometry application, regardless
of the document in which they were used.
•
The
Label
option lets you show a persistent label near a selected
object.
•
The
Color
option lets you change the line color or fill color of selected
objects (such as a function graph, shape, or point).
Note:
Color is supported for the TI-Nspire™ software in
Normal/Desktop view. If you are working in the Handheld view or
using the TI-Nspire™ handheld, the colors display as shades of gray.
•
The
Edit Relation
option moves the focus to the entry line for editing
the selected function.
•
The
Convert to Analytic
and
Convert to Geometric
options change
text created in one view to text that will display in the other. For
example, select the text box and click
Convert to Geometric
on the
context menu to change text you created in Graphing View to text
that will display in Plane Geometry view.
•
The
Attach
option lets you create a text chain, constraining the
relative horizontal or vertical position of one text object with respect
to another text object of the same type (analytic or geometric).
•
The
Group
option lets you group multiple objects and move them
simultaneously. A single label (rather than multiple label displays)
reduces screen clutter
•
The
Pin
option lets you pin objects to prevent accidental moves as you
make other changes on the work area. You can pin points, shapes,
Summary of Contents for TI-Nspire
Page 38: ...26 Setting up the TI Nspire Navigator Teacher Software ...
Page 46: ...34 Getting started with the TI Nspire Navigator Teacher Software ...
Page 84: ...72 Using the Content Workspace ...
Page 180: ...168 Capturing Screens ...
Page 256: ...244 Embedding documents in web pages ...
Page 336: ...324 Polling students ...
Page 374: ...362 Using the Review Workspace ...
Page 436: ...424 Calculator ...
Page 450: ...438 Using Variables ...
Page 602: ...590 Using Lists Spreadsheet ...
Page 676: ...664 Using Notes You can also change the sample size and restart the sampling ...
Page 684: ...672 Libraries ...
Page 714: ...702 Programming ...
Page 828: ...816 Data Collection and Analysis ...
Page 846: ...834 Regulatory Information ...
Page 848: ...836 ...

