Graphs & Geometry
505
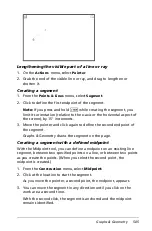
Lengthening the visible part of a line or ray
1. On the
Actions
menu, select
Pointer
.
2. Grab the end of the visible line or ray, and drag to lengthen or
shorten it.
Creating a segment
1. From the
Points & Lines
menu, select
Segment
.
2. Click to define the first endpoint of the segment.
Note:
If you press and hold
g
while creating the segment, you
limit its orientation (relative to the x-axis or the horizontal aspect of
the screen), by 15
-
increments.
3. Move the pointer and click again to define the second endpoint of
the segment.
Graphs & Geometry draws the segment on the page.
Creating a segment with a defined midpoint
With the Midpoint tool, you can define a midpoint on an existing line
segment, between two specified points on a line, or between two points
as you create the points. (When you select the second point, the
midpoint is created.)
1. From the
Construction
menu, select
Midpoint
.
2. Click at the location to start the segment.
As you move the pointer, a second point, the midpoint, appears.
3. You can move the segment in any direction until you click on the
work area a second time.
With the second click, the segment is anchored and the midpoint
remains identified.
Summary of Contents for TI-Nspire
Page 38: ...26 Setting up the TI Nspire Navigator Teacher Software ...
Page 46: ...34 Getting started with the TI Nspire Navigator Teacher Software ...
Page 84: ...72 Using the Content Workspace ...
Page 180: ...168 Capturing Screens ...
Page 256: ...244 Embedding documents in web pages ...
Page 336: ...324 Polling students ...
Page 374: ...362 Using the Review Workspace ...
Page 436: ...424 Calculator ...
Page 450: ...438 Using Variables ...
Page 602: ...590 Using Lists Spreadsheet ...
Page 676: ...664 Using Notes You can also change the sample size and restart the sampling ...
Page 684: ...672 Libraries ...
Page 714: ...702 Programming ...
Page 828: ...816 Data Collection and Analysis ...
Page 846: ...834 Regulatory Information ...
Page 848: ...836 ...

