510
Graphs & Geometry
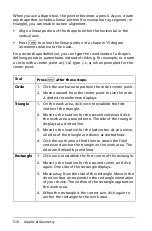
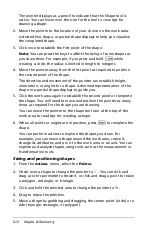
When you use a shape tool, the pointer becomes a pencil. As you create
any shape that includes a linear portion (for example a ray, segment, or
triangle), you can enable custom alignment.
•
Align a linear portion of the shape to either the horizontal or the
vertical axis.
•
Press
g
to orient the linear portion of a shape in 15 degree
increments relative to the x axis.
For precise shape definition, you can type the coordinates of a shape’s
defining points in parentheses instead of clicking. For example, to create
a circle with a center point at (-1,4) type
(-1,4)
when prompted for the
center point.
Tool
Press
·
after these steps:
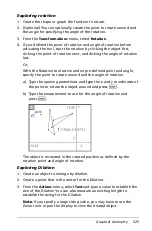
Circle
1. Click the work area to position the circle’s center point.
2. Move outward from the center point to size the circle.
A dotted circumference displays.
Triangle
1. On the work area, click once to establish the first
vertex of the triangle.
2. Move to the location for the second vertex and click
the work area a second time. The side of the triangle
displays as a dotted line.
3. Move to the location for the last vertex. As you move,
all sides of the triangle are shown as dotted lines.
4. Click the work area a third time to create the final
vertex and anchor the triangle on the work area. The
sides are defined by solid lines
Rectangle
1. Click once to establish the first corner of the rectangle.
2. Move to the location for the second corner, and click
again. One side of the rectangle displays.
3. Move away from the side of the rectangle. Move in the
direction that corresponds to the rectangle orientation
of your choice. The outline of the rectangle appears on
the work area.
4. When the rectangle is the correct size, click again to
anchor the rectangle to the work area.
Summary of Contents for TI-Nspire
Page 38: ...26 Setting up the TI Nspire Navigator Teacher Software ...
Page 46: ...34 Getting started with the TI Nspire Navigator Teacher Software ...
Page 84: ...72 Using the Content Workspace ...
Page 180: ...168 Capturing Screens ...
Page 256: ...244 Embedding documents in web pages ...
Page 336: ...324 Polling students ...
Page 374: ...362 Using the Review Workspace ...
Page 436: ...424 Calculator ...
Page 450: ...438 Using Variables ...
Page 602: ...590 Using Lists Spreadsheet ...
Page 676: ...664 Using Notes You can also change the sample size and restart the sampling ...
Page 684: ...672 Libraries ...
Page 714: ...702 Programming ...
Page 828: ...816 Data Collection and Analysis ...
Page 846: ...834 Regulatory Information ...
Page 848: ...836 ...

