512
Graphs & Geometry
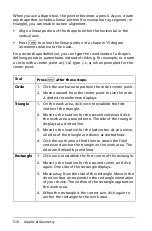
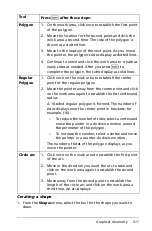
The pointer displays as a pencil to indicate that the Shape tool is
active. You can hover over the icon for the tool to view tips for
drawing a shape.
2. Move the pointer to the location of your choice on the work area.
A dotted line, shape, or partial shape displays to help you visualize
the completed shape.
3. Click once to establish the first point of the shape.
Note:
You can press the keys to affect the sizing of some shapes as
you draw them. For example, if you press and hold
g
while
creating a circle, the radius is limited in length to integers.
4. Move the pointer away from the first point as required to position
the second point of the shape.
The direction and movement of the pointer can establish height,
orientation, or angles for a shape. A dimmed representation of the
shape or a partial shape displays to guide you.
5. Click the work area again to establish the second point or complete
the shape. You will need to move and position the pointer as many
times as required for the shape you are drawing.
You can move the pointer to the shape tool icon at the top of the
work area to read tips for creating a shape.
6. When all points or angles are in position, press
·
to complete the
shape.
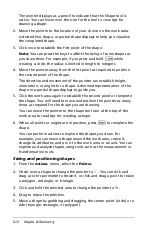
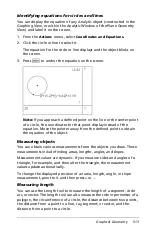
You can perform actions to explore the shapes you draw. For
example, you can move a shape around the work area, resize it,
change its attributes, and pin it to the work area or an axis. You can
explore and analyze shapes using tools such as the measurement or
transformation tools.
Sizing and positioning shapes
1. From the
Actions
menu, select the
Pointer
.
2. Hover over a shape to change the pointer to
÷
. You can click and
drag a circle’s perimeter to resize it, or click and drag a point to resize
a polygon, rectangle, or triangle.
3. Click and hold the selected area to change the pointer to
{
.
4. Drag to resize the selection.
5. Move a shape by grabbing and dragging the center point (circle) or a
side (triangle, rectangle, or polygon).
Summary of Contents for TI-Nspire
Page 38: ...26 Setting up the TI Nspire Navigator Teacher Software ...
Page 46: ...34 Getting started with the TI Nspire Navigator Teacher Software ...
Page 84: ...72 Using the Content Workspace ...
Page 180: ...168 Capturing Screens ...
Page 256: ...244 Embedding documents in web pages ...
Page 336: ...324 Polling students ...
Page 374: ...362 Using the Review Workspace ...
Page 436: ...424 Calculator ...
Page 450: ...438 Using Variables ...
Page 602: ...590 Using Lists Spreadsheet ...
Page 676: ...664 Using Notes You can also change the sample size and restart the sampling ...
Page 684: ...672 Libraries ...
Page 714: ...702 Programming ...
Page 828: ...816 Data Collection and Analysis ...
Page 846: ...834 Regulatory Information ...
Page 848: ...836 ...

