RAM Modules
Installing the Modules
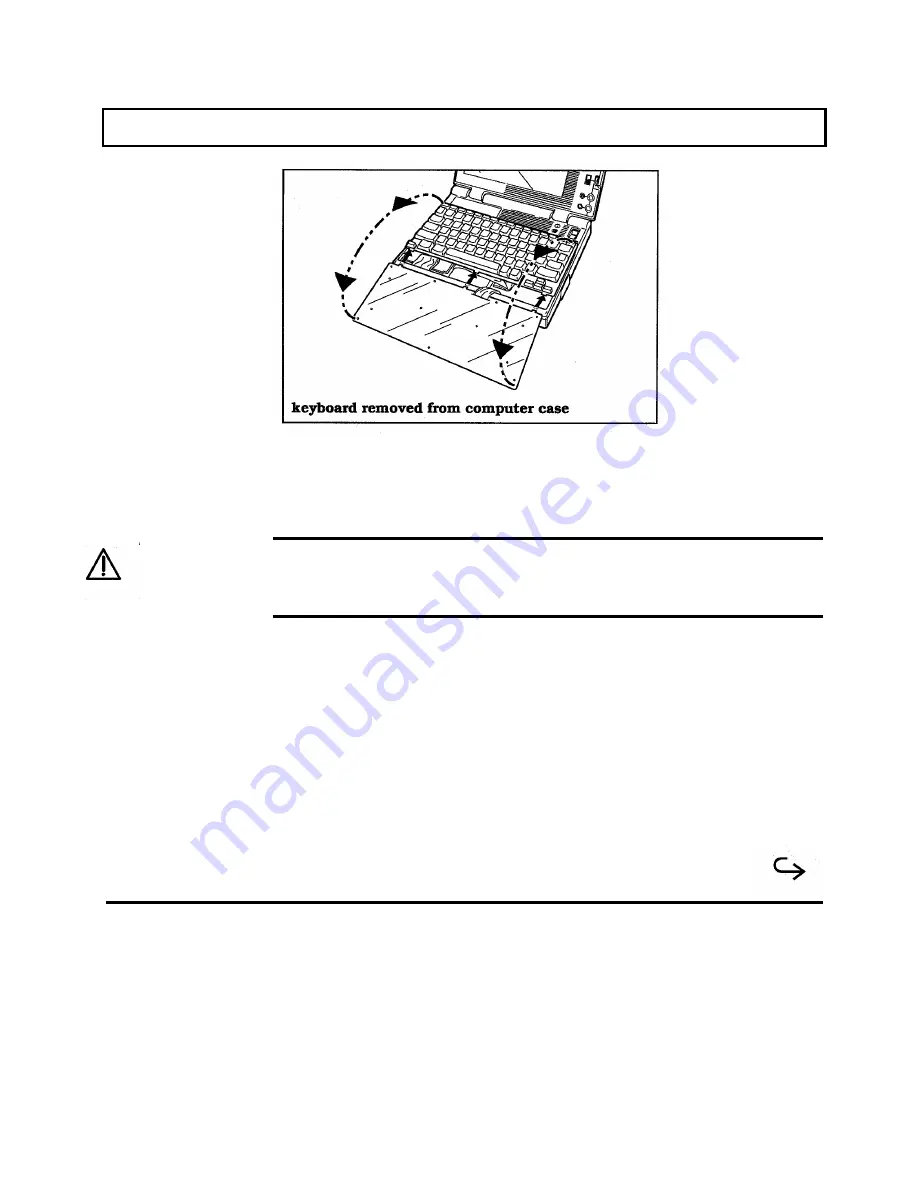
After removing the keyboard, install the four RAM modules as follows. You do not need
any tools.
Caution:
Prevent component damage caused by electrostatic discharge (ESD).
Use a high-impedance, grounded conductive floor mat or wrist strap to prevent ESD.
Before touching the integrated circuit devices, discharge static electricity from your
hands, tools, and containers by touching them to a grounded surface.
1.
Remove the RAM modules from their shipping container to prevent
bending their pins and possible static damage.
2.
Holding the first module so that the label side faces the left side of the
computer and the beveled comer faces the rear of the computer, carefully
insert the module pins into the leftmost 20-pin socket (labeled XU I 1).
Gently press down on the module to fully insert the pins into their
sockets.
TravelMate 3000 Options 6-5
Summary of Contents for TravelMate 3000
Page 1: ...TEXAS INSTRUMENTS TravelMate 3000 Notebook Computer User s Manual ...
Page 42: ......
Page 120: ...Character Sets Code Page 437 United States B 2 Character Sets ...
Page 121: ...Character Sets Code Page 850 Multilingual Character Sets B 3 ...
Page 122: ...Character Sets Code Page 863 Canadian French B 4 Character Sets ...
Page 123: ...Character Sets Code Page 865 Nordic Character Sets B 5 ...
Page 125: ...Keyboard Layouts C 2 Keyboard Layouts ...
Page 126: ...Keyboard Layouts Keyboard Layouts C 3 ...
Page 127: ...Keyboard Layouts C 4 Keyboard Layouts ...
Page 128: ...Keyboard Layouts Keyboard Layouts C 5 ...
Page 145: ......
Page 203: ...TravelMate Notebook Computer Major Components ...
Page 204: ...Manual Pat No 2566946 0001 Rev C Printed in U S A TEXAS INSTRUMENTS ...


