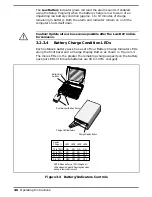
•
Press
SUSPEND
to spin down the Hard Disk Drive
•
Save RAM Disk to Disk (if using RAM Disk)
•
If using Windows, double-click on the Shutdown icon to exit all active
applications as well as Windows
•
Press
Suspend
switch to put the computer in Suspend mode whenever
you are not actively using the computer
•
Power down the system if you do not need the computer
n
Note
: If the LCD is configured for SimulSCAN or high brightness, the dis-
play may flicker when low battery charge condition is encountered. Reduc-
ing the screen brightness corrects the problem temporarily.
3.4.5.1
Sleep Mode
The TM5000 Notebook be put into a sleep mode to conserve battery power.
Press
FN-F4
(Suspend) which puts the notebook into a light sleep. To come
out of suspend, Press any key.
You can also press the
Suspend
Key which places the computer in a deeper
sleep mode. To come out of this sleep mode, press any key. Since this is a
deeper sleep, it may take several seconds to come out of sleep.
3.4.6
Removing Battery Packs
The TM5000 Series Notebooks have provisions for installing two intelligent
battery packs. As long as one of the battery packs has sufficient charge to
operate the system, the other battery pack may be removed with the
notebook operational (in Suspend mode), which is entered by pressing
FN-F4
.
To remove a battery pack from the notebook, press the
Suspend
key to
place the notebook in Suspend Mode. Then press the
Battery Eject
Button
(just above the top left side of the keyboard) and remove the pack from the
front of the notebook (as shown in Figure 3-3). If the batteries are not totally
discharged, you can replace a battery pack with the system operational (in
Suspend Mode) without loosing data. Insert a charged pack back into the
system. Repeat the procedure with the remaining pack if you have a second
replacement battery.
Operating Instructions
3-9
Summary of Contents for TravelMate 5000 Series
Page 1: ...Maintenance Manual TravelMate 5000 Series Notebook Computers 9786166 0001 March 1995 ...
Page 47: ...Figure 1 16 TM5000 Series Functional Block Diagram 1 30 General Description ...
Page 95: ...Figure 4 2 Notebook Detailed Block Diagram Troubleshooting Procedures 4 3 ...
Page 149: ...Figure 6 4 Main Board P54 75MHz P N 9798803 0001 Sheet 2 of 2 6 14 Illustrated Parts Listing ...
Page 172: ...Figure 6 7 Keyscan Board P N 9786209 0001 Illustrated Parts Listing 6 37 ...
Page 180: ...Figure 6 11 Inverter Board P N 9786134 0001 Illustrated Parts Listing 6 45 ...
Page 185: ...Figure 6 12 DAB Board P N 9786273 0001 6 50 Illustrated Parts Listing ...
Page 228: ...Figure 7 5 Figure 7 5 IR Board P N 9798813 Logic Diagram Sheet 1 of 2 7 42 Schematic Diagrams ...
Page 229: ...Figure 7 5 Figure 7 5 IR Board P N 9798813 Logic Diagram Sheet 2 of 2 Schematic Diagrams 7 43 ...
Page 239: ...Figure A 1 Code Page 437 United States A 2 Character Sets ...
Page 240: ...Figure A 2 Code Page 850 Multilingual Character Sets A 3 ...
Page 241: ...Figure A 3 Code Page 863 Canadian French A 4 Character Sets ...
Page 242: ...Figure A 4 Code Page 865 Nordic Character Sets A 5 ...
Page 286: ...Printed in U S A ...

