5.5.4
Removing/Replacing the Hard Drive
Assembly
The procedure for removing and replacing the Hard Drive assembly is as
follows:
1.
Power down the notebook, remove the battery packs, and disconnect the
AC Adapter, if installed.
2.
Disconnect any peripheral device interface cables from the external
interface connectors and remove any installed PCMCIA options.
3.
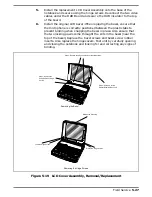
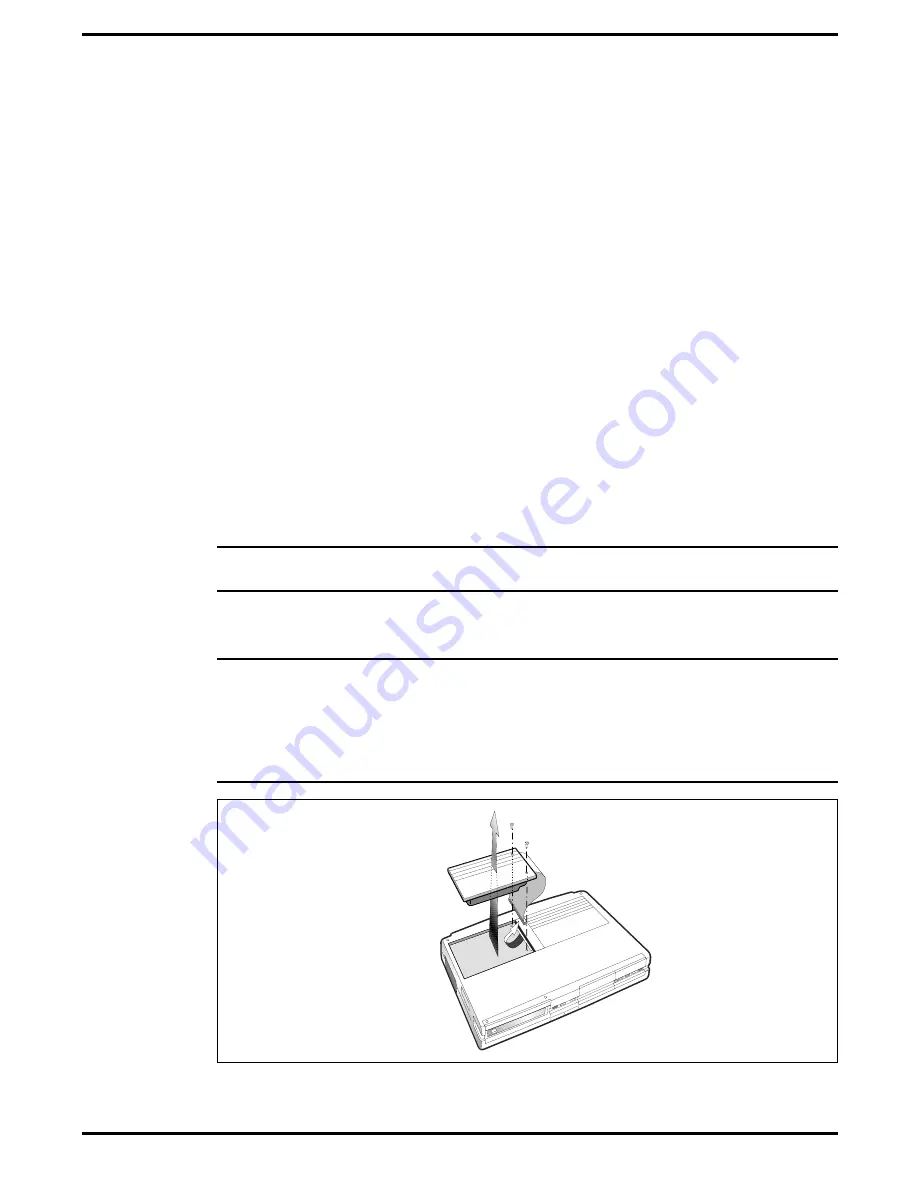
Turn the computer over and remove the two Phillips head screws located
along the edge of the panel (see Figure 5-7).
4.
Using a small straight slot screwdriver, gently pry upwards on the disk
assembly. Then pull slightly to the left side to free the plastic lip along
the right side of the drive assembly.
5.
Carefully flip the disk assembly on its back towards the left side of the
notebook.
6.
Using a small straight slot screw driver, gently pry on each end of the
connector on the Disk Drive and rock it back and forth util the
connector is removed from the drive assembly.
n
Note:
To detach the hard drive from the plastic door, remove the four Torx
screws.
7.
Replacement is essentially the reverse of steps 1 through 7.
n
When reinstalling the connector, align the edge of the cable connector with
the edge of the drive connector (nearest to you). Then press the cable con-
nector on securely working from side to side. Then flip the drive over and in-
sert the protruding lip along the right edge of the drive into the right side of
the notebook. Then press down on the left side of the drive and install the
two screws previously removed.
Figure 5-7 Hard Drive Assembly, Removal/Replacement
5-12
Field Service
Summary of Contents for TravelMate 5000 Series
Page 1: ...Maintenance Manual TravelMate 5000 Series Notebook Computers 9786166 0001 March 1995 ...
Page 47: ...Figure 1 16 TM5000 Series Functional Block Diagram 1 30 General Description ...
Page 95: ...Figure 4 2 Notebook Detailed Block Diagram Troubleshooting Procedures 4 3 ...
Page 149: ...Figure 6 4 Main Board P54 75MHz P N 9798803 0001 Sheet 2 of 2 6 14 Illustrated Parts Listing ...
Page 172: ...Figure 6 7 Keyscan Board P N 9786209 0001 Illustrated Parts Listing 6 37 ...
Page 180: ...Figure 6 11 Inverter Board P N 9786134 0001 Illustrated Parts Listing 6 45 ...
Page 185: ...Figure 6 12 DAB Board P N 9786273 0001 6 50 Illustrated Parts Listing ...
Page 228: ...Figure 7 5 Figure 7 5 IR Board P N 9798813 Logic Diagram Sheet 1 of 2 7 42 Schematic Diagrams ...
Page 229: ...Figure 7 5 Figure 7 5 IR Board P N 9798813 Logic Diagram Sheet 2 of 2 Schematic Diagrams 7 43 ...
Page 239: ...Figure A 1 Code Page 437 United States A 2 Character Sets ...
Page 240: ...Figure A 2 Code Page 850 Multilingual Character Sets A 3 ...
Page 241: ...Figure A 3 Code Page 863 Canadian French A 4 Character Sets ...
Page 242: ...Figure A 4 Code Page 865 Nordic Character Sets A 5 ...
Page 286: ...Printed in U S A ...


