Operation Manual – TEXI 781 SERVO
Adjustment method:
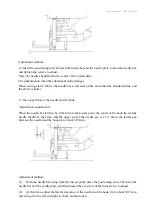
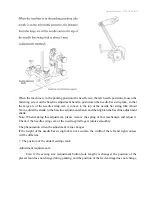
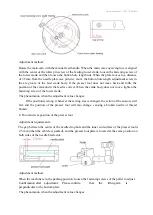
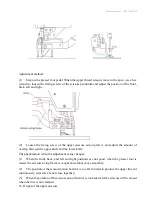
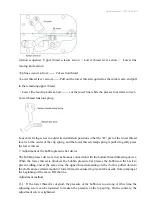
Rotate the main cam with the manual feed handle. When the main cam engraving line is aligned
with the center of the roller pin screw of the feeding lower crank, loosen the fastening screw of
the lower crank and then loosen the button hole length nut. When the plate moves to a distance
of 2.5mm from the needle plate (see picture), move the button hole length adjustment screw in
the arc groove of the feed crank body. If the presser foot does not move back and forth, the
position of the crank under the feed is correct. When the crank body does not move, tighten the
fastening screw of the lower crank.
The phenomenon when the adjustment value changes:
If the position is wrong, whenever the sewing size is changed, the action of the scissors will
fail, and the position of the presser foot will also change, causing a broken needle or thread
broken.
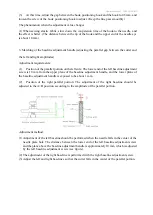
8. Front and rear position of the presser foot
Adjustment requirements:
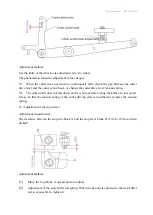
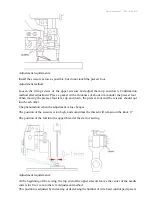
The gap between the center of the needle drop hole and the inner end surface of the presser foot is
2.5 mm (when the vehicle is parked), and the presser foot plate is located at the same position on
both sides of the needle blade slot.
Adjustment method:
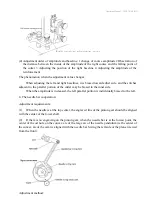
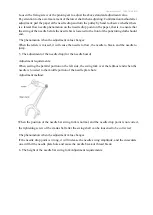
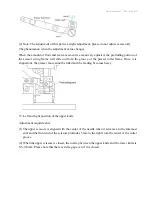
When the machine is in the parking position, loosen the fastening screws of the pallet to adjust.
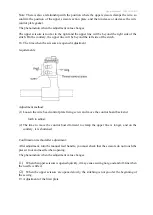
Confirmation after adjustment: Please confirm
that
the
lifting arm
is
perpendicular to the bottom plate.
The phenomenon when the adjustment value changes:


