


EN
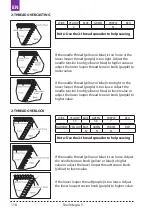
Sew coverstitch and 2-threads chain stitch.
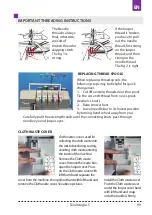
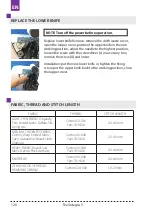
Prevent cutting plate:
The prevent cutting plate is marked with a number of
digits. The left side is in millimeters and the right is in
inches. The number indicates the distance between
the needle and the edge of the fabric.
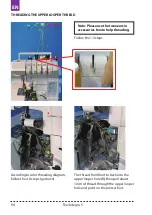
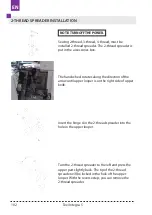
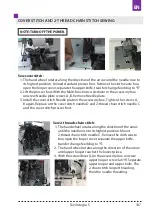
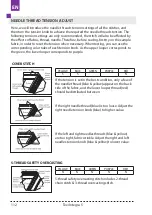
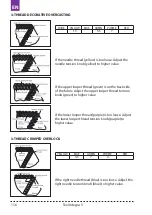
1.
Prevent cutting plate assembly and disassembly.
2.
Remove the prevent cutting plate from the
accessory box and place it in the corresponding
position of the looper cover. the prevent cutting
plates marked with a number of digits. The left
side is in millimeters and the right is in inches.
The number indicates the distance between the
needle and the edge of the fabric.
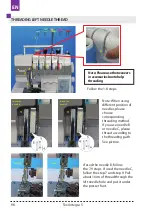
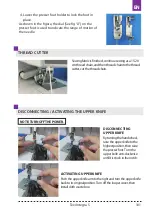
Note: When Prevent cutting plate is installed, the upper looper must be in.
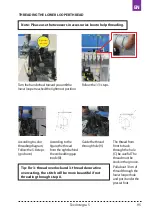
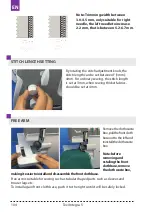
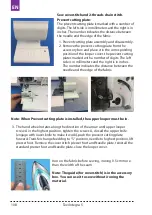
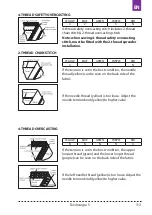
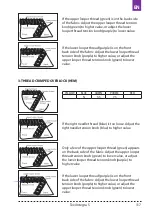
3.
The hand wheel rotates along the direction of the arrow until upper looper
screw A in the highest position, tighten the screws A, closed the upper knife
(engage with lower knife to make it work), push the prevent cutting plate
forward. Transfer change feed dog to “S” position, needle to highest position, lift
presser foot. Remove the cover stitch presser foot and Needle plate, reinstall the
standard presser foot and Needle plate, close the looper cover.
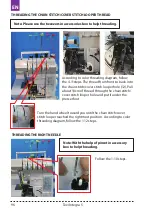
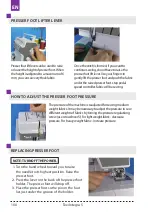
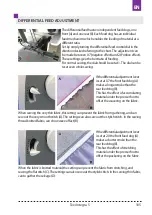
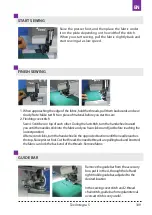
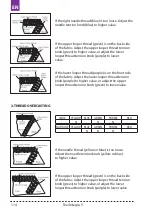
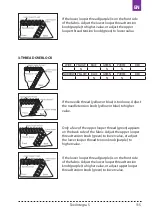
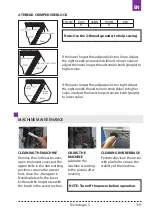
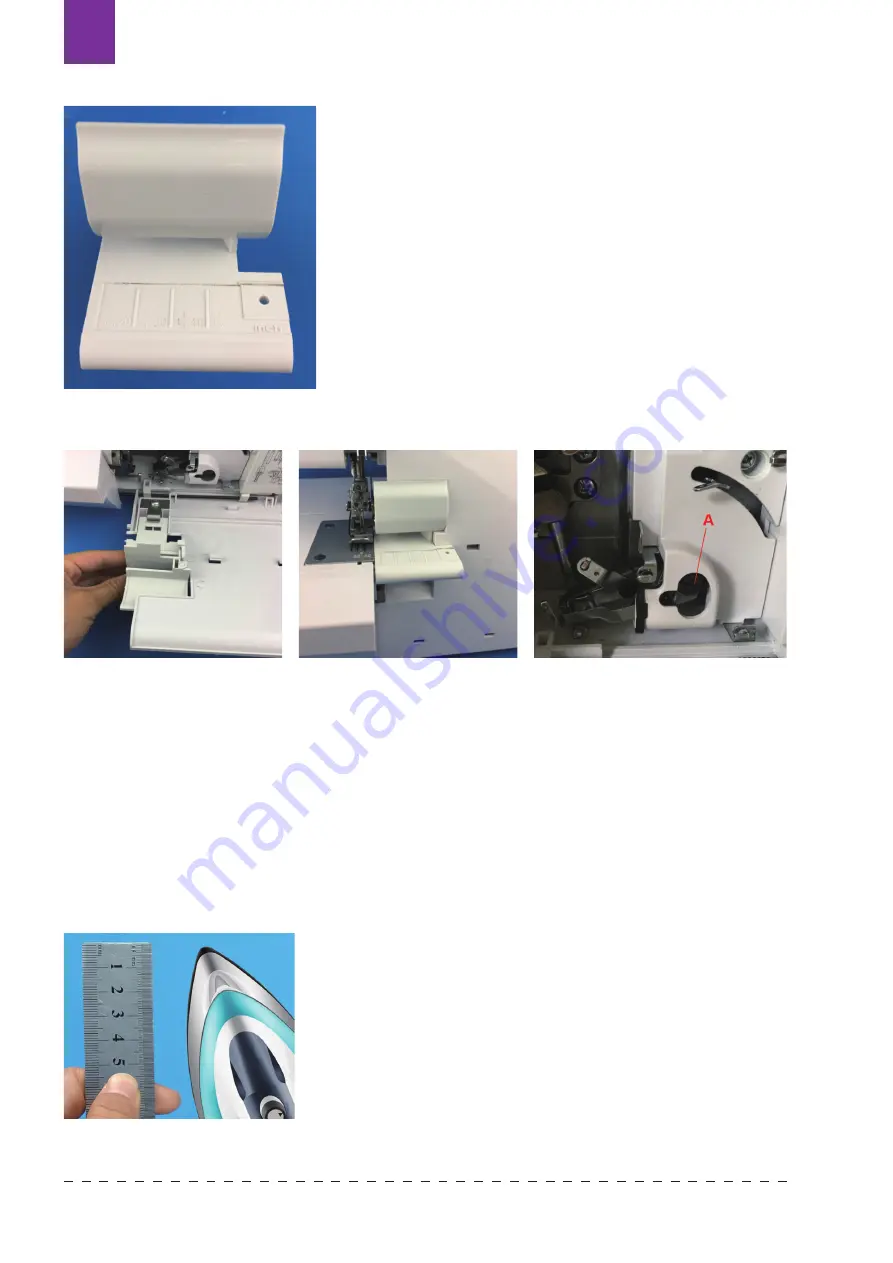
Iron on the fabric before sewing, ironing 0.5 cm more
than the width of the seam.
Note: The guide (for coverstitch) is in the accessory
box. You can use it to sew without ironing the
material.
Texi Integra 5
108
Summary of Contents for Integra 5
Page 1: ...OVERLOCK COVERLOCK 1 2 1 2 1 2 1 2 4 3 2 1 2...
Page 2: ......
Page 5: ...Texi Integra 5 5 CS...
Page 43: ...Texi Integra 5 43 CS...
Page 83: ...DE Texi Integra 5 83...
Page 123: ...EN Texi Integra 5 123...
Page 163: ...ES Texi Integra 5 163...
Page 203: ...FR Texi Integra 5 203...
Page 243: ...PL Texi Integra 5 243...
Page 244: ...RU 1 2 3 1 2 3 4 5 6 7 8 9 Texi Integra 5 244...
Page 245: ...RU 10 11 12 13 14 15 16 17 Texi Integra 5 245...
Page 250: ...RU o Texi Integra 5 250...
Page 251: ...RU 1 2 Texi Integra 5 251...
Page 252: ...RU 1 2 3 A B C 2 D A B A B C C D D 2 2 z 2 Texi Integra 5 252...
Page 253: ...RU 1 5 1 2 3 4 5 Texi Integra 5 253...
Page 254: ...RU 1 3 4 8 8 10 Texi Integra 5 254...
Page 255: ...RU 5 8 1 11 9 B C 10 3 3 8 Texi Integra 5 255...
Page 256: ...RU 4 11 12 10 1 12 1 10 Texi Integra 5 256...
Page 257: ...RU D A A 9 11 D 9 11 10 D D A A Texi Integra 5 257...
Page 258: ...RU 1 8 B C A 7 9 D 7 9 10 B B C C Texi Integra 5 258...
Page 259: ...RU 1 2 A 1 2 3 Texi Integra 5 259...
Page 260: ...RU 6 S 1 2 3 MATIC Texi Integra 5 260...
Page 261: ...RU 15 20 Texi Integra 5 261...
Page 262: ...RU A 2 3 4 Texi Integra 5 262...
Page 263: ...RU T S S A R A 3 0 4 5 R R Texi Integra 5 263...
Page 264: ...RU 3 0 4 5 2 2 5 2 6 7 F 1 4 3 4 Texi Integra 5 264...
Page 265: ...RU A B 0 7 2 0 1 0 A B 0 7 2 0 A B D Texi Integra 5 265...
Page 266: ...RU 2 0 1 0 0 5 1 0 3 3 2 0 1 0 Texi Integra 5 266...
Page 267: ...RU 2 1 R 2 A B 3 A B D 2 C 2 1 2 S 2 3 L 19 2 Texi Integra 5 267...
Page 268: ...RU 2 1 2 3 A A S 0 5 Texi Integra 5 268...
Page 269: ...RU 1 2 4 5 A 2 Texi Integra 5 269...
Page 272: ...RU 5 5 5 N N N N N N 5 2 3 Texi Integra 5 272...
Page 273: ...RU 4 2 4 4 2 5 N 4 Y N N N N N 0 4 2 2 4 Texi Integra 5 273...
Page 274: ...RU 3 N N N N N N Texi Integra 5 274...
Page 275: ...RU 3 4 2 7 4 1 5 7 Texi Integra 5 275...
Page 276: ...RU 3 3 4 5 7 4 1 5 5 5 7 m Texi Integra 5 276...
Page 277: ...RU 3 N 3 5 7 5 Texi Integra 5 277...
Page 278: ...RU 2 2 2 N 6 N 6 N Texi Integra 5 278...
Page 279: ...RU 2 N N Texi Integra 5 279...
Page 283: ...RU Texi Integra 5 283...
Page 285: ......
Page 286: ......


