


ES
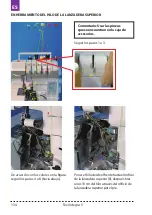
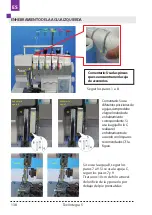
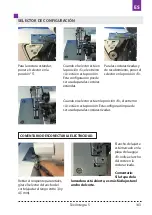
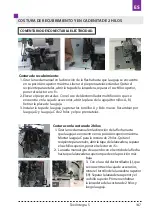
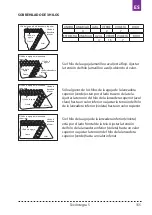
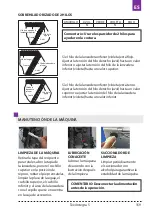
Costura con la costura de 2 hilos de
recubrimiento. Placa de seguridad:
La placa de seguridad está marcada con varias
cifras. La parte a la izquierda presenta un valor en
milímetros y a la derecha en pulgadas. El valor indica
la distancia entre la aguja y el borde de la tela.
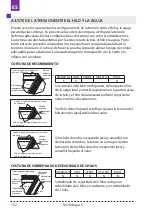
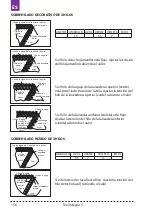
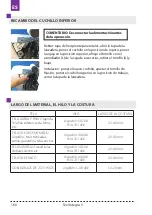
1.
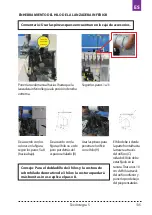
1. Instalación y retirada de la placa de seguridad.
2.
2. Retirar la placa de seguridad de la cada de
accesorios y colocarla en su lugar en la tapa
de la lanzadera. La placa de seguridad está
marcada con varias cifras La parte a la izquierda
presenta un valor en milímetros y a la derecha
en pulgadas. El valor indica la distancia entre la
aguja y el borde de la tela.
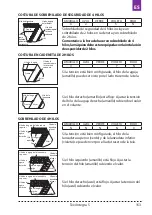
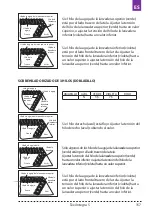
Comentario: Con la placa de seguridad instalada, la lanzadera superior debe
estar instalada en su lugar.
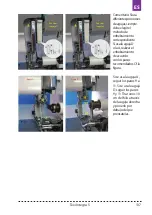
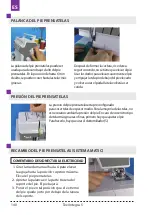
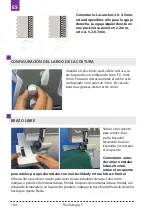
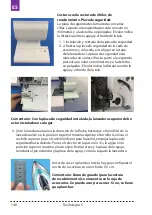
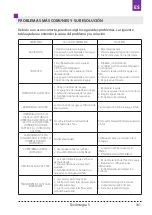
3.
Girar la rueda manual en la dirección de la flecha hasta que el tornillo A de la
lanzadora esté en la posición superior máxima. Apretar el tornillo A, elevar el
cuchillo superior (usar el cuchillo inferior para hacerlo), empujar la placa de
seguridad hacia delante. Poner el selector en la posición «S», la aguja en la
posición superior máxima, elevar el pie. Retirar el pie y la placa de la aguja,
reinstalar el pie estándar y la placa de la aguja, cerrar la tapa de la lanzadera.
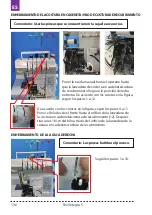
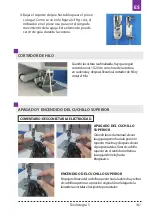
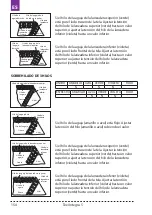
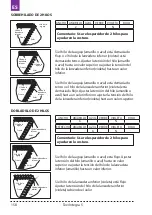
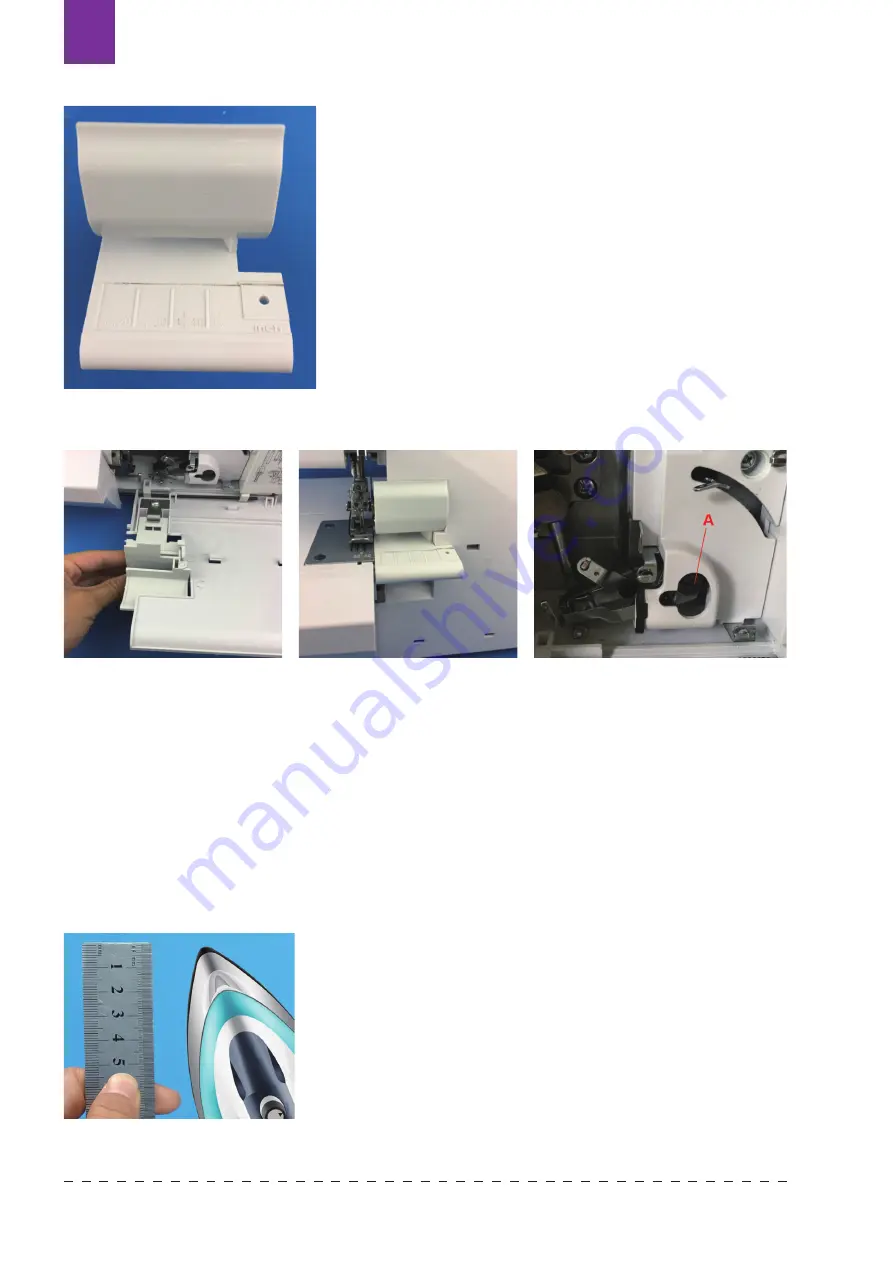
Antes de coser o planchar la tela, hay que configurar el
ancho de la costura en el ancho de 0,5 cm.
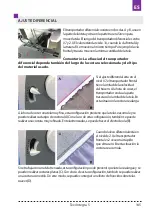
Comentario: Barra de guiado (para la costura
de recubrimiento) se encuentra en la caja de
accesorios. Se puede usar para coser. Si no, se tiene
que planchar.
Texi Integra 5
148
Summary of Contents for Integra 5
Page 1: ...OVERLOCK COVERLOCK 1 2 1 2 1 2 1 2 4 3 2 1 2...
Page 2: ......
Page 5: ...Texi Integra 5 5 CS...
Page 43: ...Texi Integra 5 43 CS...
Page 83: ...DE Texi Integra 5 83...
Page 123: ...EN Texi Integra 5 123...
Page 163: ...ES Texi Integra 5 163...
Page 203: ...FR Texi Integra 5 203...
Page 243: ...PL Texi Integra 5 243...
Page 244: ...RU 1 2 3 1 2 3 4 5 6 7 8 9 Texi Integra 5 244...
Page 245: ...RU 10 11 12 13 14 15 16 17 Texi Integra 5 245...
Page 250: ...RU o Texi Integra 5 250...
Page 251: ...RU 1 2 Texi Integra 5 251...
Page 252: ...RU 1 2 3 A B C 2 D A B A B C C D D 2 2 z 2 Texi Integra 5 252...
Page 253: ...RU 1 5 1 2 3 4 5 Texi Integra 5 253...
Page 254: ...RU 1 3 4 8 8 10 Texi Integra 5 254...
Page 255: ...RU 5 8 1 11 9 B C 10 3 3 8 Texi Integra 5 255...
Page 256: ...RU 4 11 12 10 1 12 1 10 Texi Integra 5 256...
Page 257: ...RU D A A 9 11 D 9 11 10 D D A A Texi Integra 5 257...
Page 258: ...RU 1 8 B C A 7 9 D 7 9 10 B B C C Texi Integra 5 258...
Page 259: ...RU 1 2 A 1 2 3 Texi Integra 5 259...
Page 260: ...RU 6 S 1 2 3 MATIC Texi Integra 5 260...
Page 261: ...RU 15 20 Texi Integra 5 261...
Page 262: ...RU A 2 3 4 Texi Integra 5 262...
Page 263: ...RU T S S A R A 3 0 4 5 R R Texi Integra 5 263...
Page 264: ...RU 3 0 4 5 2 2 5 2 6 7 F 1 4 3 4 Texi Integra 5 264...
Page 265: ...RU A B 0 7 2 0 1 0 A B 0 7 2 0 A B D Texi Integra 5 265...
Page 266: ...RU 2 0 1 0 0 5 1 0 3 3 2 0 1 0 Texi Integra 5 266...
Page 267: ...RU 2 1 R 2 A B 3 A B D 2 C 2 1 2 S 2 3 L 19 2 Texi Integra 5 267...
Page 268: ...RU 2 1 2 3 A A S 0 5 Texi Integra 5 268...
Page 269: ...RU 1 2 4 5 A 2 Texi Integra 5 269...
Page 272: ...RU 5 5 5 N N N N N N 5 2 3 Texi Integra 5 272...
Page 273: ...RU 4 2 4 4 2 5 N 4 Y N N N N N 0 4 2 2 4 Texi Integra 5 273...
Page 274: ...RU 3 N N N N N N Texi Integra 5 274...
Page 275: ...RU 3 4 2 7 4 1 5 7 Texi Integra 5 275...
Page 276: ...RU 3 3 4 5 7 4 1 5 5 5 7 m Texi Integra 5 276...
Page 277: ...RU 3 N 3 5 7 5 Texi Integra 5 277...
Page 278: ...RU 2 2 2 N 6 N 6 N Texi Integra 5 278...
Page 279: ...RU 2 N N Texi Integra 5 279...
Page 283: ...RU Texi Integra 5 283...
Page 285: ......
Page 286: ......