Texmate, Inc. Tel. (760) 598-9899 • www.texmate.com
Page 22
Apr-18-2016 DI-60A 320 DS (NZ302)_UL April 2016
Prog.
SP1
SP2
SP4
SP3
SP5
SP6
Prog.
SP1
SP2
SP4
SP3
SP5
SP6
Prog.
SP1
SP2
SP4
SP3
SP5
SP6
Prog.
SP1
SP2
SP4
SP3
SP5
SP6
XX
CONFIGURE
SETPOINT
ANNUNCIATORS
Prog.
SP1
SP2
SP4
SP3
SP5
SP6
Prog.
SP1
SP2
SP4
SP3
SP5
SP6
Prog.
SP1
SP2
SP4
SP3
SP5
SP6
Prog.
SP1
SP2
SP4
SP3
SP5
SP6
Prog.
SP1
SP2
SP4
SP3
SP5
SP6
Step 1
Step 2
Step 3
Operational Display
Operational Display
Example
Press
2
Press
at same
time
Press
at same
time
Press
1
OR
Step 4
Press
at same
time
Press
at same
time
Step 5
Enter Brightness Mode
Pass Brightness and
Calibration Modes
and enter Code 1
Select SP Annunciators
setting [1XX]
Save setting and
enter Code 2
Exit Code 2. Return to
Operational Display
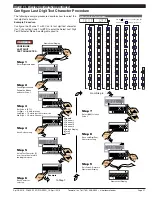
The following example procedure describes how to configure
setpoint annunciators.
Example Procedure:
Configure the setpoint annunciators to come ON when the set-
points are OFF (not active) by setting Code 1 to [
1XX
].
Configure Setpoint Annunciators Procedure
Prog.
SP1
SP2
SP4
SP3
SP5
SP6
Prog.
SP1
SP2
SP4
SP3
SP5
SP6
Prog.
SP1
SP2
SP4
SP3
SP5
SP6
Prog.
SP1
SP2
SP4
SP3
SP5
SP6
X X
Prog.
SP1
SP2
SP4
SP3
SP5
SP6
CONFIGURE
UPDATE AT
SAMPLE RATE
Prog.
SP1
SP2
SP4
SP3
SP5
SP6
Prog.
SP1
SP2
SP4
SP3
SP5
SP6
Prog.
SP1
SP2
SP4
SP3
SP5
SP6
Prog.
SP1
SP2
SP4
SP3
SP5
SP6
Step 1
Step 2
Step 3
Operational Display
Operational Display
Example
Press
2
Press
at same
time
Press
at same
time
Press
1
Press
1
OR
Step 4
Step 5
Enter Brightness Mode
Pass Brightness and
Calibration Modes
and enter Code 1
Select update at sample
rate setting [X2X]
Save setting and
enter Code 2
Exit Code 2. Return to
Operational Display
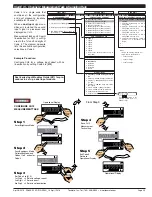
The following example procedure describes how to configure
the display to update at the sample rate selected in Code 2.
Example Procedure:
Update the display at the sample rate selected in Code 2 by
setting Code 1 to [
X2X
].
Configure Update at Sample Rate Procedure
Programming Tip
The
Configuring Setpoint Annunciators
and the
Update at Sample Rate
procedures can be combined so
that Code 1 could be set to [12X] (for the above examples) in a single procedure.
START HERE
START HERE
Initial Setup Procedures
[CodE_1] - Display Configuration continued


