B
ELECTRICAL SYSTEM
Read all of SAFETY and this section before attempting any procedure. Pay particular attention to Notices, Cautions, Warnings and Dangers.
137
Repair and Service Manual
668061
the battery each month during storage and charge
as needed to maintain full charge.
A full charge will prevent the battery from freezing
in winter conditions.
If the vehicle is going to be out of operation for three (3)
months or longer, do the following:
1.
Remove the battery from the vehicle.
2.
Make sure the battery is fully charged.
3.
Store it out of the sun, in a cool, dry place.
4.
Check battery voltage each month during storage
and recharge as needed to maintain a full charge.
Battery Removal
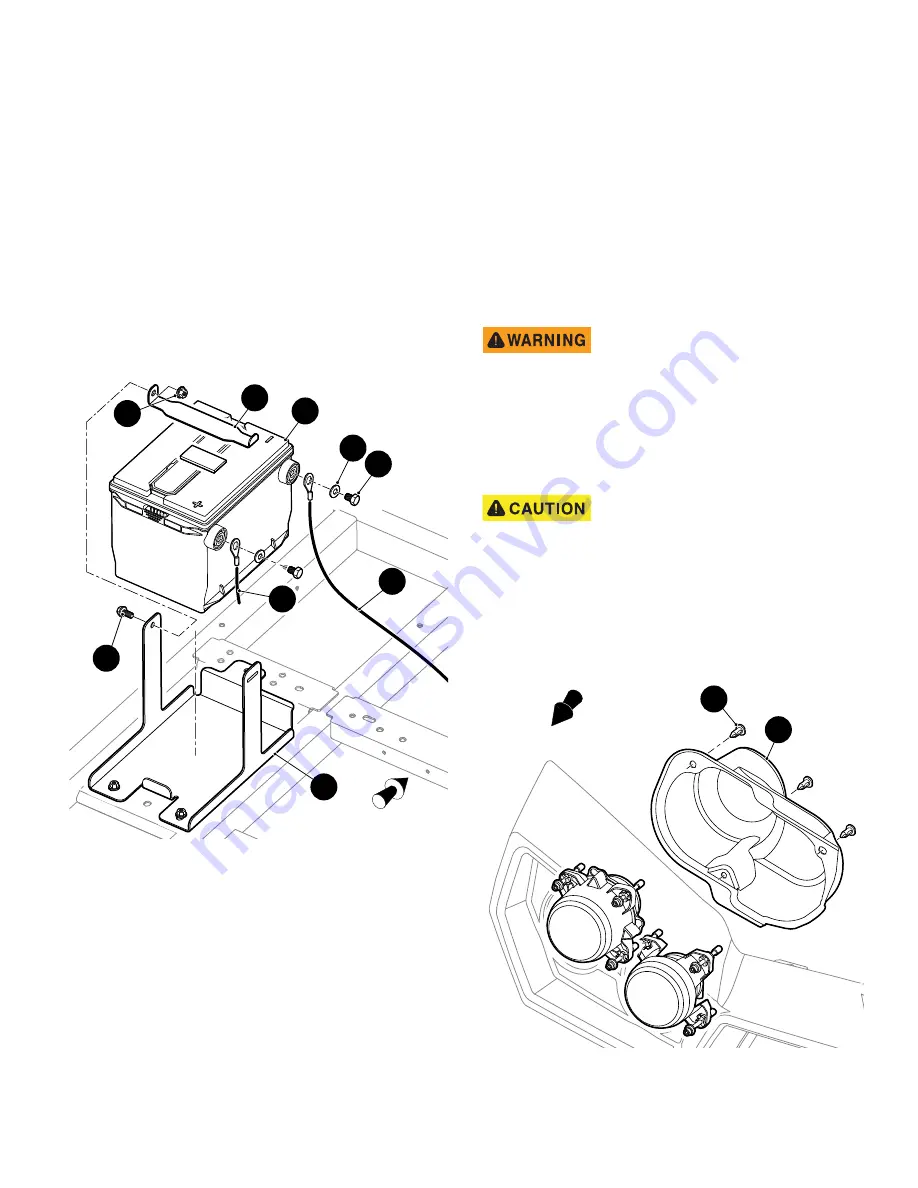
Fig. 1 Battery
Tool List
Qty.
Insulated Wrench, 1/2” ................................................ 1
Socket Wrench ............................................................ 1
Socket, 13mm ............................................................. 1
Wrench, 13mm ............................................................ 1
1.
Remove the seat frame support. See “Seat Frame
and B-Pillar Crossmember” on page 34.
2.
Use an insulated wrench to remove bolts (10) and
washers (11) that secure the battery cables (8 and 9)
to the battery (1) (Ref. Fig. 1).
3.
Remove the bolt (5) and nut (6) from the battery tray
(3). Remove the battery hold-down bracket (2).
4.
Lift the battery up and out of the vehicle.
5.
Installation is the reverse order of removal.
LIGHTS
•
Clean the lights frequently to maximize visibility.
•
Replace burned out bulbs promptly.
•
Always make sure the headlights are adjusted prop-
erly.
Do not operate this vehicle at night
or in low light if any bulbs are
burned out. Poor lighting reduces
visibility that could cause an accident resulting in
severe injury or death.
Headlight Bulb Replacement
Tool List
Qty.
Screwdriver, Flat Tip ....................................................1
Light components can get hot if
they have been in operation. Allow
the lights to cool before servicing to
prevent burns to the skin.
NOTICE: Do not touch a halogen bulb with bare fin-
gers. Oil from skin leaves a reside that causes a hot
spot and will diminish the life of the bulb.
1.
Remove the three plastic rivets (25) that secure the
cover (23) to the vehicle. Remove the cover (Ref.
Fig. 2 Headlight Bulb Replacement
Front of Vehicle
1
10
11
5
9
8
3
2
6
Front of Vehicle
23
25
Summary of Contents for Stampede 900 2017
Page 1: ...Technician s Repair and Service Manual 668061 B 2018...
Page 21: ...9 Repair and Service Manual Notes TABLE OF CONTENTS 668061...
Page 22: ...10 Repair and Service Manual TABLE OF CONTENTS Notes 668061...
Page 190: ......
Page 236: ......


