background image


11


NO 

Part Name 

Qty 

Remark 

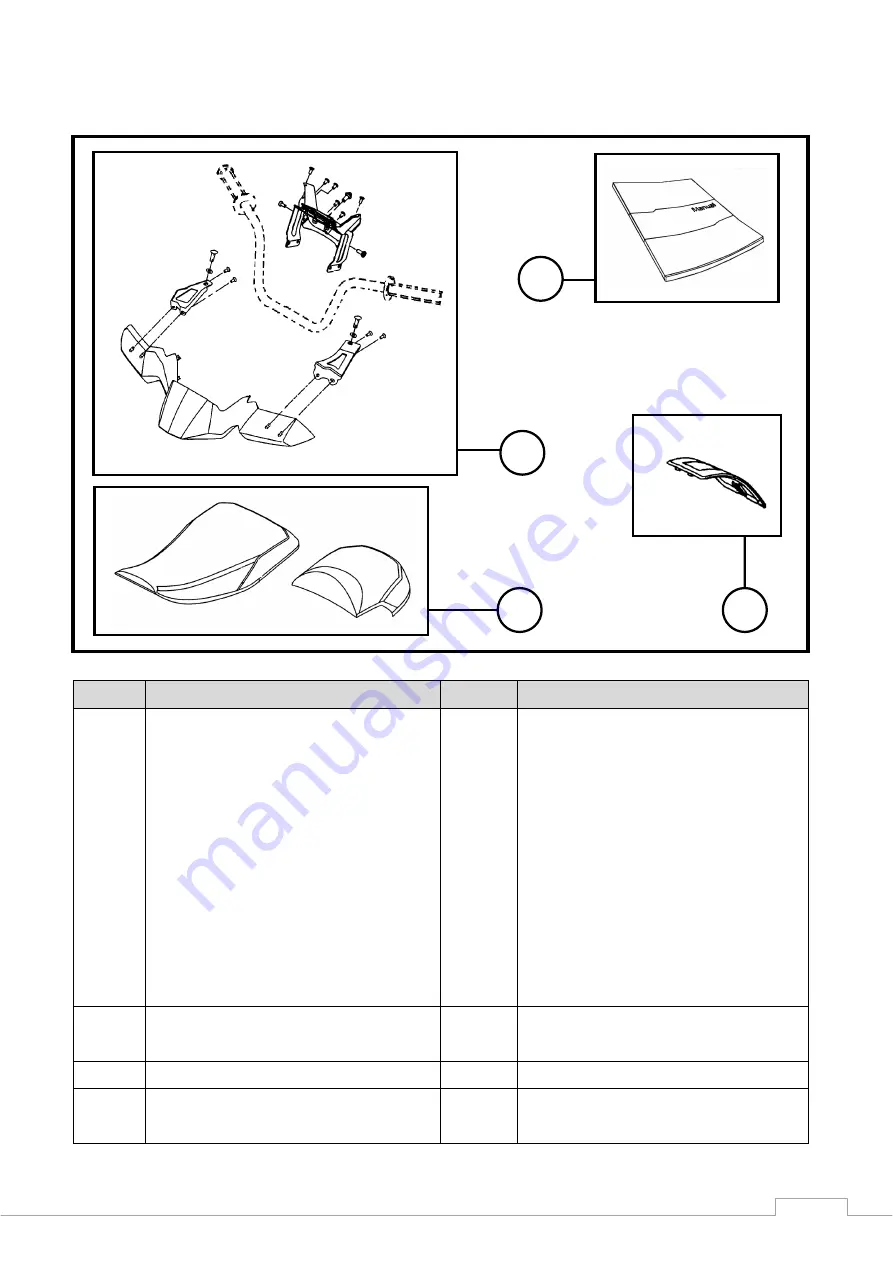
Handlebar Front Cover 


Handlebar Rear Cover comp. 


Hand Guards Bracket (RH) 


Hand Guards Bracket (LH) 


Flange Screws 

D=5, L=16 


Bolt 

D=8, P=1.25 (Right-Handed Thread) 


Bolt 

D=8, P=1.25 (Lift-Handed Thread) 


Washers 

φ8.4 x 15.5 x 1.2t 


Tapping Screw 

D=4, L=16 


Tapping Screw 

D=4, L=12 


Bolt 

D=5, L=8 

Driver Seat 


Passenger Seat 


Owner’s Manual 


Right Glove Box Cover 


Left Glove Box Cover 


Summary of Contents for BLADE 1000 EPS IRS 4X4

Page 1: ...1 BLADE 1000 EPS IRS 4X4 BLADE 1000 EPS SE IRS 4X4 Recreation Utility Vehicle Assembly Manual...

Page 2: ...ect to change without notice NOTICE The service specifications given in this assembly manual are based on the model as manufactured Modifications and significant changes in specifications and or proce...

Page 3: ...7 Uncrating 8 11 Parts Check 12 13 Assembly Shock Absorber 13 Assembly Rear A arm Protector Cover 13 Assembly Wheels 13 14 Assembly Handlebar 14 Assembly Handlebar Cover Hand Guard 15 Assembly Shift H...

Page 4: ...4 Table of Contents PAGE CONTENT 16 Assembly Muffler Ornamental Cover 16 Assembly Seat 16 Assembly Battery...

Page 5: ...must be kept away from rain 3 Contents of the transport package are fragile therefore the package must be handled with care 4 Up to 4 of the transport packages can be piled up 5 Do not insert from the...

Page 6: ...re shown on the crate outer cover 2 Insert the fork as shown below the fork must be horizontal into the crate pallet The operation with angles will damage the vehicle and created components Uncrating...

Page 7: ...ve the bolts A and then lay down LH RH side diagonal braces B to disengage its sockets from the pallet Warning Remove the bolts while holding the frame 4 Lay down Front Rear diagonal braces A to disen...

Page 8: ...st parts Check the parts against the illustrations In the following charts under Remarks D diameter in millimeters and L length in millimeters and P Pitch In the following charts under Qty component o...

Page 9: ...1 Rear A arm Protector Cover RH 1 Rear A arm Protector Cover Bolts 4 D 6 L 16 3 Muffler Ornamental Cover 1 Hex Socket Bolts 3 4 Rear Carrier Comp 1 Bolt 4 D 8 L 18 P 1 25 Passenger Hand Holder 2 Socke...

Page 10: ...e Qty Remark 1 Handlebar Upper Bracket 2 Handlebar Lower Bracket 2 Bottom Bracket 1 Bolts 4 D 6 L 16 P 1 0 Pan Head Screw 1 D 6 L 16 Bolts 4 D 8 L 80 P 1 25 2 Fuel Cap 1 3 Shift Shaft Holder 1 4 Tool...

Page 11: ...s Bracket LH 1 Flange Screws 4 D 5 L 16 Bolt 1 D 8 P 1 25 Right Handed Thread Bolt 1 D 8 P 1 25 Lift Handed Thread Washers 2 8 4 x 15 5 x 1 2t Tapping Screw 4 D 4 L 16 Tapping Screw 4 D 4 L 12 Bolt 1...

Page 12: ...e floor jack and ATV jack stands on a solid flat level surface 4 Do not start the engine while the vehicle is supported by floor jack 5 Do not raise the vehicle while someone is in the vehicle 6 When...

Page 13: ...rection of the wheel Tighten the nuts A with 680 720 kgf cm tighten torque and then plug the rubber cap B Warning Install the nut with its tapered side towards the wheel 5 Handlebar Place the bottom b...

Page 14: ...meter wires main switch wires and rear differential controller wire Fix the LH hand guard bracket A on the master cylinder by the right handed thread bolt and fix the RH hand guard bracket on the brac...

Page 15: ...rackets B and assemble back with the rear hand hold C the hand hold have to be fixed between the frame and the rear bumper brackets 10 Rear Carrier Make the front support tube of the rear carrier thro...

Page 16: ...oints A on the main seat Please carry out this operation on a soft surface to avoid damage to the seat leather 13 Battery Remove the battery mounting bracket A and place the battery in the positioning...

Reviews: